I have been inspecting houses for decades, and one common thing I noticed that ruins a home’s aesthetics is uneven subfloors or concrete slabs. Fixing it is not always as simple as it sounds. That’s why we have collated six ways to fix uneven subfloors.
Uneven subfloor or concrete slabs can usually be fixed by leveling the raised areas or filling in the dents, but this is not always true. You may have issues with a floor that slopes in one direction – to the sides or toward the middle. Alternatively, your uneven floor may have many irregularities within different surface areas. Regardless of the situation, it would help if you found the right way to fix your uneven floor to avoid future problems.
You must understand the problems that uneven subfloors or concrete slabs can cause, what causes uneven subfloors, ways to fix them, and how to determine which method to use.
This article discusses all these issues in detail.
3 Problems That Uneven Subfloors Pose
A subfloor is a thick, flat base upon which you will lay all other flooring layers. It can consist of concrete slab, plywood, wood planks, and oriented strand board (OSB), among other things.
If the base of your floor is uneven, then every layer will have issues afterward. Ignoring the unevenness of your subfloor or trying to hide it will not solve your problems.
Below are some of the issues you will still have to deal with.
1. Your Floor Covering Will Not Adhere Well
One of the most significant issues with an uneven floor is that it will prevent your floor coverings from adhering well to its surface. So, you may find gaps between flooring, such as tiles. They not only affect the overall appearance of your floor but may also cause moisture to get trapped underneath, thus causing water damage in the long term.
In addition, if the flooring layers are not well laid out due to the unevenness of the subfloor, you may end up dealing with creaks and squeaks every time someone walks on some parts of the floor. These noises can drive you crazy because they are such a nuisance.
2. Your Floor Will Become A Falling Hazard
In addition to dealing with flooring treatments that fail to adhere well and look unattractive, you must worry about falling hazards.
The more layers you place on your subfloors, the more likely you will have highly uneven surfaces that cause you to slip, stumble, trip, and fall. As a result, you and your loved ones may end up with sprains, fractures, head injuries, abrasions, and bruises. So, you may get sued if this kind of uneven subfloor is on your business premises.
3. Your Furniture Will Not Rest Properly
The sloppier your subfloor is, some of your furniture will likely move. If your subfloor slopes from end to end, lighter furniture pieces may move in the same direction when slightly pushed. And if some parts of your subfloor are raised while others are depressed, you are likely to deal with wobbling furniture, which is unstable.
If you place your decorative items or books on unstable furniture, they may fall off. So, your expensive stuff may end up getting damaged or even hurting someone within the vicinity.
What Causes Uneven Subfloors?
Before deciding which strategy to fix your uneven subfloor, you must determine the problem. Doing so will enable you to use the right approach to fix the problem once and for all.
Below are some causes of uneven subfloors:
1. Aging
An older home is much more likely to have an uneven subfloor than a new one. That’s because, over time, your concrete slab or any other kind of subfloor will experience wear and tear. The aging process will result in many imperfections and uneven subfloor spots.
How ear and tear have affected the subfloor will determine the kind of method you use to fix it.
2. Foundation Problems
Foundation problems tend to be caused by a process known as settling. This process refers to the sinking of a home over time due to weathering. When it happens, it strains the foundation, weakening the rest of the house.
As a result of foundation settling, your floors may become uneven. In addition, you may begin to see cracks in the floor and the walls. You may also experience sticking doors and windows. You must worry more than usual if you notice any of these signs. You should hire a home inspector to check things out before you fix your uneven subfloor to ensure the underlying problem is dealt with first.
3. Damaged Floor Joists
Sometimes, your foundation is not the issue. However, the floor joists upon which the subfloor is laid may be damaged somehow.
You are more likely to find extensive damage to the floor joists in older homes. But even in a new home, the joists may still have an issue. One reason could be pest damage.
Insects, such as termites, powderpost beetles, and carpenter ants, can damage the wood, thus making it weak. And in those weak areas, the subfloor may end up sinking because it won’t have enough support.
Another reason for damaged floor joists is water damage, which may come from leakages, wet soils, and humid air conditions. Over time, the moisture will make the wood rot, which weakens it and causes it to begin sagging. That, in turn, causes the subfloor above it to become uneven.
4. Poor Installation And Building Techniques
The level of expertise of those who build your floor joists, subfloor, or foundation can affect the building’s integrity. If your floor joists are cut improperly or have notches and holes drilled in the wrong places, they could cause slopes or weaken and sag.
You may also have an issue with the subfloor itself. If it was poorly installed, it could end up getting loose and warped. In the case of a concrete slab, poor construction techniques could result in bumps and depressions. These may be in the form of poor mixing or application techniques.
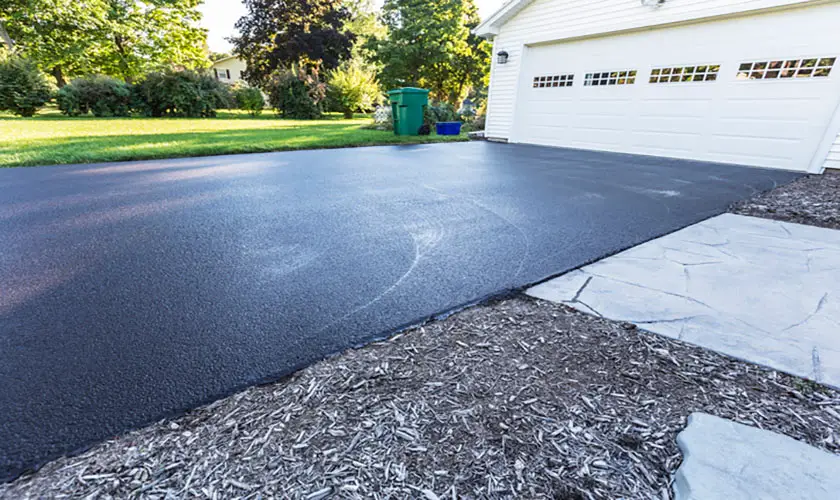
6 Ways To Fix Uneven Subfloors Or Concrete Slabs
Once a professional determines the source of the problem with your subfloor, you can fix it. You have several options available. Below are some of the common ways you can improve your uneven subfloors:
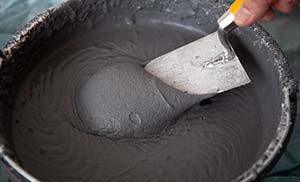
1. Use Self-Leveling Concrete/Underlayment
If you want to level an uneven concrete slab, use self-leveling concrete.
Benefits Of Self-Leveling Concrete
Self-leveling underlayment has several benefits worth considering. Below are some of them.
- The concrete is a modified cement mixture with high viscosity and can be set quickly. It also strengthens the surface on which it is applied.
- Also, remember that you can use self-level concrete on other kinds of surfaces as long as it is rigid. These include wood, plywood, and ceramic tile. So, it’s multi-purpose.
- It is not the cheapest product because it provides plenty of convenience to homeowners. So, you should expect to spend anywhere from $1.80 to $5.00 per square foot on self-leveling your subfloor. However, the final price depends on whether you use a professional to even out your subfloor. You will save more money if you buy the materials yourself since installing them is easy.
- In addition, self-leveling concrete doesn’t require a lot of water and is hypoallergenic. In wet conditions, it resists mold growth better than regular concrete.
- Also, it dries quickly, so you can install your floor covering without waiting long.
How To Apply Self-Leveling Concrete
Once you learn how to apply self-leveling concrete, you can do it.
Here’s how to go about it:
- First, determine if the kind of uneven subfloor you have can be fixed using self-leveling concrete. You can do this by reading the manufacturer’s instructions. Some may call for adding aggregates to fill in more prominent depressions.
- Do the math concerning how much self-leveling concrete you need. Ensure you buy more than what is required. It’s better to err on caution so you have enough to finish the job in one go.
- Ensure you have all your tools and supplies ready. These include self-leveling concrete, protective clothing, a polyurethane sealant, water, a mop, latex concrete bonding primer, a bucket, and a pencil. Other supplies include a trowel or gauge rake and a power drill. Your self-leveling concrete should be stored indoors and above the ground.
- When you are ready, put on your work gear and clear the floor area on which you will work.
- To ensure no dirt will affect the effectiveness of the self-leveling mortar, clean the concrete slab. You can vacuum and then mop it.
- If cracks exist within the concrete subfloor, start by sealing them off. You can use a concrete repair tube if you don’t have polyurethane sealant. Follow the manufacturer’s guidelines on use and drying times.
- Apply latex concrete bonding primer on the dry-clean concrete subfloor. Every inch must be covered.
- Mark the uneven surfaces so you can ensure they are rectified.
- Mix the self-leveling compound in a cleaning bucket according to the manufacturer’s instructions. You can use a drill to speed up the mixing process. The ratio given is crucial to ensure you get it right. You cannot start adding water later on.
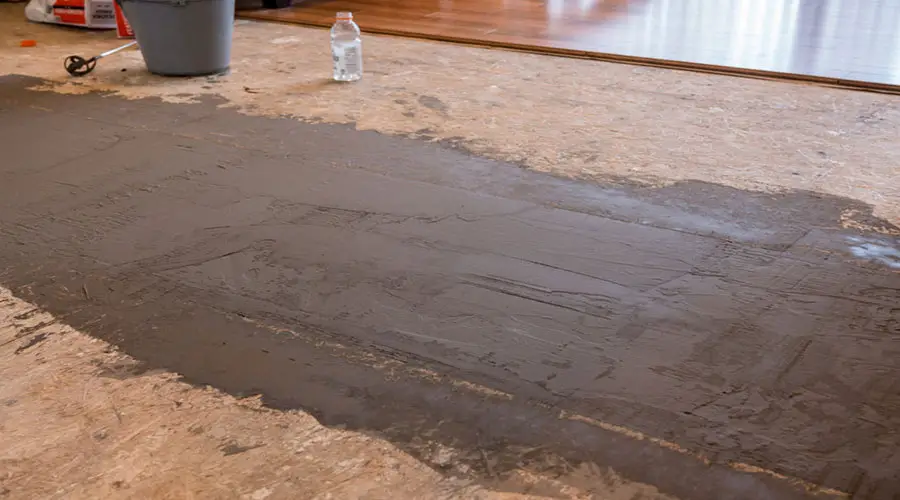
- Pour the self-leveling concrete onto the uneven surfaces and spread. If you only work on a small section, you can use a trowel to spread the compound evenly. However, a gauge rake can apply the mixture quickly in a larger subfloor area. Mix only one bag at a time in larger sections because the mixture dries quickly – within 15 to 30 minutes.
- Due to its high viscosity, the self-leveling compound will likely flow into the recessed areas, thus making your work easier. Once you are done, evening out the subfloor and allow it to set and dry. It will be ready to walk on in about four to six hours. But it’s best to leave it alone for at least 24 hours.
- In the meantime, clean all your tools and supplies.
- Once you confirm the subfloor is level (using a carpenter’s level), you can lay the floor covering of your choice.
2. Install A Flooring Underlayment
The flooring underlayment is a layer of material between the subfloor and the top floor covering that evens the surface underneath it. You can place it above subfloors made of wood as well as those made of concrete. It should be thick enough to hide imperfections and thin enough to prevent room height discrepancies.
Plywood is usually one of the most common underlayment materials and the best option for wavy subfloors. However, you can also use foam padding, underlayment panels, cement board, and hardboard.
The way you install the underlayment depends on the subfloor issues.
- If your subfloor has many levels, you can cut plywood of different thicknesses and lengths and appropriately install them.
- If you have small knot holes or protruding screw heads, you can use cork or foam underlayments to smoothen out the imperfections. But these only work well if the old flooring is in good shape and you want to cover it with a secondary floor covering, such as laminate.
- You can nail it down if you install an underlayment, such as plywood, on a wooden subfloor. However, if the subfloor is concrete, you must use bolts to hold it down.
- You can take advantage of the large four by eight feet plywood sheets on a wavy floor and lay them on the entire subfloor.
- If one end is lower than the other, you can insert plywood on the recessed area to bring it up to the level of the higher side.
3. Grind Or Sand The Subfloor
Another option available is grinding or sanding your subfloor to make it even. These options are meant for concrete and wooden subfloors, respectively. They also help lower bumps within the subfloors to put them at the same level. So, if you have bumps on your subfloor, you can use a grinder or sander to even them out.
But do bear in mind a few things:
- You need to remove screws and nails before leveling the subfloor.
- Since sanding and grinding flatten the raised areas, you must take care of depressions some other way. A self-leveling compound is one way to do that. If you opt for this method, you must fill in the depressions before using a sander or grinder.
- If your subfloor is heavily painted or has sections with adhesives, be sure to remove them first using a floor buffer. Then vacuum it before sanding.
- For wood subfloors, you must ensure the surface is firmly held down. Fix any loose areas before sanding.
- Always use the correct sanding or grinding equipment to fix your uneven subfloor.
- The sanding and grinding processes release dust and produce a lot of noise. For this reason, ensure you wear protective clothing to safeguard yourself from it.
- If you do not know what to do, consult or hire a professional to sand or grind your subfloor.
4. Replace The Subfloor
Your subfloor may not only be uneven but damaged beyond repair. That can happen when the subfloor swells and then deteriorates. In such a case, it would be better for you to replace it with a new one. Here are some tips on how to go about doing that:
- If some parts of your subfloor are damaged, cut them out and replace them with new parts. Ensure the underlayment in the damaged area is also removed and replaced.
- It would help if you first addressed the cause of the subfloor damage. For example, if water is the source of the damage, you must ensure the point at which it entered the subfloor has been plugged to prevent future issues.
- You need to budget enough money to replace your subfloor. It will cost you an average of $550 to install a new subfloor in a 306 square foot room. For the materials alone, expect to pay $1.45 to $7 per square foot. On the other hand, labor will cost an average of $27.50 per hour. So, be prepared for the entire cost of subfloor replacement.
5. Fix Your Floor Joists
When the issue behind your uneven subfloor concerns your floor joists, you must fix them first. However, repairing your floor joists will depend on the underlying problem. You can use some of the approaches below to resolve it.
- When a floor joist bows upward, it can push the floor above it upwards. To fix this problem, remove the subfloor, plane the floor joist, and then reinstall the subfloor. The raised area will be even.
- If the floor joists underneath the uneven subfloor are twisted or warped due to incorrect installation techniques, you can shim them. The process involves attaching small wedge-shaped wood pieces on the low-lying sections to become level with the rest of the floor joist areas. Afterward, you can plan the raised areas to make them even. Additionally, shimming can be used after the foundation has been stabilized to improve the subfloor’s evenness.
- Suppose a structural engineer or home inspector determines that some of your floor joists are weak due to undersized lumber, excessive spacing, or pest and water damage. In that case, you can sister the joist system. The process entails bolting new joists to the old and weakened ones to strengthen them. Doing so increases their stability and fixes the sagging and cracking issues that cause depressions within the subfloor.
6. Stabilize Your Foundation
If your foundation is the cause of your uneven subfloor, it may need to be stabilized first. It would be wise to consult a structural engineer in this process.
If you have a concrete slab, it may undergo slab jacking. The process involves pumping a stabilization mixture underneath the slab through holes drilled into it to lift it and restore its original elevation. Afterward, the experts will plug the gaps. That may be all you need to fix your uneven concrete subfloor.
Piering is another technique available for stabilizing your foundation. The process involves using concrete or metal posts to support your building. These posts are usually placed at the footing of your foundation. Hydraulic jacks are generally used to elevate the foundation.
If you live in an area with many settlement issues, you should consider additional support piers to stabilize your foundation. And it works very well for concrete slabs.
Final Thoughts
There are just as many ways to fix uneven floors as there are causes of the issue. What works for someone else may not work for your home. Therefore, you first need to learn your subfloor problem, determine what’s causing it, and then select the best method to fix it.
Addressing the underlying cause of uneven subfloor will reduce the likelihood of dealing with that problem again. So, try to solve the problem once by doing it right rather than avoiding it and repeatedly dealing with the symptoms of the issue.