Undertaking a tile project can be daunting. There are guidelines to help you ensure your tile work is on par with code and state-of-the-art modern designs.
Signs of a successful tile installation:
- Tile is laid on an even surface.
- Color, pattern, and design details are all coordinated.
- The layout and features of your property determine how tiles are centered and symmetrical.
- Corner and side wall cuts are clean. A tell-tell sign of an amateur installation can be found along walls and in corners.
- Before grouting, all tiles, underlayments, and subfloor units should be clean.
- After grouting, excess grout should be cleaned before it curing.
With so many moving parts, tile is one of the most complex types of flooring to install. Many of us desire a home in which we can take pride. If a minor feature is out of place, it may not appear to be a significant concern to visitors, but it can be an eyesore to residents who hoped to prevent the error in the first place.
What Do You Want Tile To Look Like?
When done, you want your tile to lay evenly fit side by side in equally spaced rows. You want it to have smooth, well-spread mortar that leaves it flush with the subflooring. Your tiles should not wiggle.
It’s also ideal if the grout fits neatly into the spaces between the tiles and does not bleed or bubble.
A poor tile job is going to stick out sorely. If you have questions about those mistakes that aren’t obvious, speak with a professional home builder.
What Do You Not Want Tile To Look Like?
If your tile is installed incorrectly, you will see it because it will look uneven. Some pieces may look squished together, and tiles will look too far apart and expose under flooring.
You do not want cracked or uneven flooring. You also don’t want uneven or splotchy grout and wavy applied mortar that leaves spaces of under flooring bare.
How Do You Determine The Starting Point For Laying Tile?
Draw chalk lines on the floor at the midpoints of each wall. The tile begins at the point where two lines intersect in the center of the room. Place a row of tiles more than halfway across the room along a straightedge. Use tile spacers to keep your joints uniform.
How Do You Check If Tiles Are Laid Properly?
You can start with a visual check to see if the floor appears even. Do you see any oddly angled tiles or spaces where there is a gap in grout space? If so, you may need to do a bit of reworking.
If you can’t visually tell that tiles are misplaced, try a pressure test. Press your thumbs against the tile and lean on it a bit. Does it rock or make any scraping sounds? If so, you may have put it in the right place yet failed to add enough mortar and grout to fix it in place.
Starting From Scratch
It is more prudent to begin your project with a quality control mindset rather than wait until after. If you are starting the checking process from scratch, there are some integral steps to take first.
Don’t Scrimp On Your Underfloor
Some plywood may be cheaper, but that doesn’t always make it a good alternative. Because the substrate is vital to your flooring longevity, you don’t want to scrimp on the underfloor materials.
Staying on budget for adequate substrate does not mean sacrificing quality here. It does mean that you will need to do some extensive homework.
Waterproof Substrate To Ensure Longevity
There are plywood and plywood alternatives like OSB on the market that have flexible quantities. Plywood is efficient beneath vinyl because it adds flexibility to under flooring that keeps it from snapping or cracking underfoot.
However, when laying tile, a subfloor of backer board is best. Backer board is resistant to moisture, unlike plywood or OSB.
The ultimate downside to bendable underflooring is its water damage issues. If the underfloor gets water warp damage, it can swell and bow, making for breakable floor spots and weird humps jutting upward in the underfloor. If there are tiles present, they will pop loose, crack, twist, or gnash together as a result. You will be able to see the underfloor deficiencies.
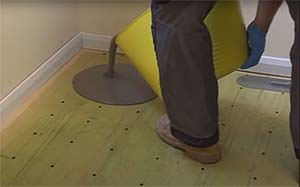
Make sure you add a waterproofing measure to your underfloor. Things like self-leveling compounds can prevent these warping issues.
Using Leveling Compounds
Since we’re on the subject of cracking, there is a way to avoid them after the tile work is complete. These cracks can typically spawn from mistakes in the subflooring. Take a moment to check your subflooring for any missteps. A full assessment helps you lay out a checklist for the corrections process.
Membrane products exist to provide a lacquer to tile and crack-proof it. These products often come in a bright pink formula and can be applied with a roll-on paint sponge or sponge mop.
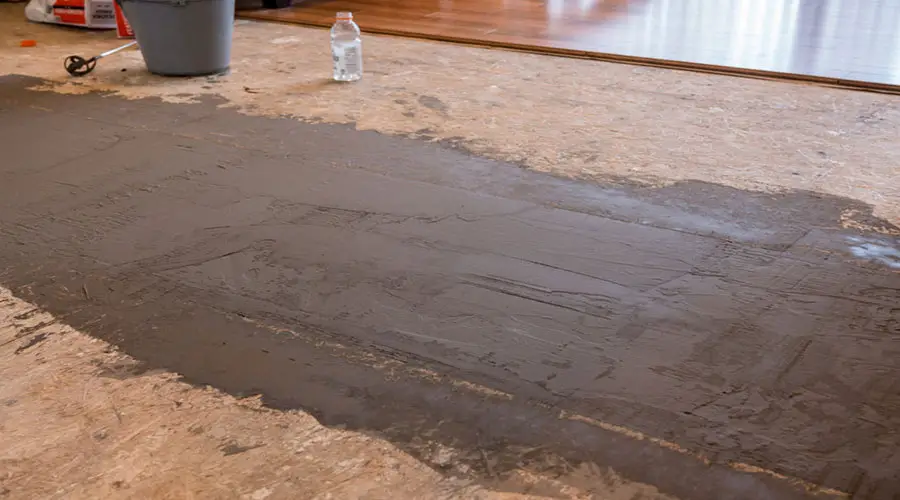
Leveling compounds can be used on concrete slabs and wood floors to help provide an even surface to lay the tile.
Home Depot also sells a mortar product that is a crack-resistant formula. Keep in mind that crack proofing should focus on the substrate. Review the cost efficiency of such products in the context of your project scope.
Note On Crack Proof Membranes
The American National Standards Institute warns that crack-proof Membrane is not effective against all tile defects. Crack proofing should enforce the substrate to prevent tile friction. Apply the crack proofing with care for functionality.
ANSI notes the importance of locating expansion joints and sealing them. Reinforcing expansion joints adds a layer of crack proofing to membrane applications.
Prep Your Floors First
Is there an old floor? Take it up. Remove all old tiling and substrate. Initiate a clean-up process to rid the underflooring of old floor residue and debris.
Scrape away particles and chips with scraping tools and a broom. Wash the floors afterward to break loose debris and earlier sealants.
Be sure to consult guidelines before undertaking such a task. Wear a respirator to avoid harmful effects from the debris of breaking up old flooring.
Measure Around Dry Tiling
If you played hopscotch as a kid, then you’ve got some practice drawing equal squares on a flat surface. You can emulate this with a chalk line, carpenter’s pencil, and the tiles themselves.
Layout tiles that have not had mortar applied to them yet. Using your chalk line, make a line horizontally through the room and then make a vertical line from the room’s top to bottom.
Make A Grid To Lock It In
Within this grid, line your tiles up to be even. You can trace each one with the carpenter’s pencil on the first layer of under flooring to serve as a template for laying backward board, mortar, and tile in the perfect place.
Use Spacers
As you lay tile, any trace lines you put on the underfloor as a template will get covered by your backer board or thin-set mortar. You can use spacers to place between each tile to keep them even and aligned with the template grid you made.
You may consider taping spacers in place. Apply a small strip of masking tape to the top of the spacer and the tile surface, which will keep them from falling out of space or bouncing around while you work with them.
Select Tiles To Suit The Need
You should also select tiles to suit your project needs. Vinyl is an affordable tile that is cheap and easy to store but may not be best for all scopes.
Compare ceramic to porcelain. In some cases, ceramic is more affordable. And in others where more water resistance is required, porcelain works best.
If you select tiles on a project need basis, you will lessen the room’s chances of improper tile installation. Choosing tiles per project encourages even spread for mortar as well as powerful enough clippers for cutting tiles.
Lay A Level Along Tile Rows
Even with a drawn grid, sometimes it can be hard to eyeball what you are laying down around your tools. A level laid along the top or bottom of the tile row can help you have an even edge to follow to ensure tiles follow uniform lines.
Check Your Mortar Quality
Not all mortar is the same. Experts recommend thin-set mortar for tiling. Look for a water-based product for its elasticity. This added bonding agent will keep tiles sealed into the floor.
Because your mortar is your bonding agent, you want to go with top quality. Check your mortar to ensure it is clump-free, non-flaking, and adhesive. If not, then you may need a new product.
Mix The Mortar Well
A high-quality mortar product is a starting place, but you still need to ensure a quality mix. You need to mix the mortar for about 10 minutes before you use it. After that, you will have a window of roughly 30-40 minutes to use the mixture before it clumps up.
Stir the mortar well. It needs to be like the paste you used in grade school. Mortar is your glue that holds the tile to the floor, so you can afford to be a bit particular about getting this right.
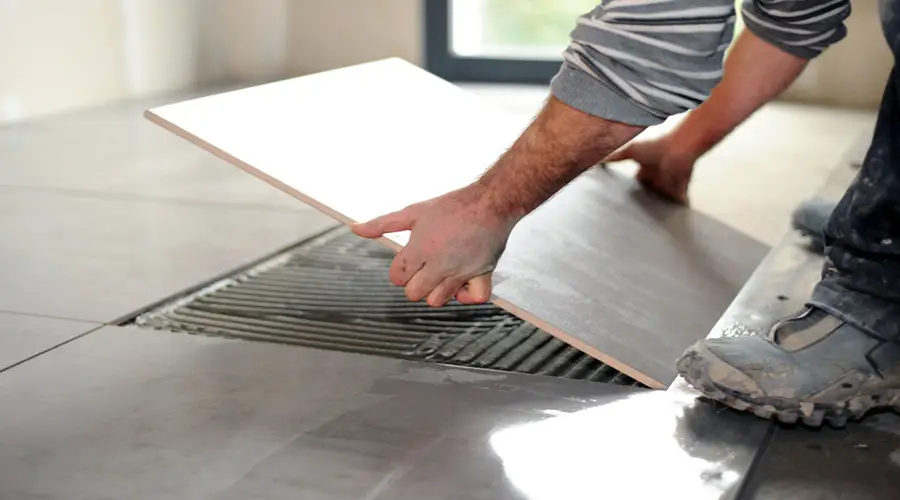
Use Enough Mortar
If you want your tiles to stay in their correct place, you need to seal them adequately. Apply thin-set mortar to the back of each tile. Heavy tile material will require a liberal application of grout on the back. Between 80-90 percent of the tile’s back should have mortar.
Do not forsake back buttering your tile to keep them even. You might get trying to keep the gooey mess down to a minimum, but tiles without proper cement are going to shift, which can cause tiles to crack, crush each other, or pop out of the floor entirely.
Watch Out For Cruddy Grout
The grout is as vital as your mortar and serves more than one purpose. Grout keeps tiles from shifting around. It secures them from cracking or peeling at the edges. Grout also seals the floor from water seepage below the edges of the tiles. Think of grout as the hem of your tiles. Without this integral seam, the tile work is inadequate.
For these reasons, check your grout quality before you even go to work. You don’t want grout that will get clumpy, gritty, or bunch up and fail to go into the cracks between the tiles.
Make Clean Tile Cuts
You need to invest in sturdy tile cutters for this because you don’t want jagged edges. Drought cut tile edges will not fit with the other tiles well. If need be, cut the tile along with a level tool, a process similar to cutting fabric along a straight edge.
You can rent tile saws from most home stores such as Lowes or Home Depot.
Clear Away Debris Before Mortar/Grout
You will not want pieces of substrate or cut tile in your mortar or grout. These wood scraps and ceramic have the same effect as clumping in the mortar and grout mixtures. Keep a little broom and dustpan handy to constantly sweep your work area.
Rubber Mallet Tap Tiles In Place
You will want to press your tiles into their grout better than the slight press of your hand strength. For this, you need a tool that can apply force without damaging ceramic flooring.
Use a rubber mallet to tap tiles in place with force but without cracks.
Clean Up As You Go
Leaving grout debris, mortar debris, and other pieces of the job behind is bad for efficiency. Mortar or grout sticking in the wrong place may make tile uneven. Spread mortar and grout evenly with a trough to avoid this problem and keep adhesive work clean.
Don’t skip clean-up time if you want to avoid the subpar looking of grout smudges or scratches on new tile that would come from grout paste residue. A simple sponge in dishwater solution can rid tile surfaces of grout residue and give them a polished finishing touch.
Takeaway
If you are laying tile for the first time, don’t worry. Even seasoned home improvement professionals constantly improve methods and skills to be better. You might not get it technically perfect on your first try, but with these helpful tips, you guarantee approximate technique.