When a water heater leaks from the relief valve, it can be due to excessive temperature or pressure inside the tank. This valve is a safety mechanism designed to prevent the water heater from exploding in such situations.
The possible causes of the leak include excessive pressure, thermal expansion, or a faulty valve. In some cases, the valve may need to be replaced. If the problem persists after valve replacement, installing an expansion tank to regulate the pressure may be necessary.
It’s important to promptly address a leaking relief valve before it leads to property damage and safety hazards.
How Do I Know If My Water Heater Relief Valve Is Bad?
Excessive Persistent Noise
Your water heater occasionally makes weird noises due to what’s in the tank. However, Noticing a persistent rattling or high-pitched whistle might be a sign of pressure trying to escape the heater.
These noises over time mean the valve isn’t opening and closing as it should. That also means it is releasing less pressure. It could be putting your water heater at risk of explosion.
Sediments in the Water From Your Outlets
Dirt or debris in your water hot water outlets indicates that your valve is overdue for replacement and your heater has been taking continuous internal damage.
Excess pressure tends to wreck the tank’s internal lining. The debris accumulates and disintegrates in the tank. If the damage continues and the sediment isn’t flushed, it shows up in your outlet taps.
Continuous Leaking
Sure, the water relief valve leaks. If it leaks after fixing or when it’s not under any pressure, you might have a bad valve. Continuous leaking could be from constant overheating or excess pressure and insufficient release. Both are signs of a failing valve. Also, it can be a sign of a bad thermostat that cannot control heat.
A loose relief valve cannot hold pressure. Therefore, it keeps leaking.
Leaking From the Tank
Leaking from the tank should be a cause for alarm. It means your heater has taken so much damage from the pressure that the lining has become weak and broken. The tank cannot drain water, and its pressure only worsens the situation.
Now, your options are limited to getting a heater replacement. However, on the off chance that you can still salvage your tank and you can repair the relief valve, you need to do it as soon as possible.
How Do You Test a Water Relief Valve
The relief valve doesn’t always have a problem for it to leak. Extreme weather conditions such as super cold winters can cause the valve not to perform to its best potential. Other factors include rust, corrosion, and debris in the seal.
These factors are why testing whether the relief valve works is crucial. Here are the steps in testing a water relief valve:
- Make sure you safely conduct any checks every time. The water in the heater will likely be hot most of the time. You can wait until it’s cold before checking the valve. Alternatively, have a licensed plumber check the valve during maintenance.
- For an electric heater, shut off the power from the main circuit breaker. Whether you do it yourself or call a plumber, first turn off the power and the gas. Your heater probably has a dedicated shut-off switch. Turn the gas valve to ‘Pilot’ or ‘Off’ if you have a gas hot water tank.
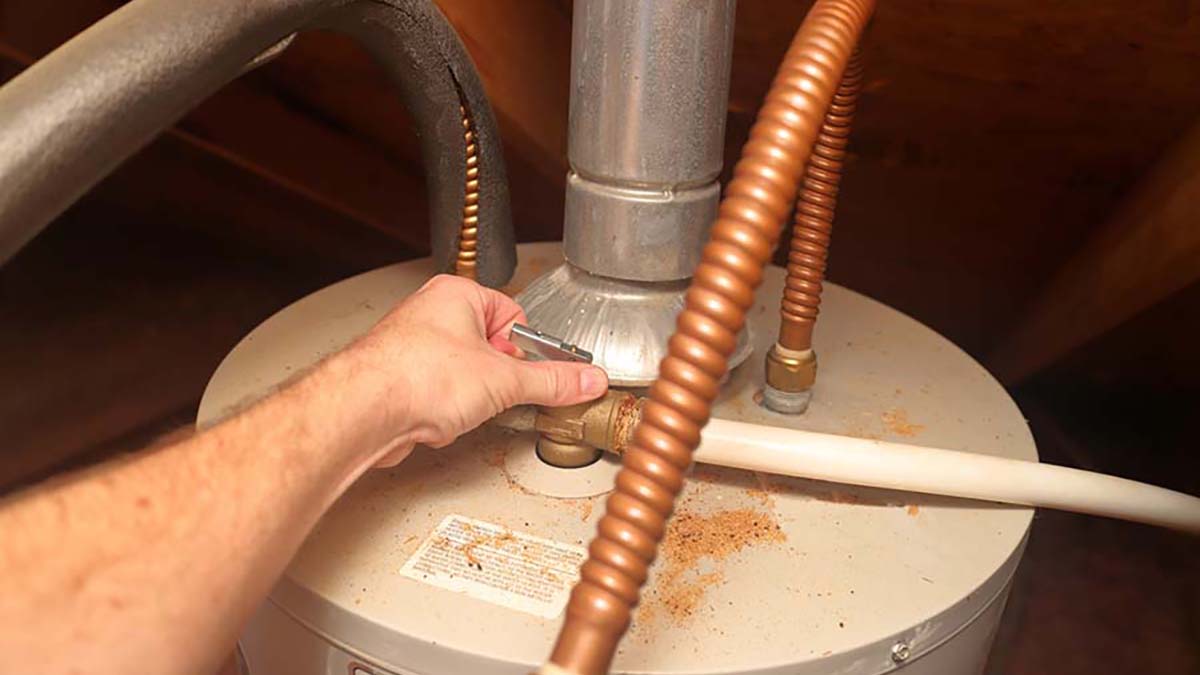
- Flip the lever open once to let off some pressure. Place a collection pail under the overflow drain pipe for the outflowing water. Now, flip the lever for about five seconds and close it. Repeat this a few times, noting if water comes from the overflow drainpipe.
Checking if the relief valve is working is helpful for two things. It tells you whether the problem is with the valve or not.
- It clears out sediment.
- If you notice a leak after checking the valve, it’s time to replace it.
How Do You Stop a Relief Valve From Leaking?
Right about this point, you’re probably tired of fixing the leak. The quickest fix would be to replace the valve and install an expansion tank to boot. However, there’s a faster fix that you might be overlooking.
The relief valve is a spring-loaded contraption. If the spring is not seated correctly, it leaves space for water to drip. Fortunately, you can fix it before replacing the entire valve (the best option).
Flipping and closing the lever on the relief valve firmly can reset the spring to its comfortable position. Usually, the seal and the gasket get misaligned because of long-term negligence. It gets corroded and leaves spaces for leaks. Flipping and closing the lever removes some of that corrosion.
If the leak doesn’t stop, it’s time to replace the valve. Here are the steps to do so:
1. Drain the tank
Drain the tank to below the relief valve level. You can drain the entire tank. However, most tanks hold as much as 50 gallons in them. Draining all the water in a tank to replace the relief valve would be wasteful. However, you can drain it if you’re also flushing the tank.
2. Remove the discharge tube.
The discharge pipe extends to the ground. This tube is essential to the relief valve mechanism. It drains all the overflow when the tank drains itself. Without the tube, the pressure would make hot water splash out from the valve, posing the threat of serious injury to anyone close.
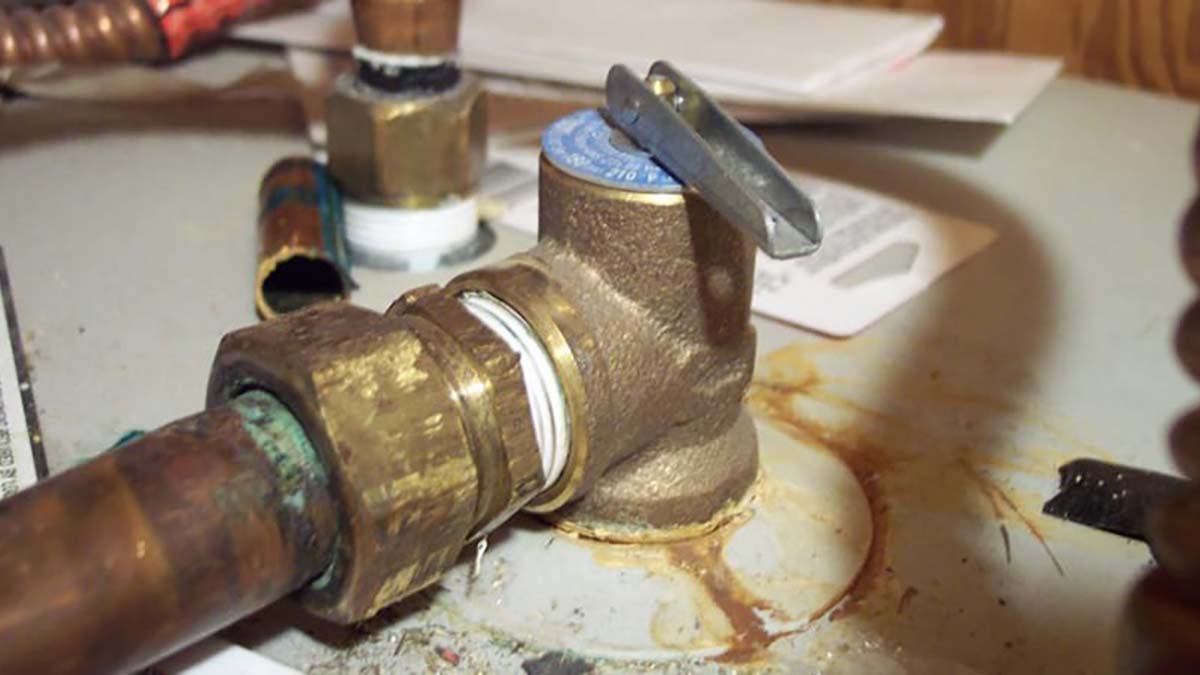
3. Remove the old relief valve
A replacement valve costs about $35 in stores. Use a pipe wrench to unscrew the old faulty valve. Turn it anticlockwise to pry it open. Brush the inner area with a wire brush to remove any sediment and buildup in the inner part of the tank.
4. Tape the new relief valve
Teflon tape or plumber tape is a vital part of the installation. It allows you to get a tight fit. Also, it makes the new installation smoother. Wrap the Teflon tape clockwise about six times. Leave about three threads of the new drain valve exposed. The exposed threads are your anchor. Screw it in place.
Note: Each valve is inscribed with its temperature and pressure setting. Ensure you buy one that matches the previous valve’s setting.
5. Turn the water on
Before you return the overflow pipe, turn your water back on from the cold inlet. Also, power back your gas. You’ll know the tank is full when the tap you left open starts letting water out with a steady flow.
6. Test out the new valve
Flick the lever of the new valve open to release some of the initial pressure. Hold a bucket under the new valve. Hold the lever open for a few seconds, then release it. Make sure there are no leaks. Once you ensure no leaks, put the overflow pipe back on.
Bonus Tip: Install an expansion tank
An expansion tank is a smaller tank that you can install above the heater. The expansion tank takes in some excess water from the thermal expansion in the main heater. The main heater is less likely to get damaged with less water and less pressure in the main.
You can install an expansion tank by welding it onto the main supply line of the water heater.
How Often Should Pressure Relief Valves Be Replaced?
Your relief valve WILL wear out. However, you can stay ahead of the damage if you check its status occasionally. Surprisingly, you won’t need to check it that frequently.
First, check once a year whether the relief valve is working. You can make it frequent if you live in an area with hard water or too high water pressure.
Regardless of whether you check the relief valve once or twice yearly, you must replace it. You should replace the pressure relief valve on your water heater every five years, even if it’s in okay shape.