Do you have a new water heater for your home, and do you understand the codes regarding its installation? Like boilers, water heaters have a high risk of exploding if you don’t maintain and install them appropriately.
There are water heater installation codes at the national and local levels to ensure correct installation and everyone’s safety. Violating these codes could put you and the people around you in danger. Water heater installation codes cover proper water hookup, device set up, wiring, and more.
Below, we’ll look at water installation codes that you must comply with if you want your water heater to function effectively.
Water Heater Installation Permits
Before you mess around with installing a water heater, it is crucial to do everything to code and acquire the proper permitting. To install a water heater, you are required to have at least one permit.
Below are some of the permits you might need:
Primary Water Heater Permit
This primary water heater permit is a mandatory permit that you must have to install a water heater in your home. You can easily go to your local building or planning department to ask for one. A water heater permit typically costs between $20 to $100.
The permit assists you in installing the heater according to local codes and safely. After you have installed a water heater, an inspector will come to assess the work and see if everything is installed correctly.
Common Secondary Permits
Apart from a water heater permit, you often need a plumbing or electric permit as well. However, whether you need one depends on your location and the type of heater you intend to install.
Make sure to check your local building codes or talk to someone at your local building or planning department.
Additional Permit Considerations
For older homes, you might need additional permits before installing a water heater. Some common instances where you’ll need additional permits are if you’re doing any structural work, such as installing a cabinet for a tankless heater or building a level platform in your basement.
Considerations Before Installing a Water Heater
Here are a few things to consider and make sure you properly set up before installing your new water heater into your home.
Ensure You Have Appropriate Water Pressure
The water pressure of your house is essential for all water-using applications. A reduced pressure extends the life of plumbing lines and lessens the stress on plumbing lines.
You can check the pressure of your house using a pressure gauge. The perfect pressure is somewhere between 50 to 60 pounds per square inch (PSI). When the pressure is higher than 80 PSI, try lowering it using a pressure-reducing valve.
An inline pressure gauge is also essential for pressure monitoring. If you don’t have a pressure-reducing valve in your home, you can have a professional install one for you.
Get a Proper-Sized Thermal Expansion Tank
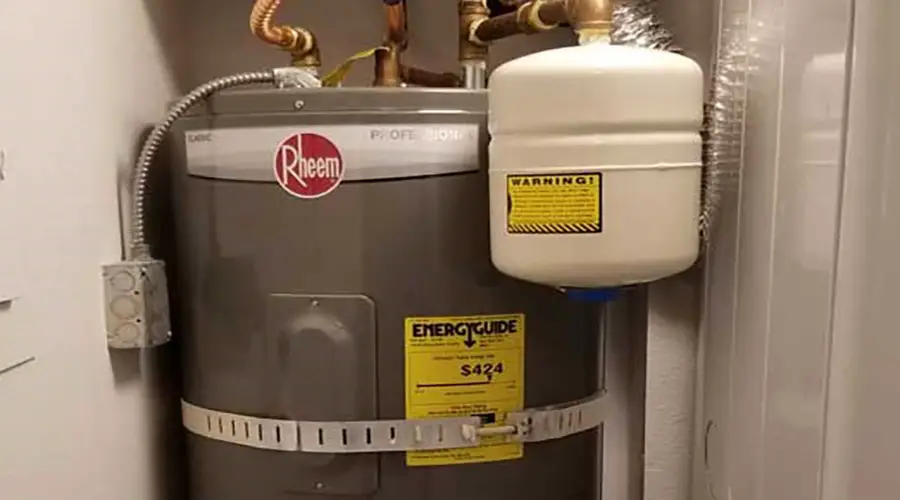
Determine the correct-sized expansion tank that you’ll need. A thermal expansion tank limits pressure in a closed system. A 2-gallon expansion tank should work with heaters up to 50 gallons. For water heaters up to 100 gallons, use a 5-gallon expansion tank.
Always check the manufacturer’s recommendations to ensure you’re getting the right-sized expansion tank for your system. The installation of a water heater requires that its pressure matches the primary water pressure.
Get a Proper-Sized Drain Pan
Depending on where you live and the location of your water heater you may be required to install a drain pan underneath your water heater. Generally drain pans are not required in garages or unfinished basements.
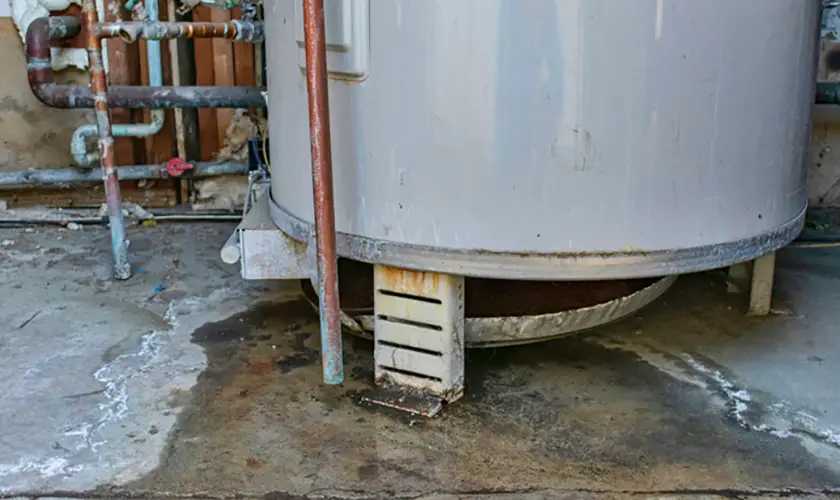
The drain pan catches water that leaks from the water heater to help protect the interior.
If your water heater is installed in the living space or attic, a water heater pan is required. The drain pan will need to have a discharge pipe to expel water to the exterior. In condos and apartments, your drain pan will likely pipe to a 3 inch drain pipe that directs water outside.
How to Install a Water Heater to Code
While installing a water heater, you must make sure that you do everything according to the set standards and codes. Follow the process below to install an electric water heater the correct way. For a gas water heater, codes are similar with some exceptions.
1. Set Your Heater In Place
Put your heater in a drain pan. You can prevent flooding by routing a pipe to a drain from the drain pan.
Gas tank water heaters installed in a garage must be installed on an 18 inch stand. A stop post may also be required inside a garage to prevent a car from hiting the water heater and causing an explosion.
2. Install Your T&P Valve
There is a chance that the heater didn’t come with a T&P relief valve. You can twist in a valve at this point. The valve might be in the box, or you might have to buy one separately. Never reuse an old valve. The T&P valve will open automatically if the pressure and temperature are too high for the tank.
3. Install a Discharge Pipe
Place the discharge pipe from your T&P relief valve to the drain or floor. If you don’t have a drain under the pipe, you can put a bucket there to catch water dripping from your discharge pipe. Cut the pipe, so it’s less than 6-inches above your bucket or drain pan.
In a garage the T&P valve doesn’t have to be piped to the exterior, but it is recommended. If not directed the to the exterior, the pipe should stop 6 inches from the garage floor.
4. Hook Up the Water
To hook up water effectively, use a flexible hose kit. You can then apply plumbers to tape the heat trap nipples’ threads. Attach the hoses after that.
5. Install the Fittings
There are areas where you must install dielectric fittings to limit corrosion between various metals. Your local area’s ordinances and codes detail the specifics of installations.
6. Secure the Fitting
Include plumbers tape to your connector body threads. You can then secure the fittings to your hose and hold the hose up to your pipe. Mark and then cut your pipe to remove any burrs.
7. Secure the Compression Nut
Slide the compression ring and nut onto the pipe. Push the pipe into your fitting and then tighten the nut.
8. Install Seismic Straps
If you want to prevent damages resulting from earthquakes, some areas require the installation of seismic straps. The straps hold the water tank on the wall, thus preventing it from toppling over. However, you don’t need to install seismic straps if you aren’t in an earthquake zone.
You should install a seismic strap about 18-inches from the bottom of a water heater and about 6-inches from the top. Identify the wall studs that are closer to the strap measurement and then drill pilot holes.
Use a ratchet and socket to secure one end of the strap to your stud. Use a masonry bit to make a pilot hole if blocks cover the studs. Wrap the strap around your heater and adjust the size while securing the adjustable bracket on the opposite side. Repeat the same thing on the lower strap.
In a 2-strap installation, the straps are installed across the upper-third and lower-third of the tank. On gas water heaters the lower strap must be 4 inches above the thermostat. Some locations will require a third strap.
Check with your local building inspector for strapping guidelines.
The Uniform Plumbing Code (UPC), section 510.5 says “In seismic zones 3 and 4, water heaters shall be anchored or strapped to resist horizontal displacement due to earthquake motion. Strapping shall be at points within the upper one-third (1/3) and lower one-third (1/3) of its vertical dimensions. At the lower point, a minimum of four (4) inches (102mm) shall be maintained above the controls with the strapping.” Washington, Oregon and California are all seismic zones 3 or 4. At FAST, we use only the best earthquake strapping kits available. If you live in a seismic zone, earthquake strapping is a very important part of your water heater installation.
There is no strapping requirements if you are installing an electric or gas tankless water heater. Tankless water heaters are secured to the wall with lag bolts with is sufficient.
9. Fill the Tank
Remove an aerator from the closest faucet and then slowly open the hot side. Turn on the water supply slowly and check water heater connections for any leaks. Fill the tank if there are no leaks. If you notice leaks, shut off your supply and then tighten the connections. Repeat the process until the links become secure.
10. Flush the Tank
The tank becomes full when water runs from the tap. Allow water to run for about three minutes to empty debris and air from the tank.
11. Connect the Wiring
Remove the cover of the junction box. Connect the ground wire to a green ground screw. Apply wire connectors to twist the wires together.
12. Turn On the Power
Replace the cover of the junction box and turn on the power at the circuit. If the heater doesn’t have power, you can turn the circuit off to check the connection.
13. Set the Temperature of Your Water
Go through the manufacturer’s instructions to set the water temperature at 120 degrees Fahrenheit. It might take hours to heat the water initially.
14. Check Your Discharge Pipe
After a short period, check the discharge pipe running out of the T&P valve. If the pipe is dripping, the pressure is too high. Lower your pressure down to below 80 PSI.
15. Check Aeration
If your faucet ceases to run after installation, remove the aerator from the faucet and allow water to run for a few minutes to clear loose sediment. You can rinse and replace your aerator.
Skills Needed To Install a Water Heater
The installation of a water heater requires more skills than you might imagine. However, you’ll need fewer skills and knowledge to replace an existing water heater than install a brand new one.
Some of the skills that you need to install a water heater include:
- Plumbing: This is the most important skill required to install either an electric or gas water heater. With these skills, you’ll ensure that there are no pressure issues or potential leaks.
- Electrical skills: All water heaters come with electrical parts. These parts are normally hooked to a breaker box. You’ll therefore require some electrical skills to handle water heaters.
- Carpentry skills: Even though you might never interact with wood, you should familiarize yourself with some carpentry skills. In some cases, you might have to anchor your pipes to the ceiling beams.
Can A Homeowner Install a Water Heater?
Most ordinances and codes allow homeowners to install their own water heaters, while other jurisdictions let unlicensed individuals install heaters as long as they have a permit for safety purposes.
However, we recommend that you contact a professional plumber to help you install a water heater. Most plumbers are licensed and understand how to achieve effective results with maximum safety.
Common Mistakes When Installing a Water Heater
If you decide to install your water heater yourself, you want to avoid many mistakes and errors for cost and safety reasons. Below are a few of the most avoidable common mistakes:
Buying The Wrong Heater Size
When we say size, we refer to the capacity of the tank and the dimension of the heater. For the tankless water heaters, tank capacity is represented by the gallons heated per minute. If your home has 2 to 4 residents and 2.5 baths, you should go for a 50-gallon water heater.
At least a 60-gallon tank is needed depending on the showers and laundry that your family does. If you pay more for a larger tank, you might end up saving more money in the long term.
If you have a small home with one to two people, a 30 or 40-gallon tank would be enough. Always assess how many people live in your home and choose a tank size that fits your needs.
Installing Water Heaters In Restricted Locations
According to water heater installation codes, you can’t just go about installing water heaters anywhere you like. Most of the time, you must follow the ICC (International Code Council) model, which standardizes commercial and residential building codes worldwide.
For instance, you can only install a water heater in Texas if you have an installation permit. Even after you are through with the installation, the local municipality should inspect everything to ensure that you complied with the code.
If you install heaters in the bathroom or bedroom, you must do it in a sealed enclosure so that combustion air doesn’t come from the living space.
Installing A Heater Without A Permit
Having unpermitted work can lead to legal problems. It will also invalidate your insurance coverage. If you contact a plumber and find that they don’t have an installation permit, you should never allow them to install your heater.
Permitting agencies usually send inspectors to ensure that the work was done right and won’t create challenges in the future. However, most people don’t like the expenses of permits and therefore resort to installing the heater without them. It is something that you should avoid at all costs.
Having No Drain Pan Below The Heater Tank
Most states require that tank heaters have corrosion-resistant waterproof drain pans. The pan you use should be between 1.5 to 2.5 inches high and 2-inches wider than new water heaters.
The drain pan should have somewhere to attach a drain pipe that runs near the ground and out of your home to discharge water if your tank fails.
If you have a large enough old drain pan, you can use it. You must, however, ensure that there is no corrosion or damage. If your drain line is obstructed or too small, it won’t handle water flow, and you’ll experience water damage. Therefore, you should always have a fully functional drain pan in place.
Water Heater Gas & Power Shut Offs Not In Sight
Whether your water heater uses electricity or gas, you should never apply heat until the heater is filled with water and is fully installed.
Any heating element must be immersed in water. Otherwise, they’ll overheat and burn out quickly. If you apply a flame to an empty gas heater, it’ll also overheat and lead to tank crack. At all times, the shutoff switch should be visible from the location of the heater.
Discharge Tube & TPR Valve Errors
As we have seen before, while installing a water heater, you should ensure that the TPR valve is functioning and that the hot water it emits is routed via the discharge valve.
The TPR valve usually discharges water from time to time. Some of the discharge tube errors that plumbers make may include:
- A discharge tube is too short: The discharge tube should be within 6-inches of the drain pan or floor.
- Discharge tube being made from unapproved materials: The approved materials that you can use include stainless steel, polypropylene, CPVC, copper, and galvanized steel.
- A small tube diameter: The discharge tube can’t be smaller than your TPR valve.
- Discharge water being routed improperly: Water should be routed to a floor drain from the discharge tube. It shouldn’t be linked directly to the drainage system.
Poor Soldering Practices
You should understand how to solder water heater joints effectively. The soldering includes:
- Applying a pipe cutter & removing burrs from the cut areas
- Fluxing the joints
- Applying the heat evenly
You should hold the torch in the correct places. It will allow the solder to flow directly into the joint and create a water-tight connection. Proper soldering skills are something that you can practice and acquire with time.
How Much Space Do You Need Around A Water Heater?
Water heaters should be surrounded by an air space or a certain level of clearance to function safely or properly.
They must have a clearance area of 12-inches on all sides. Water heaters also require some airflow for proper ventilation and combustion. The building code requires proper airflow as per the manufacturer’s specification of the unit under installation.
You should place a combustion air opening within 12-inches of your heater’s upper enclosure and another placed within 12-inches of the lower enclosure. The air ducts needed for combustion should have a diameter of at least 3-inches.
What Do the Letters Mean On a Water Heater Mean?
You might be wondering what the letters on your water heater mean. On your water heater, you’ll notice a knob on the thermostat or gas valve.
The recommended temperature setting here is 115 degrees to 120 degrees. For most water heaters, you’ll notice an ABC knob. Below is what temperature the letters represent:
- Hot: 120 degrees
- A: 130 degrees
- B: 140 degrees
- C: 150 degrees
- Very Hot: 160 degrees
Setting your temperatures at 120 degrees keeps your water tank from overheating. It also limits the gas/energy used to heat water. If you have plans of leaving your house for an extended period, turn the dial to low. It helps in saving gas/energy when the heater isn’t in use.
Conclusion
If you want to install a water heater in your home, you should understand the installation codes fully. If you don’t follow installation codes, you risk your water heater exploding.
A violation of installation codes could also put you in great danger. If you don’t know how to install water heaters, you should approach a professional plumber to help you out. Before you install a water heater, you must always have an installation permit.


