There was a time when I wanted to change the color of our house’s walls but was hindered by not knowing what to do with the wallpaper glue all over it. If you have the same problem, look no further because I have gathered the information you need. If you’re thinking about painting over wallpaper glue, here are the important things you need to know.
Painting over wallpaper glue may cause blisters, cracking, and peeling. Thus, clean the wallpaper glue before painting. It’s impossible to remove all the glue from the wall, but you can clean most of it off. Prepare well, clean the wallpaper glue, apply a primer and then paint the wall.
Below are a few things to keep in mind as you ponder how to paint over wallpaper glue. Here are 10 Things To Know Before Painting Over Wallpaper Glue
Paint And Glue Don’t Mix Well (How Paint Reacts to Glue)
As you get ready to paint over wallpaper, be sure to take note of spots with glue. Wallpaper glue and paint don’t mix well and can leave you with an unsightly mess.
Many people opt to use water-based wallpaper glue. It’s among the best and lasts longer. Not to mention, it’s an eco-friendly option. However, when it’s time to change the color of your walls, you must know the glue you used.
The most common type of paint is also water-based. It’s a better option since it’s odorless and better for your walls. But, mixing the paint and wallpaper glue isn’t a good idea because the paint reactivates the glue.
Once the glue is active, the paint won’t hold on the wall as expected. Instead, you end up with patches of paint that won’t cure. These spots start chipping and cracking over time to the extent of falling off the wall.
So, it’s better to start by removing the wallpaper glue before you can paint the wall. Or make sure the wallpaper is intact during the preparation process. You must work on any places with exposed glue to prevent any problems later once you start painting.
Dress Appropriately – Break Out Your Old Clothes
Part of learning how to paint over wallpaper glue is dressing appropriately. This is an intense job that needs the right tools and clothing before you can begin.
Removing the wallpaper glue requires using elbow grease and hot water. These substances tend to spill. The same applies to primer application and painting the wall. So, take a moment to prepare yourself for the process.
First, get a headcover. You can wear a cap or a bandana to cover your hair. Second, get some eyewear. These substances are toxic, and it’s better to avoid getting them in your eyes. Therefore, grab some eye protection wear.
Third, choose comfortable and non-constrictive clothing. Make sure the clothes you wear don’t restrict your movement when working on the wallpaper glue. Also, make sure these are clothes you don’t mind getting stains on.
Lastly, wear appropriate shoes. Footwear is important when working on any wall in your home. It’s easy to step on different tools, which can turn out disastrous.
So, avoid working with open shoes or barefoot. Washing paint from parts of your body isn’t the best experience.
Prepare The Room: Prepping The Wall For Painting
While thinking about how to paint over wallpaper glue, remember the preparation process. Which room in your house do you want to paint? Are there any furniture and other items that can get in the way?
The first step before you can start working on the wall is removing as many items as possible. You can move them to the side if you want to work wall by wall. Or get all of them out of the room.
Another step when preparing the room is covering the floors. Residue from the wall, plus paint can stain your floor or carpet. Therefore, find a way to protect the entire space if possible. You can get nylon paper or something that won’t allow liquids to pass through.
Also, remember to cover any items you can’t move. Probably these are items or furniture fixed to the floor. Get huge coverings to keep the paint and liquids away. It saves you from more work of cleaning these items.
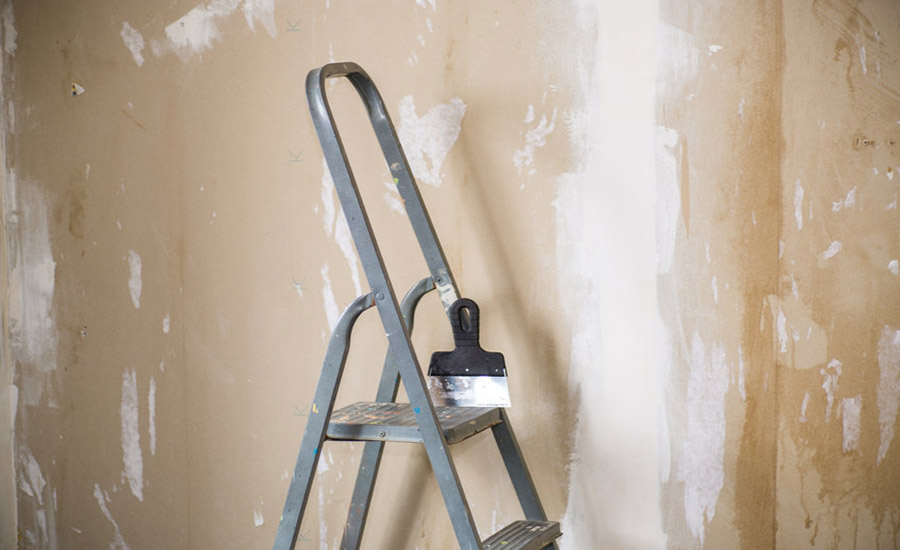
Scrub & Scrap As Much Glue Residue As Possible
Wallpaper glue can come off. Therefore, it’s better to take the time to remove it before you can start painting the wall. It would be best if you had a couple of things for this process. Start by getting elbow grease and a sprayer.
The sprayer is the best way to soak the entire area with elbow grease and remove the wallpaper glue. Check all spots on the wall with residue wallpaper glue and spray a generous amount of elbow grease.
Once all the glue is nice and wet, you can proceed to scrub it off the wall. Ensure you have a scrapper at hand that can help you remove all the bigger glue chunks on the wall. Such build-ups cause a mess when you paint over them, so do your best to scrape them off.
Then proceed to scrub all the remaining glue off the wall. Get a large sponge that can remove huge amounts of the wet glue as possible. Keep spraying the elbow grease on the wall to keep the glue moist.
Use Hot Water To Loosen Stubborn Glue
After scrubbing the entire wall using elbow grease and a sponge, it’s time to use some hot water. Fetch a pail or bucket of hot water and grab a clean sponge. You want to cover the whole area you had scrubbed again.
Soak the sponge in hot water but don’t wring it. Instead, wipe the whole area with hot water to eliminate the elbow grease and any remaining wallpaper glue.
It’s the final step of removing all the wallpaper glue before you can prepare the wall for painting. Remember to give the wall time to dry after wiping with hot water before applying primer. Spillage is inevitable no matter how careful you try to be as you master how to paint over wallpaper glue.
Expect To Make Some Minor Drywall Repairs
Before you can master how to paint over wallpaper glue, the next step is to make repairs. Check the entire wall after removing as much of the wallpaper glue as possible. Are there any cracks or holes that need mending?
Painting every wall must start with fixing it. Wallpaper is susceptible to wear and tear after some time. It’s better to seal these torn parts to prevent the tear from being present when you paint.
Begin by removing all extra wallpaper that’s hanging around the wallpaper. Then sand the area using smooth sandpaper. Once you finish that, apply some patching mold and even out the sites. Repeat the same for all spots with wear and tear before you can proceed with the primer.
The more you do this, the fewer dents you’ll see on the wall once you paint it. It’s better to start by mending the wall if you want a smooth and attractive finish at the end. A drywall compound can come in handy during this process.
You’ll Need to Prime the Wall Before Applying Paint
Every professional painter will insist on getting a good quality primer for your wall. It goes on first before applying paint. Primer is also known as the undercoat and is at the beginning of the entire painting process.
If you compare a wall with a primer and one without, you can notice a huge difference in appearance. A primer helps your paintwork appear more flawless and attractive. The finishing is great, plus the paint job lasts longer.
Additionally, applying the undercoat on a bare wall is an added protection to your surface. It helps you have a better wall, plus you don’t need to use too much paint to have a flawless finish. Some walls absorb too much paint, but you can avoid this by applying a primer.
Another reason you need a coat or two of primer on the wall is to cover any imperfections. After getting rid of all the wallpaper glue, you can notice patches on the wallpaper or the wall. The best way to cover them up is by applying several undercoats before you top up with the paint color of your choice.
Lastly, the primer helps neutralize the space. For instance, if you have wallpaper with multiple colors, it’s easier to paint over it. But, you have to balance the colors before applying paint. A good primer is an answer for this step.
Plan Out a Painting Strategy: 3 Tips For A Great Finish
The best way to paint over wallpaper glue and make sure the space looks great in painting from top to bottom. Start by gathering and mixing your paint after you finish applying the primer undercoat. By this time, you have an excellent neutral tone in the space.
Painting works best from top to bottom but keeps in mind what you want to do in the space. Do you intend to paint different colors and patterns in the room? To do this successfully, start by painting the light colors.
While splutter and spillage is inevitable, you can easily cover up the light color with a dark one as you finish painting. Also, plan if you want any patterns on the wall. Most people use masking tape for this, but it tends to leave adhesive on the wall.
Find a better pattern source to use, then proceed with painting the wall. You can use a roller or brush but take your time to get a great finish. Also, have the right amount of paint at hand to prevent running out when you’re halfway done.
The best strategy is painting one wall at a time. It’s better to take longer but do a great job. Additionally, you might need two or three coats of paint on the wall. Always wait for the wall to dry before applying another coat of paint to prevent smudging.
Check For & Correct 3 Problem Areas: Blisters, Cracking, & Peeling
Once you start applying paint, check if there are any problem areas. Perhaps you missed certain parts of the wall that have wallpaper glue. If you notice the paint reacting with such spots, stop and start the cleaning process.
It’s better to get rid of all the wallpaper glue than continue applying paint on the wall. Certain painting problems to watch out for include:
- Forming Blisters
Painting over wallpaper glue can cause blistering. Even after you remove the glue, it’s not uncommon to notice certain parts forming blisters. These are indicators that the surface is moist and needs more time to dry.
Therefore, the best way to prevent blistering is to give the wall ample time to dry, thus eliminating all the moisture. After applying the primer, give it enough time to dry before beginning the paint application. Follow the same process for each coat of paint.
- Cracking
Have you ever noticed cracks forming on the paint after some time? It happens when you want to apply another coat of paint. This is an indication that you don’t allow the coat to dry before applying another coat.
Again, take time with each coat from the primer process. It’s better to go slow than have to repeat the entire process. Also, it saves you lots of time, money, and paint when you do it right from the start.
- Peeling
At times, you can start noticing some paint peeling off the parts that had the wallpaper glue. This means the paint has lost its adhesion, and some glue is still on those spots. The glue removal process is crucial if you want to avoid peeling paint after completing the work.
Use Light To Spot Thin Areas of Paint
Avoid shutting the drapes and turning off the light as the paint dries. Lighting affects paint color and helps you see the outcome. If you start painting in a dark room, it’s hard to see how the paint looks on the wall.
You’ll inevitably have some areas of thin paint where the undercoats are bleeding through. Even with primer, primer is often applied thinly to act as a receiving coat. Light, especially natural daylight, can help spot these problem areas. You can also use a LED
You might notice you don’t like it when it’s too late. So, allow lots of natural light into the room and stand back to take in the view. If you want it, proceed. If you don’t, you can try a different shade or mixture.
Final Thoughts
It’s better not to paint over wallpaper glue. Instead, remove it, then apply a primer coat for a neutral color on the wall.
Make sure you patch all problem areas to get an even and smoother paint consistency.