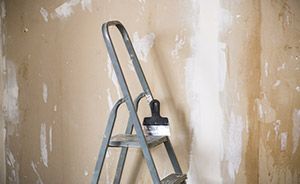
Can wallpaper be applied to bare drywall? Well, it can. But it is not advisable to do so on unfinished drywall because it is not the most conducive surface for wallpaper.
Drywall consists of gypsum, and it is an excellent material for creating interior walls of the house. However, it can absorb a lot of moisture when unfinished. Since installing wallpaper requires paste, it is a bad idea to install wallpaper on drywall. With time, it will bond with the wall and become part of it. And removing it will be a nightmare. When installing wallpaper on bare drywall, it’s best practice to apply a primer and paint first to seal the drywall.
This article discusses why it is not a good idea to install wallpaper onto unfinished drywall. It also discusses the circumstances under which you can successfully apply wallpaper on drywall.
5 Reasons Why You Should Not Apply Wallpaper To Unfinished Drywall
The gypsum in drywall has a tendency for over-bonding with wallpaper adhesive. As a result, the wallpaper has effectively become a part of the wall. When it comes time to take down the old wallpaper, you’ll have a lot of trouble.
Many reasons exist for why you should not apply wallpaper to drywall, especially if it is unfinished. Below are some of these reasons.
- Drywall Can Post A Threat To Your Health
While drywall is a popular method of creating interior walls, the material has its fair share of cons. These include the generation of silica dust, which irritates the lungs. Therefore, anyone who handles drywall must wear protective equipment, such as goggles, masks, and gloves.
When installing wallpaper to unfinished drywall, you will be exposing yourself to the unfinished surface to a higher degree, especially when you need to sand the surfaces. In addition, it breaks down more when in this condition.
If you don’t have the right gear or stay exposed to the drywall environment, your health will be at a greater risk. That is because of the dust and the harmful particles the drywall produces.
- Moisture Damages Unfinished Drywall Easily
Some types of drywall are resistant to mold and moisture. These usually have a foil-back. But generally, drywall is susceptible to moisture when unfinished. And that is a huge problem.
Before installing wallpaper, you must prepare the surface on which it is to be applied. And one way to do that is to clean it. And usually, this cleaning process involves the use of water and soap. Unfinished drywall is highly porous, which means it will absorb the water you use to clean. That, in turn, is likely to cause moisture damage and mold growth.
While the moisture damage may not be visible during the installation process, it will weaken the drywall and make your walls unstable with time. Also, the mold growth that occurs may end up causing respiratory illnesses in the future. By the time you realize what the problem is, you and your loved ones could be dealing with serious health issues.
- Unfinished Drywall Will Absorb Too Much Adhesive
Due to the high porosity of unfinished drywall, it tends to absorb many adhesives too fast. That has several implications. If you aren’t fast enough, there will be little glue left to help the wallpaper adhere to your walls, which means you may need more than you anticipated.
You will also have minimal time to fix any issues, such as air bubbles that form in some areas. So, your wallpaper will look imperfect due to the hurry.
Another implication of dealing with highly porous drywall is that over time, your wallpaper will adhere more strongly to the surface on which it is applied as the adhesive seeps into its pores. So, removing that wallpaper will be a massive challenge because some parts will become part of the drywall.
- Temporary Wallpaper Cannot Adhere To Unfinished Drywall
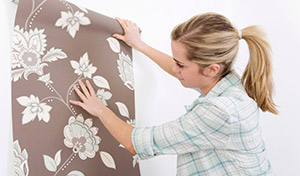
Using temporary wallpaper is the most convenient way of installing wallpaper. It is a giant sticker of sorts that you peel and stick onto the surface you want to be displayed.
However, some surfaces are not compatible with the peel-and-stick kind of wallpaper. It best adheres to surfaces with a glossy or semi-gloss finish. Additionally, it is compatible with surfaces with a satin or eggshell finish. Since unfinished drywall is not one of those kinds of surfaces, your temporary wallpaper will not stick to it.
- You Need A Higher Level Of Skill To Apply And Remove Wallpaper From Unfinished Drywall
Wallpapering tends to require a high level of skill compared to activities like painting. And that’s when the drywall is finished. If you know what you are doing, though, and have the experience, you could install the wallpaper.
However, it requires an even higher level of skill to install wallpaper on unfinished drywall due to the porous nature of the surface. The work has to be done fast and right the first time around.
For that reason, unless you are a wallpaper expert, you would not be in a position to do this work on your own. In addition, you will probably do imperfect work that leads to even more moisture damage. So, that means you will need to pay much more for wallpapering services due to the difficulty involved in installing them.
How To Install Wallpaper On Drywall Successfully
First, choose a drywall-safe wallpaper primer — commonly acrylic, although there are other possibilities. Apply the primer to the entire wall in the same way that you would paint it. Allow for thorough drying before applying wallpaper to your drywall. Make sure the primer you choose is both a primer and a sealant.
The goal is to separate the bare drywall surface from the adhesive surface. Once you deal with these issues, you are likely to install wallpaper on drywall successfully. The biggest challenges of wallpapering on unfinished drywall are porosity and imperfections on the surface on which installation will take place.
Here is how to do that.
Step 1: Repair Drywall (Spackling)
When you have old drywall, it may have many kinds of imperfections accumulated over the years. These include nail holes, cracks, and stress lines.
The first step is to repair the old drywall using mesh drywall tape and to apply drywall joint compound or spackling paste over those imperfections. Then smoothen the surface and scrape any excess. After that, wait for the paste to dry and apply a second coat.
The spackling paste is also helpful for sealing the seams where the drywall pieces meet. So, consider using it on new drywall if you are installing it yourself. Professionals usually do so.
Step 2: Sand The Drywall Surface
Sanding is the second step in repairing a drywall surface. It takes place when old drywall has been mudded.
You need to sand your drywall joints and other repaired surfaces so that the surface on which you will eventually apply wallpaper is even and smooth. That ensures no air bubbles and bumps.
If you opt for dry sanding, prepare for the vast amounts of dust that you will generate. So, take all the necessary precautions. Bear in mind, though, that this method of sanding will create the most even finish.
If you don’t want to deal with the dust, you can opt for wet sanding. You will need a damp stiff sponge for this process. However, this method of smoothing the drywall may leave mild waves on the surface. And if you do it quickly and poorly, it will remove some of the drywall joint compounds.
Step 3: Prime Your Drywall
Once your drywall has been spackled and sanded, it should undergo priming.
Priming is the process of applying a primer, which is a coating that prepares the drywall for painting and wallpapering. It is necessary because wallpapering requires adhesives, which unfinished drywall will absorb at a much higher rate than needed.
Most primers contain polyvinyl acetate (PVA) as the main ingredient. Some are water-based, while others are oil-based. Whatever you choose, go for a primer-sealer, which performs dual functions of priming and sealing.
Primer-sealers will seal the drywall pores, thus making it more resistant to moisture. So, the drywall won’t absorb more adhesives or paints than they need.
Also, primers even out the surface of the drywall. By doing so, they make it ready for application of a different layer of finish. High-end primer-sealers are so effective that they can help even out very uneven drywall finishes. But they will cost more.
Another significant benefit of priming is that it hides the base colors of the drywall and the mud used to repair it. Some drywall primers are thicker. They are known as hiding paints. That’s because they do a better job at hiding the base colors of the drywall so that the wallpaper or paint colors shine through.
Sometimes, it may not be necessary to use primers. For example, that usually happens when you intend to use self-priming paints. However, if your drywall is new, has water damage, or stains, you cannot afford to skip priming.
In such cases, priming is necessary to ensure your adhesives don’t get absorbed too quickly, thus leaving the wallpaper with nothing to help it adhere to the walls. It also helps to ensure the stains don’t show if you are using sheer or light-colored wallpaper.
It’s also worth noting that even though primers tend to come mainly in white, many primers can be tinted to resemble the color of the wallpaper you intend to install. That enables you to ensure that you use less paint when painting darker colors.
You need at least one coat of primer-sealer. But for new drywall, which is very porous, you may have to apply as many as three coats before wallpapering.
If you have drywall with primary paint, oil-based primers are the best option. However, if you have existing wall coverings on your drywall, especially those made of vinyl, choose acrylic primers. These primers also have colored options to help ensure the existing wall coverings don’t bleed through when you apply the new wallpaper.
Oil-based primers don’t work well with existing wall coverings. That is because they can dissolve the older pigments and cause them to seep through the wallpaper you install.
When you apply a primer-sealer, ensure it dries completely before working on the drywall again. It will take a day or so for this to happen.
Step 4: Paint The Surface
Once your drywall has been primed, you can paint it before wallpapering. If you intend to use traditional wallpaper in your entire home, this step may not be necessary. However, if you want to use the peel-and-stick kind of wallpaper, painting is essential.
If you did not prime your drywall, you must ensure you use self-priming paint at this stage. However, if you apply a primer to your drywall, you can apply two coats of paint before wallpapering.
The rule of thumb is that you should wait for at least a month after painting before you install new wallpaper. That’s because some paints take that long to set completely.
If you intend to use temporary wallpaper, your surface should have a semi-gloss, satin, or eggshell finish. These kinds of finishes allow the wallpaper to adhere well to the wall surface. However, other types of finishes may cause the wallpaper adhesive to bond with the paint to such an extent that when you peel it off, the paint will come off too.
Step 5: Apply Lining Paper
The application of lining paper is not always necessary when wallpapering. But in some circumstances, it may be a good idea to use it.
It helps absorb the excess moisture. Additionally, it helps manage the expansion and contraction process as the traditional wallpaper dries out, thus ensuring it adheres properly to the drywall.
It would help if you considered using lining paper on drywall when:
- You intend to use thin or foil wallpaper.
- The drywall surface is heavily textured.
- Your environment has plenty of humidity that exposes your wallpaper to a lot of moisture which will cause shrinkage later on.
- The drywall surface has lots of stains.
- The drywall surface has many imperfections that are difficult to fix.
- The wallpaper manufacturer recommends that you use a lining first.
When using lining paper, ensure it sticks well so that the wallpaper doesn’t lift it off the surface of the drywall during the installation process. Also, use a high-quality paste to enhance its ability to adhere to the drywall.
Step 6: Install The Wallpaper
You can install wallpaper either after priming or painting your drywall. At either of these stages, the drywall is considered finished enough for that activity. It depends on what you prefer.
The installation of wallpaper can take many days or even weeks if you opt to do it yourself. You would also need to buy equipment and the right gear to do the installation process. Additionally, ensure that you buy more wallpaper than you need to accommodate the trimming and possible mistakes that may occur.
If you want to do your own wallpapering and have no experience, you can opt for the temporary wallpaper. Then, all you need to do is remove the backing and stick the wallpaper wherever you need it.
However, if you want to install the traditional wallpaper, you may want to hire a professional for this part after choosing the designs you prefer. In such a case, you won’t need to buy any equipment or gear. Instead, the professionals will give you a quote that covers all these things.
Usually, the cost will vary depending on many factors, including your location. Typically, it varies from $1 to $7 per square foot.
Final Thoughts
Unfinished drywall is not a good surface for wallpapering. It is too porous and has many imperfections, which prevents wallpaper from adhering well to its surface. For that reason, you would do well to prepare your drywall surface and make it ready for wallpapering first.
You can do some of the work yourself and hire a professional to complete those steps you have no experience doing. Then, once the surface of the drywall is considered finished, you can install the wallpaper you want and enjoy its beauty for many years to come.