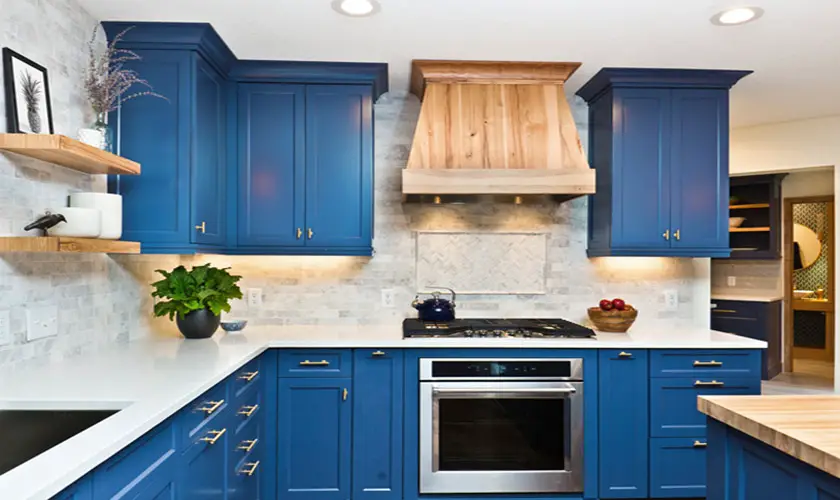
Painting anything in your home can be tricky if you’re inexperienced at the job, but painting wood cabinets white poses a unique set of problems. Cabinets are often prominently displayed in a home, so it’s imperative to make sure they look professionally painted and near perfect.
- Remove all cabinet doors and drawers and clean them thoroughly
- Sand the cabinet doors to remove any imperfections and visible wood grain
- Apply a primer coat before adding your finish coat
- Apply the white paint of your choice to your cabinets
- Lightly sand any brush strokes or bumps between coats as needed with a fine grit sandpaper
While you can undoubtedly dive right into the project and begin painting wood cabinets white, there are quite a few things to consider and plan if you want to do things correctly. White paint does not provide vibrant color to distract the eye from any imperfections in your paint job. However, you can achieve a beautiful cabinet paint job by following simple steps, planning, and applying a few tips.
A Step-By-Step Guide to Painting Wood Cabinets White
There are many great methods for painting wood cabinets white, all with slight variations between steps. But in most situations, the overall job is essentially the same. Below we’ll outline a simple method to get a beautiful white finish on your cabinets that will last a long time.
1. Disassemble
Before painting wood cabinets white in your home, the first thing to do is to remove all doors and drawers. Make sure you take pictures of the space before removing anything to have a reference when reassembling your cabinets.
Cabinet fronts often fit perfectly into the cabinet, so it’s important to label everything so you can put it back in its correct spot. Otherwise, you might end up with cabinets that don’t quite fit back together correctly, which can ruin the look of your kitchen and cause many headaches. Remove and label all cabinet hardware as well.
During the disassembly phase, it’s essential to be highly organized and have enough space to lay out all the removed doors and drawers. Take more pictures than you think you might need and label everything possible. It can save a lot of time and confusion later, trust me.
2. Thoroughly Clean
The next step is to thoroughly clean every possible cabinet surface, whether you removed it or not, during the first step. Even if your cabinets look clean, removing all grime, dust, and oil splatter that can be nearly invisible to the naked eye is essential.
You can use various cleaning products to ensure your cabinets are clean, but soap and water can do the job perfectly. You can also scrub your cabinets with mineral spirits to get any tricky dirt spots. Scrub everything down and then wipe it off with a dry rag to eliminate any soap or liquid residue.
Scrape off any remaining gunk or pads on the back of cabinet doors that help them close softly. Once you’ve finished cleaning your cabinets, every surface should be immaculate and ready to prepare for painting wood cabinets white.
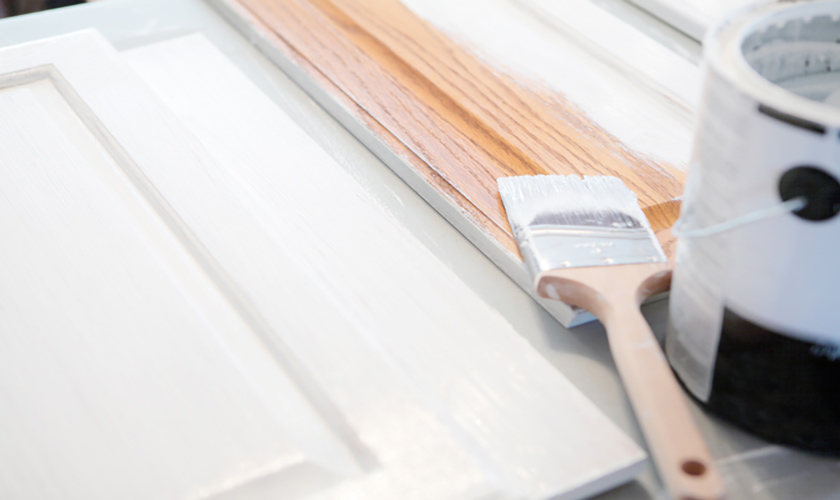
3. Sand, if Necessary
Once your cabinets are immaculate, you’ll want to sand them to create a smooth adhesion surface for the paint. Many people skip this crucial process step, but sanding is imperative to create a surface to which the paint can adhere without peeling or flaking off.
It’s essential to sand to prepare the surface, but not enough to overdo it. Wood cabinets come in many different types and have varying wood grain levels. With that in mind, how much you should sand cabinets depends on wood grain visibility, the finished look you’re going for, how many coats of paint are on the cabinets, and many other factors.
To help remove deep, visible wood grain on cabinets, you can cover the surface with a light layer of wood spackle. Fill in any scratches or dents with wood spackle or caulk. The spackle gets into the tiny ridges and divots in the wood to create a much smoother surface once you sand over the area.

4. Apply Primer
Now that your cabinets are disassembled, cleaned, and sanded, it’s time to apply a primer to the surfaces you intend to paint. Many great primers are available for cabinets, but acrylic-based primers are great because they have low VOC levels and provide a smooth, rich finish.
In most situations, you should use primer on your cabinets as it serves various valuable purposes. Primer helps to block stains, hides surface imperfections, and creates better paint adhesion. Many natural kinds of wood, especially darker woods, have tannins that can seep toward the material’s surface and create unsightly dark spots. A layer of primer can help to prevent these dark spots from forming.
When priming cabinet fronts and drawers, it’s best to start on the backside. Once the backsides are primed and dried, flip them over to carefully prime the fronts. After everything is primed, dried, and cured, you should lightly sand every surface again. Sanding your primed cabinets will eliminate any brush strokes or imperfections the paint layer will make even more visible.
5. Apply Paint
At this point, you should have entirely clean, smooth, and primed cabinets waiting for paint. Before applying the first paint coat, use a vacuum with a bristle attachment to clean your cabinets and remove any last dirt or wood dust from sanding.
While you can use a paint sprayer on cabinets to get a professional finish, you can achieve a similarly beautiful result using brushes and rollers. Use a microfiber roller to carefully apply paint to the cabinet’s large surface areas and a brush for fine-edge work.
For most cabinets, it’s best to do at least two paint coats. Remember to paint the backs of the drawers and doors first and then move onto the front and sides to avoid ugly drips along the edges. Apply the first coat of paint, ensure it dries, wipe down the surface again, then apply the second paint layer.
No matter how many coats you decide on, you can sand the surface using super fine sandpaper before applying the last paint layer to achieve an extra smooth finish. It’ll add more time to the project, but the smooth result is well worth it. In most cases, quality cabinet paint dries hard with a durable finish. However, some may require a protective coating, so look into your product.
6. Reassemble
The exact times vary depending on the paint used, but most cabinet paints dry reasonably quickly, within 4 to 8 hours. Once everything is dry, you can start to reassemble everything and reattach the cabinet hardware.
If you did the first step of this project correctly and disassembled everything carefully, reassembling your cabinets should be a complete breeze. Simply reattach everything where you labeled it, using before photos as a reference when needed. However, if you rushed and skipped that first step, you’ll likely have difficulty getting things in their correct places and working correctly.
Once you’ve finished reassembling your cabinets, it’s essential to use them carefully until the paint has fully cured. Depending on the paint you used, the curing process could take up to 60 days.
Best Tips and Tricks for Painting Wood Cabinets White
Painting wood cabinets white is relatively straightforward as long as you follow the necessary prep work steps to ensure an excellent finished result. But like most things, many pitfalls and tiny nuances can easily trip you up.
Below are a few crucial tips and tricks you can use when painting cabinets in your home white to make the process easier and quicker.
- Photograph and Label Everything – One of the easiest things to skip but crucial to your success is labeling and photographing your cabinets before you disassemble them to paint. Most cabinet fronts fit precisely to a single cabinet box, so it’s essential to match them again to ensure a seamless fit.
- Remove Cabinet Hardware – Some homeowners try to leave their cabinet hardware on when painting wood cabinets white to save time and effort. To properly clean, sand, prep, and paint your cabinets, you must remove all hardware. Remember to label any removed hardware to know where to reattach it once you’ve finished painting.
- Take Your Time Doing Prep Work – Prep work is essential to paint your cabinets successfully. White paint accentuates painting and surface imperfections, so prep work is vital to help remedy these before painting. Proper preparation helps paint adhesion and can make your cabinet’s paint last much longer without flaking or peeling.
- Use Spackle to Remove Wood Grain – Deep, visible wood grain absorbs more paint than other areas of your cabinets and can create unsightly dark spots. You can apply a light layer of wood spackle to the fronts of your cabinets before sanding to help fill in areas with visible wood grain. The spackle fills in the tiny cracks and divots in the wood, creating a more cohesive and smooth finish.
- Clean More Often Than You Think – Cleaning all oil splatter, dirt, dust, and grime from your cabinets before painting wood cabinets white is essential to creating a beautiful finished product. In addition to a deep clean at the beginning of the project, it’s always good to wipe down your cabinet surface every time you sand, paint, or apply primer.
- Always Sand Your Cabinets – To save time, many homeowners skip sanding their cabinets when deciding to paint. While you can skip this step in a select few situations, sanding the fronts of your cabinets ensures the surface isn’t too slick or uneven for the paint to adhere. Sanding before painting makes your cabinets look better and can make your paint last much longer without peeling or flaking.
- Generously Apply Primer – There are selection situations where a primer coat is unnecessary when painting wood cabinets white, but it’s an essential step most of the time. Primer creates a cohesive surface for paint application, improves adhesion, helps prevent wood tannin dark spots, and can help fight against unwanted stains.
- Choose the Best Paint Base Type – Oil-based and water-based are the primary paint base categories you’ll commonly see. While oil-based paints produce a very rich and desirable finish, their high Volatile Organic Compound (VOC) emissions make them unideal for painting indoor cabinets in most situations. It’s typically best to use low-VOC water-based paint, such as acrylic or latex.
- Select an Appropriate Paint Finish – The five primary paint finishes include matte, eggshell, satin, semi-gloss, and high-gloss. You’ll typically want a higher gloss paint finish for cabinets, allowing easier cleaning and better resistance to moisture, oil splatter, and temperature changes. Satin and semi-gloss paints are popular for use on cabinets.
- Avoid Using Foam Rollers – Foam rollers are extremely popular for household painting, but they are often not the best option for cabinets as they tend to spread paint quite unevenly. When painting wood cabinets white, smoothness and even application is incredibly important, so microfiber rollers are better suited for the job.
- Apply Thin Coats of Paint – When painting white wood cabinets, it’s much better to do multiple thin layers instead of fewer thick paint coats. Thin coats of paint allow you to better control the surface finish and sand over any imperfections between layers. There’s less drip, it’s more manageable, and overall you’ll be much happier with the final result.
- Do Not Clean Newly Painted Cabinets – Most paint dries relatively quickly but takes longer to cure. Depending on the type of paint you use, it could take anywhere from two weeks to two months to cure, and it’s essential to avoid cleaning your newly painted cabinets until that time is up. Cleaning your cabinets they have cured could result in streaks, peeling, or flaking that could ruin your beautiful paint job.
- Add Cabinet Felt Pads – Adding felt pads, sometimes called feet, to the inside of your cabinet doors can help prolong the lifespan of your paint job and make using your cabinets much more enjoyable. The felt stops the doors from scratching the paint when closing and creates a much quieter shut. It’s important to use felt instead of rubber pads as the rubber can easily peel your fresh paint.

Painting Wood Cabinets White FAQs
When researching painting wood cabinets white, you may have other questions. We asked some local painting contractors about questions they hear when customers are painting wood cabinets white.
Can you just paint over the wood cabinets?
Yes, you can paint over wood cabinets. However, it is important to prepare the surface properly before painting wood cabinets white. Cabinets that are not properly prepared may not hold up as well to wear and tear and may require more frequent repainting.
What kind of paint do you use on wood cabinets?
You can use either oil-based or latex paint on wood cabinets. When choosing a paint, consider the type of finish you want. For example, a high-gloss finish will be more durable and easier to clean than a matte finish. Due to VOCs, some states no longer allow the sale of oil-based paints.
Is painting kitchen cabinets white a good idea?
Painting wood cabinets white can brighten up a space and make it feel fresher and newer. However, white cabinets may require more frequent cleaning to keep them looking their best. To make cleaning easier, we suggest a semi-gloss paint finish.
Do you have to sand the cabinets before painting them white?
You should sand your cabinets before painting them white. Sanding helps to remove finishes allowing the adhesion of the paint and creating a more smooth finish. If you don’t sand your cabinets first, the paint may not adhere well and may chip or peel easily.
Do I need to prime the cabinets before painting?
It is generally advisable to prime cabinets before painting them. This will help improve the paint’s adhesion and create a more even finish. You can use paint and primer in one, but you’ll still need to apply multiple coats for an even finish.
Does painting wood cabinets decrease value?
Generally speaking, painting wood cabinets white will not decrease the value of your home. Painting white wood cabinets may not appeal to some buyers, as they may prefer the natural look of wood. However, painting wood cabinets white is a good way to update the look of your kitchen without spending a lot of money on new cabinetry.
Should I roll or brush my wood cabinets?
A brush or a small foam roller can be used when painting wood cabinets white. However, it is generally best to use a brush for a more smooth and even finish. Using a foam roller is often reserved for a finish coat to minimize brush strokes.
Can wood cabinets be painted professionally?
Yes, wood cabinets can be painted professionally. This is generally a good idea to achieve a high-quality finish. Professional painters will have the necessary equipment and expertise to properly prepare and paint your cabinets.
Should I DIY kitchen cabinet painting?
DIY wood cabinet painting can be a great way to save money. However, ensuring you have the time and patience to do the job properly is important. If you are not confident in your ability to paint cabinets, it may be best to hire a professional.