Dimmers can adjust the brightness of your lights for various effects. Control them with remotes, switches, or smartphone apps. Replace a light switch with a dimmer switch and enjoy well-lit nights!
Replacing your standard switch with a dimmer switch can be tricky for some people. You can install a dimmer by replacing a regular light switch. You don’t need any special tools or training. Anyone who knows a little about electricity can change a light switch to a dimmer.
This article is your best how-to guide for replacing your ordinary switch with a dimmer switch!
Moreover, we will also be listing down some of the most prevalent dimmer switches so our readers can choose from the best!

Can I replace a regular switch with a dimmer switch?
Yes, specifically, a single-pole switch can be replaced with a single-pole dimmer switch, which is designed for lights controlled by one switch. If you’re upgrading to three-way dimmers, you’ll need to follow a different process for lights controlled by multiple switches.
A dimmer switch can be an excellent replacement for a regular light switch. They help conserve energy and make your home look cozy, which is why many people want to use it.
There is no doubt that lighting has a big impact on our home’s ambiance and feel. Besides making a home look more comfortable and pleasant, efficient lighting conserves energy. And as a result, this helps save more money, too.
However, electricity can be an expensive necessity if it is not installed and used correctly.
What dimmer lighting does is reduce the light bulbs’ brightness and allow the lights to function in a milder, less bright fashion. But, for many people around the world, hiring an electrician can be difficult or expensive. Even though hiring an electrician is affordable, some people still choose to replace light fixture switches independently.
If you are someone who’s looking to do this, you’re in luck! Fortunately, this is a relatively simple process.
10 Steps in Installing a Dimmer Light Switch
Before starting the process, please prepare the following tools:
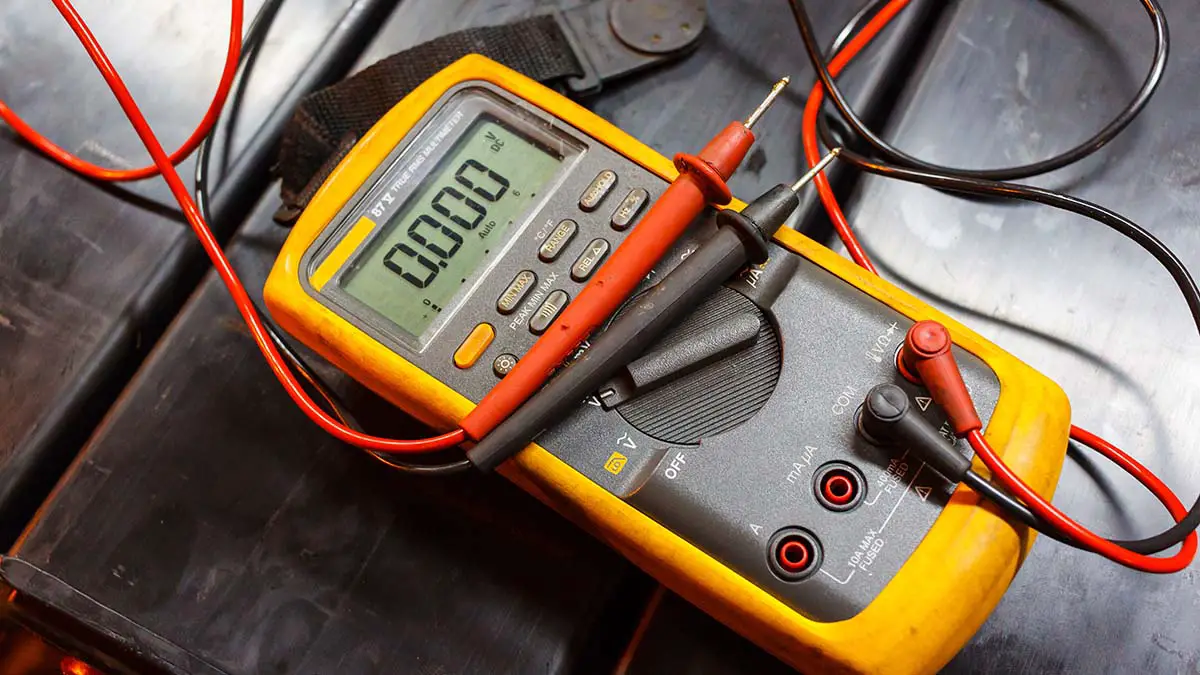
- A voltage tester
- A wire stripper
- Tape measure
- 4-in-1 screwdriver
- Needle-nose pliers
After preparing the necessary things, follow these steps to replace your light switches successfully. You’ll need a Phillips head screwdriver for most dimmer switches, as many use Phillips head screws for securing the wire connections. You should see an in-depth guide on how each step is done as you read on.
- Turn Off the Power
- Check for Hot Wires
- Remove the screws of the switch
- Check Box Volume
- Pay Attention to the Gauge of Wire
- Test the Ground
- Turn the Power Off
- Add your new dimmer
- Connecting the Wires
- Put the Cover Plate back on
It is essential to understand this guide and follow it closely. When working with electrical components, your top priority should be your safety. If you ever feel unsure or doubt your ability to convert your lights, stop and call a licensed electrician. They can help you replace them.
Step 1: Turn Off the Power
Before you begin, locate your circuit breakers to ensure you can safely cut the power to the switch you’re working on. This is critical in any electrical project to prevent dangerous overheating or electrical shock. When dealing with wires and electricity, the first step should always be to ensure your safety. It might seem obvious, but it can be hazardous if one forgets this crucial step.
Thus, it is necessary to make sure the power is off. I recommend that you double-check by turning the light on at the switch, so there is no room left for any accident.
Step 2: Check for Hot Wires
The second step would be checking for hot wires. For this, remove the plate of the current switch by unscrewing it. Now, with the help of a non-contact voltage tester, check for hot wires.
This type of voyage tester will help ensure that there are no wires carrying voltage. This is also one way to determine whether the power is off. By holding the tip of the voltage tester around each screw terminal, check for hot wires.
Step 3: Remove the screws of the switch
Do so by loosening the screws on the plate and then remove them from the switch box. To keep a record, I recommend taking a picture of the wiring with your cell phone.
You will find a red/brown wire for life in the box and a black wires/blue wire one for neutral. There will be other colored wires, either green or yellow, including the earth wire. If the wires attached to your switch are white wires or aluminum, always have an electrician inspect it.
Step 4: Check Box Volume
For this step, please refer to the National Electrical Code Article 314 to help you understand the volume you need inside your steel box. Having too many wires inside a box can lead to hazards such as short-circuiting, fires, and overheating. Hence, it is essential to adhere to the boxes’ size to ensure you and other people stay safe.
Step 5: Pay Attention to the Gauge of Wire
Choose the gauge of your wiring. Usually, 20-amp circuits are wired with 12-gauge wires, and 15-amp circuits are wired with 14-gauge wires.
Step 6: Test the Ground
Ensure the green wire, which is the ground wire, is securely connected to the green grounding screw on the dimmer. The black dimmer wire should be connected to the black line wire from your home wiring for proper function.
There’s either a green ground screw or a green grounding wire for modern dimmers. Either one of these needs to be connected to a grounding source (if there is a grounding source present).
If your wiring has a plastic casing, you will have copper ground wires requiring getting hooked up with the dimmer switch. In some cases, metal conduits are present for this purpose.
Check for grounding with a neon voltage tester. If the ground is present, pop a short ground wire into the metal box or use a grounding clip. Now, connect this to the dimmer.
Ensure that there is no ground present in cases, use a plastic cover plate, and make sure there are no metal parts exposed. Now, test again and turn the power back on. Your box is grounded if the tester lights up by popping your voltage tester leads between the screw terminals and the box.
Step 7: Turn the Power Off
After you’re done checking for grounding, TURN THE POWER OFF.
Step 8: Add your new dimmer
For this step, with the help of a screwdriver, you will have to press 6 inches of copper wire along with a grounding clip onto the box.
To give the clip a little clearance, you will have to cut away some drywall. Bend the wire back onto the clip by using a needle-nose plier. To make sure there is no interference with the dimmer switch, pinch it down tightly.
With the help of your wire cutters, cut the ends off. Strip around 3/8-inch of insulation off the ends so you can proceed to connect the wires, ensuring to secure them with electrical tape.
Step 9: Connecting the Wires
Connecting the right dimmer is one of the most crucial steps of the entire process. If your dimmer has stranded wires, hold the wire tightener so the stranded wire stands up 1/8-inch from the solid wire.
Match the sizes and number of wires to the connectors. By twisting the connector clockwise, fit the wires. If your dimmer has screw terminals, use needle-nose pliers to strip off 3/4-inch of insulation from each wire.
After popping this loop around the terminals, close it using your pliers. Once you’re done, tighten up the screws.
Step 10: Put the Cover Plate back on.
The last step would be to fold up the wires and put them back in the box. After doing so, screw the dimmer onto the box and install the cover plate. Turn the power back on and test your installed dimmer!
Now, you will be able to adjust the brightness of the lights in your home and reduce the amount of electricity you use. As a result, this will reduce your electric bill in the long run.
What is the best dimmer switch to buy?
Now that you know how to replace your light switch with a dimmer switch, you wonder which type of dimmer you should buy.
Choosing and buying a dimmer switch can be tricky because many dimmers are available on the market. Several companies offer dimmer switches in different price ranges and qualities.
As with any electric component, it is crucial to buy a good quality dimmer to avoid risky situations in the future.
Here are 5 top-rated dimmers which will be an excellent option for you to add to your house!
1. Insteon Remote Control Dimmer Switch
This one is one of our favorites because it is a modern-day, unique dimmer switch. With this Insteon dimmer switch, you can control your home’s lights from your phone. It’s simple to dim them whenever you want.
You can use the Switch app on your smartphone or smart devices like Amazon Alexa or Google Home. The app lets you control the dimmer through the Insteon Hub. You can control many lights together and adjust their brightness or turn them off, even from another floor.
One great thing about this dimmer switch is that it doesn’t need a C-wire. Many older houses don’t have one. Installing this dimmer switch is easy since you will not have to do any rewiring to replace your regular light switches. This dimmer gives you great value for money and allows you to customize your home lighting to your desire.
2. Wemo Wi-Fi Smart Dimmer Switch
Wi-Fi dimmer switches have grown in popularity over the recent years, and rightfully so; these switches make it super easy to control the lighting in our homes without much trouble. This dimmer is considered one of the most versatile switches available.
With the ability to access it using the Wemo app, it makes for an excellent option for anyone looking for a smart dimmer switch, especially for controlling multiple switch locations.
The switch can also be accessed using Amazon Alexa or Google Home if you want to use voice commands to control the lights in your home. This dimmer’s capacity is 150W for dimmable LEDs or CFL, while it has a wattage capacity 400W for dimmable incandescent light bulbs.
A unique feature offered by this dimmer switch is the ‘away mode scheduling.’ This mode makes it seem like your house is occupied even when you are away to increase your home’s security.
This feature can be useful if you are a frequent traveler and want to ensure that your home will remain safe from theft. If you want a smart dimmer switch to replace regular light switches, this is a great option.
3. Lutron Maestro Dual Dimmer and Switch
If you are looking for a dual-purpose dimmer and switch, this one is the right pick for you. This classic dual dimmer switch can give you all the benefits of a dimmer while also serving as a regular on/off switch for your lights.
It also has LEDs, which can help when looking for light switches in the dark. Alongside this, the LEDs can provide physical cues of your light’s set brightness levels with just one glance.
If you do not have a neutral wire running through your circuits, this is the right dimmer for you. Since it does not require a neutral wire, installing this switch is much easier, and you get the benefit of a combined light switch and a dimmer.
4. GE Slide Dimmer Rocker Wall Switch
The GE slide dimmer is a classic and affordable yet effective dimmer switch.
The quality of this dimmer switch at the price point that it is offered is unbeatable. It is a standard rocker switch with a sliding dimmer that makes it extremely easy to use and gives you an easy, foolproof way to dim your lights without much trouble.
It can control dimmable LED bulbs up to 150W, and dimmable incandescent bulbs up to 600W.
5. Kasa Smart HS220 Dimmer Switch
TP-Link offers the Kasa Smart dimmer switch, a great, affordable one. The best feature of this dimmer is that you can easily control your home’s lighting using Amazon Alexa, Google Assistant, or even Microsoft Cortana devices. You can control your home’s lighting brightness level using the smart gadgets you already own.
This dimmer switch has the unique feature of turning off the lights with a slow fade when the switch is double-clicked, which can be quite handy as it makes it easier for your eyes to transition to the lights turning off. It’s a unique feature that impresses many, and the price point this dimmer offers makes it a great option to be added to your home.
How To Replace a Light Switch With a Dimmer Switch? Now You Know
Dimmer switches help control the lighting within our homes, giving the desired ambiance for when you want to relax, have a party, or need to study or work.
The energy-conserving and waste-reducing nature of dimmer switches allows you to utilize electricity in a much more sustainable way and reduce your electrical bill in the long run.
Replacing regular light switches with modern-day dimmer switches can be tricky, but it can be easily done with proper instructions and the right wire nuts.
Pick a dimmer switch that suits your needs, follow the instructions provided in this article to add dimmer switches to your home, and gain all the benefits that come alongside good quality dimmers without much hassle.
Replace a Light Switch with a Dimmer Switch FAQs
Can a regular light switch be replaced with a dimmer switch?
You can replace a regular light switch with a dimmer switch if the lights can dim. To make sure the light bulbs work with dimmers, check their compatibility. Not all LED and CFL bulbs are suitable for all dimmer switches. Ensure the dimmer switch works with your home’s wiring and lighting circuit.
Can you have a dimmer switch and a regular switch on the same circuit?
When dealing with a 3-way switch configuration, it’s important to understand the wiring in your wall box to ensure the correct connections for both the dimmer and the regular switch. Yes, you can have both a dimmer switch and a regular switch on the same circuit for different lights. For the same light, use a three-way switch dimmer and a compatible regular switch.
How much does it cost to replace a switch with a dimmer switch?
The cost of replacing a switch with a dimmer varies based on factors like dimmer type, labor, additional materials, and local rates. Dimmers range from $10 to $50+. Hiring an electrician can add $40 to $100 per hour, costing around $60 to $150 or more.
How do you wire a dimmer light switch?
Wiring a dimmer switch requires caution and an understanding of electrical work. Turn off power, identify wires (hot, neutral, ground), and connect dimmer wires accordingly. Secure the dimmer, test the switch, and ensure compatibility with bulbs. If unsure, consult a professional to avoid risks.
Final Thoughts
You can replace a regular light switch with a dimmer switch. This change is not only possible but also has benefits. It can create a cozy atmosphere, save energy, and save money. This article gives you detailed steps to install the cover switch plate.
If you like doing things independently or are considering hiring someone, you should understand the process. This will help ensure the upgrade to your home’s lighting system goes well. Safety is most important. When unsure, consult a licensed electrician for the best action.


