Building a smart home requires a lot of effort and, most importantly, money. But with some effort and creative ideas, you can build a smart home for cheap. This article will share some DIY tips that you can use to save some money while building your own smart house.
To convert your home into a smart home, you have to set up a DIY smart home hub. Then convert your old speakers into a smart speaker and make a smart security camera using old webcams. Also, make notification lights using cheap LEDs. In all these cases, you will need Raspberry Pi. You can also make your house fully automated with the help of IFTTT.
But just knowing how to turn an old home into a smart home using some DIY tricks is not enough. You will also need to learn how you can prevent network breaches in your smart home’s network. I’ve also shared some tips on how you can improve the security of your smart home networks. So, without further ado, let’s begin!
7 DIY Tips to Convert Your Home into a Smart Home
Smart Home sounds great and all, but building a smart house from scratch is an expensive task. However, with the help of some cheap components and a creative mind, you can do just that on a meager budget. I’ve listed some DIY tips down below that you can use to save some bucks while building your own smart house.
1. Make a DIY Smart Speaker
One of the critical features of a smart home is controlling all the processes through voice command. You can do that via virtual assistants like “Google Assistant” or “Amazon Alexa.” For example, you can use voice commands like “Alexa, turn on/off the kitchen lights,” “Ok Google, play some music,” or similar commands to perform various functions in your smart home.
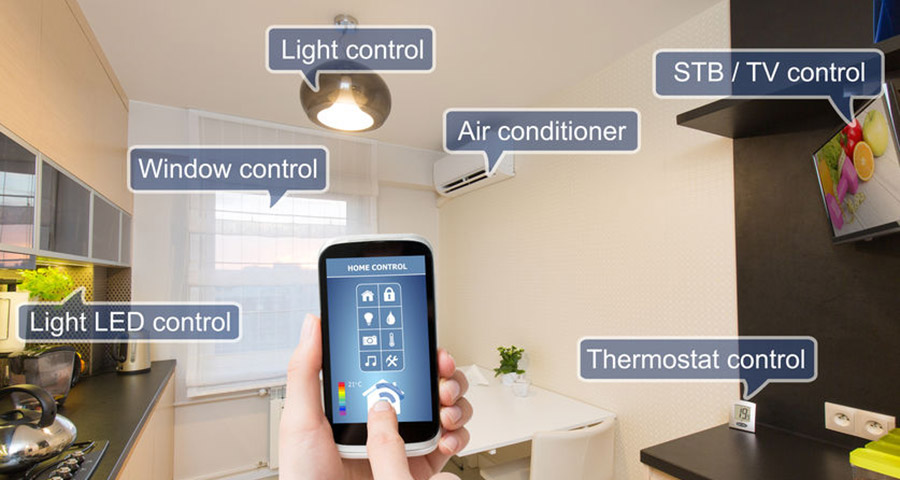
Through smart speakers, you can control lights, air-conditioners, thermostats, TVs, and a wide variety of functions. These speakers make it easier to control the devices in your smart home.
All smart speakers are equipped with virtual assistants like Amazon’s “Alexa” or Google’s “Google Assistant.” Right now, the most popular smart speakers in the market are Amazon Echo and Google Home. In addition, Tech giants like Xiaomi, Samsung, Lenovo also have their smart speakers equipped with a virtual assistant.
But no matter which one you buy, all of them come with a significant price tag. In this case, you can save a lot of money by making a DIY smart speaker. To do that, you will need some old speakers, a microphone, and a Raspberry pi.
Raspberry Pi is equipped with a USB slot and an AUX port. You can use these to convert your old speakers into a full-fledged smart speaker equipped with a virtual assistant (either Alexa, Siri, or Google Assistant).
To make a DIY smart speaker, follow the steps below:
Step 1: First, download your music into a USB flash drive and plug it into the Raspberry Pi using Prota OS (See below).
Step 2: Now, use the AUX cable to connect the speakers with the Raspberry Pi.
Step 3: Download the Volumio Application into your Prota OS and open it.
Step 4: Start playing music.
Once you are all set up, you can use these speakers for various purposes. For instance, you can trigger these speakers remotely, and you can play music via these speakers to greet guests detected via motion sensors in your smart home or via voice command. On top of that, you can integrate these speakers into the automation process via IFTTT (See below).
2. Make Your Smart home hub Using Raspberry Pi for Your DIY Smart House
One of the critical parts of a smart home is a smart home hub. This hub will allow you to integrate all your smart devices from different categories and manufacturers and makes it possible to control them remotely. In addition, the smart home hub allows these smart devices to collaborate. As a result, you can perform various functions using multiple smart devices in your smart home at the same time.
For instance, a smart home hub will allow a motion detector to trigger some functions to other smart devices in your smart home, like playing music via an audio system near the front door to greet guests or turning on the lights when someone enters a room. On top of that, the smart home hub allows you to use voice commands to perform multiple functions at once.
Buying a smart home hub like a Home assistant or Samsung SmartThings can cost a fortune. But you can save a lot of money by making a DIY smart home hub. All you need is a Raspberry Pi and an SD card (at least 16 GB storage space).
For those who are not familiar with a Raspberry Pi, it is a computer that is very cheap (typically costs around 30 dollars in the United States). This computer was made with only one goal in mind “To make computers accessible to everyone.” To turn your Raspberry Pi into a smart home hub, you will need an optimized operating system for this computer.
In this case, I will recommend you to use Prota OS. Of course, you can use other OS, but they will make the setup process much more complicated. But with Prota OS, you can do it in just under fifteen minutes, even if you don’t have any experience working with microcontrollers.
You can download Prota OS for free. To download the OS, click here. Then, follow the steps given below to burn the Prota OS image into your SD card.
Step 1: First of all, extract the .img file from the downloaded zip folder.
Step 2: Now, plug in your SD card.
Step 3: Download the Etcher application and open it. Locate the extracted image file and the SD card to install the OS and start the burning process.
And that’s all there is to it. It will take some time to complete the burning process (roughly six to seven minutes). Once the process is complete, you are ready to convert your Raspberry Pi into a smart home hub. To do that, follow the instructions accordingly given in this installation guide. After that, the setup will not take long.
Once you are done, your Raspberry Pi will turn into a full-fledged smart home hub.
3. Convert Your Old Webcam into a Smart Security Camera
Smart security cameras offer great convenience. You can monitor what is happening in your home, even when you are away, via your smartphone. But installing a smart security camera system is very expensive.
It is the most expensive part of building a smart house. However, with a bit of creativity and some old webcams, you can save a lot of money. To convert a webcam into a smart security camera, follow the steps given below:
Step 1: Connect your webcam to the Raspberry Pi with Prota OS installed.
Disclaimer: You can use other operating systems for your Raspberry Pi, but each OS has its unique setup process. Setting up your security camera might be challenging for you if you have no experience in programming. But with Prota Os, you can do it with ease.
Step 2: Now open the app library, download the “Webcam” application and open it.
And that’s all to it. Now you can use the webcam as a smart security camera. You can monitor the camera feed via smartphone from anywhere. You can use this camera to keep an eye on your kids, elderly parents, or pets when you are away from your home. You can also use it to communicate with them too.
On top of that, you can integrate other smart devices with this smart cam. For instance, whenever a motion detector in your house is triggered, you can use this smart camera to take snapshots, or if someone pushes your doorbell, you can use the camera to see who is outside your house. The potential use of this device is truly limitless.
4. Make Your Smart Button
Smart buttons offer great convenience, depending on the situation. Think of them as a shortcut to perform certain functions in your smart home. The working principle of these buttons is simple. When you press them, it triggers a signal that is sent via Bluetooth to a smart device. This signal commands the device to perform a predefined function.
For example, you can use a smart button to turn off all the lights in your smart home when you are away on vacation, or you can use it to open/close your garage door. But buying a smart device can cost you as much as thirty dollars. Plus, you will need a smart home hub for it to work. But you can create your DIY smart switch for less than five bucks.
To do that, all you need to do is a breadboard, some jumper wires, and one button. Then, follow the steps given below to make your smart switch:
Step 1: First, plug the button on the breadboard.
Step 2: Now connect the breadboard to the Raspberry Pi computer with the help of jumper wires. (Connect the jumper wires to PIN 6 and PIN 7 of the Raspberry Pi)
Step 3: Open the app library and download the GPIO application.
Step 4: Now open the GPIO app and select “GPIO4,” and set it on “INTERRUPT>PULL UP.”
Once you are done, you can add a specific action to the button like turning off/on lights, or services like sending a summary of your smart home’s power consumption to your smartphone, etc. This smart button is like an inexpensive remote control that you can use to perform a wide range of functions in your smart home.
5. Make a Notification Light Using a Simple LED
Notification LEDs can be handy in certain situations. They can give you a heads-up notification and assist you at your work. And making them does not require you much money. You can make your notification LED for just under two dollars.
To make your notification LED, you will need a breadboard, a LED, and some jumper wires. Then, follow the steps given below:
Step 1: First, connect the LED on the breadboard.
Step 2: Now, connect the breadboard to the Raspberry Pi using jumper wires.
Step 3: Now, from the app library, download and open the “GPIO’ application.
Step 4: In the GPIO application, set the connected PIN on output and test whether your LED notification light is working or not.
And that’s all. You can use any OS for your Raspberry Pi. But in some OS, the process might require some extra steps that might include a bit of coding. For example, I would recommend you to use Prota OS for your Raspberry Pi. Using this OS, setting up the notification LED is a piece of cake.
Now that you have set up your notification LED, you can use it for various things. For example, you can use it to be notified if the motion sensors detect someone or something inside your smart home’s perimeter. You can use this notification LED in any way you want. The potential use of this device is endless.
6. DIY Philips Hue Lights
Philips is one of the companies that have been developing smart home technologies for many years. One of their most popular smart home products is the Wi-Fi-enabled Phillips Hue light bulbs and LED strips.
The Philips Hue lights and LED strips are popular because of their highly customizable lighting patterns, light color accuracy, and mobile application that you can use from your smartphone. But these lights are costly.
However, you can easily make your very own Hue light strips. For that, you don’t need to be an expert on electronics or have soldering skills. If you know how to use a screwdriver, this might be enough for this DIY project.
To make your own Philips Hue LED light strips, you will need to buy a cheap LED strip and one Wi-Fi-enabled LED controller Hue compatible. Then, you can buy them from Alibaba, Amazon, or other online retailers.
Most of the LED strips come with a connector. You will need to cut the connector to separate the wires. Once you have separated the wires, cut off the plastic insulation and strip the wires to expose the copper threads. Now, determine which wire is which and label them accordingly.
Take a screwdriver to unscrew the connector ports on the LED controller and push the wires exposed copper wires into the corresponding labeled holes in the LED controller. Now screw the holes while keeping the wires inside the holes. That’s all to it.
Sometimes, LED controllers don’t come with a power adapter. In that case, you will need to buy one 12-volt, 3-ampere power adapter separately. Now install the “Philips Hue” app on your smartphone. This app is available for both Android and iOS.
Once the app is installed on your smartphone, open the application, tap on “Add Light.” Your LED controller will show up in the “Add Light” wizard. Add the LED controller, and you are done. Now you can customize lights on your LED strips as you wish.
By making your own DIY Hue LED lights, you can save up to 50% of the original Phillips Hue Lights cost. And the performance of your LED strips will be almost on par with the original one as long as you buy decent quality LED strips.
7. Connect with Hundreds of Smart Devices and Services Using IFTTT
The complete form of IFTTT is “If This Then That.” IFTTT is an online smart home hub that is in the cloud. IFTTT allows your smart devices to communicate with other smart devices in your home like any smart home hub.
IFTTT is one of the tools to bring together all the smart devices in your smart home and deliver a complete smart home experience. This service allows you to trigger one or more services or products in your smart home when another device performs a specific action.
In the past, this service used to be completely free. You can still use it for free. But to access the full extent of the services that IFTTT provides, you will need to upgrade to the IFTTT Pro plan. In this case, you will need to pay 3.99 dollars per month.
If you are an IFTTT Standard account user, you will only create just three applets. However, if the applets don’t meet your needs, you will need to go for the IFTTT Pro plan. The Pro plan will allow you to create unlimited applets with conditional logic, multi-step applets with queries, and multiple actions according to your needs. Thus, using IFTTT is very easy.
To use it:
- Go to the IFTTT website and find the service that you need.
- Find your device from the list and link it to your account.
- Select which service it should perform and the conditions to activate the trigger.
And that is all you have to do to create a new applet.
You can also connect IFTTT to your Raspberry Pi smart home hub. However, this process might be a bit complicated and will require some computer programming knowledge.
Things You Should Consider Before Converting Your Home into a Smart Home
Before I explain what you need to consider before building a smart home, you need to understand “what makes a smart home?” A smart home is a home where everything is automated, integrated, aided by technology, and controlled remotely.
Smart technologies provide the homeowner comfort and make it easy to control everything, reduce energy waste, and provide excellent security to the home. On top of that, everything is automatic, so you don’t have to worry about anything.
Building a smart home requires a considerable investment. Making one wrong decision can cost you a fortune. Therefore, it would be best if you considered certain things before building your smart home. These are given below:
Ensure Good Network Connection
Smart homes mostly rely on your home network, which in most cases is your internet connection. Without a stable connection, the smart devices on your smart home won’t integrate correctly.
You need to make sure the network connection in your home is stable and robust. Make sure that your Wi-Fi router signal is strong enough to cover your entire smart home. If not, invest in a better-quality router. Also, you can have a cellular connection for your smart devices as a backup.
Plan Before You Start
Don’t just jump into the work of building a smart home. Make sure that you have a solid plan. As smart homes are a considerable investment, you will need to avoid wastage of money.
The first thing you will need to do is set goals for your smart house. Then, whether you want to save energy consumption, convenience or comfort, prioritize which one you are interested in. Depending on your priority, the device choice for your smart home will change.
Once you set your goals, fix your budget. Depending on your budget, search the market to find out which device models you should buy. Also, make an inventory of the available devices in your home. Find out which devices that you already have fit your plan. In this way, you can save some money.
Also, find out if the devices that you are buying for your smart home are compatible or not. Once you are done with all these things, you are ready to turn your home into a smart home.
Protect Your Smart Home from Hacking
As smart home devices mainly depend on wireless signals and your internet connection, they are very vulnerable to hacking. Smart homes slightly insecure, and that is why you will need to make a plan to protect your smart home from IoT (Internet of Things) device hacking even before you build one.
To learn how you can protect your smart home from hacking, look for the tips I’ve shared below.
- Upgrade Your Router’s Firmware to the Latest Available Version
Your router’s firewall is the primary defense against IoT hackers. Router manufacturers often release new firmware updates to patch vulnerabilities and security risks to their products. Hackers can exploit these vulnerabilities to breach your smart home’s network.
You need to upgrade to the latest firmware if any update is available. If your router is too old and is not receiving any firmware updates, consider replacing it.
- Use Strong Password for Your Wi-Fi Connection
It’s imperative never to use the password that is used in the router by default. Otherwise, hackers can easily penetrate your network and cause chaos. Instead, implement a strong password for your Wi-Fi network that nobody can guess. Use symbols, upper-case and lower-case letters in your password. And don’t share your Wi-Fi or any password in public.
- Use Hard Drive Encryption
No matter how much protection you take to make your smart home’s network unbreachable, hackers can still find a way. If they hack your network, they can easily access your computer and mobile devices like tablets or smartphones and access your data.
But you can protect your data by encrypting your hard drives. In this way, it will be tough for hackers to access your data, and your files will be safe. If encrypting the entire hard drive feels unnecessary to you, encrypt the sensitive data that hackers might be able to use against you.
- Check Your Network Logs Regularly to Identify Breaches
Make a list of the devices that are connected to your network. Then, check the network logs on your router to see which devices are connected to your network. In this way, you can find out if any unwanted devices are connected to your network or not.
If you see anything unusual, immediately change the password and find out whether there was any breach of your network or not. Then, inform appropriate authorities if you find out that you were hacked.
Conclusion
Smart homes do provide a lot of comfort and convenience. But they also come with many security risks where hackers can penetrate your smart home’s network. If you do not take measures to prevent hacking, your sensitive data can get into the wrong hands that you can use against you. So, make sure to take preventive measures to avoid any dreadful situation.
After going through the entire article, I hope that you’ve found your answer to the question “How to turn an old home into a smart home?”
