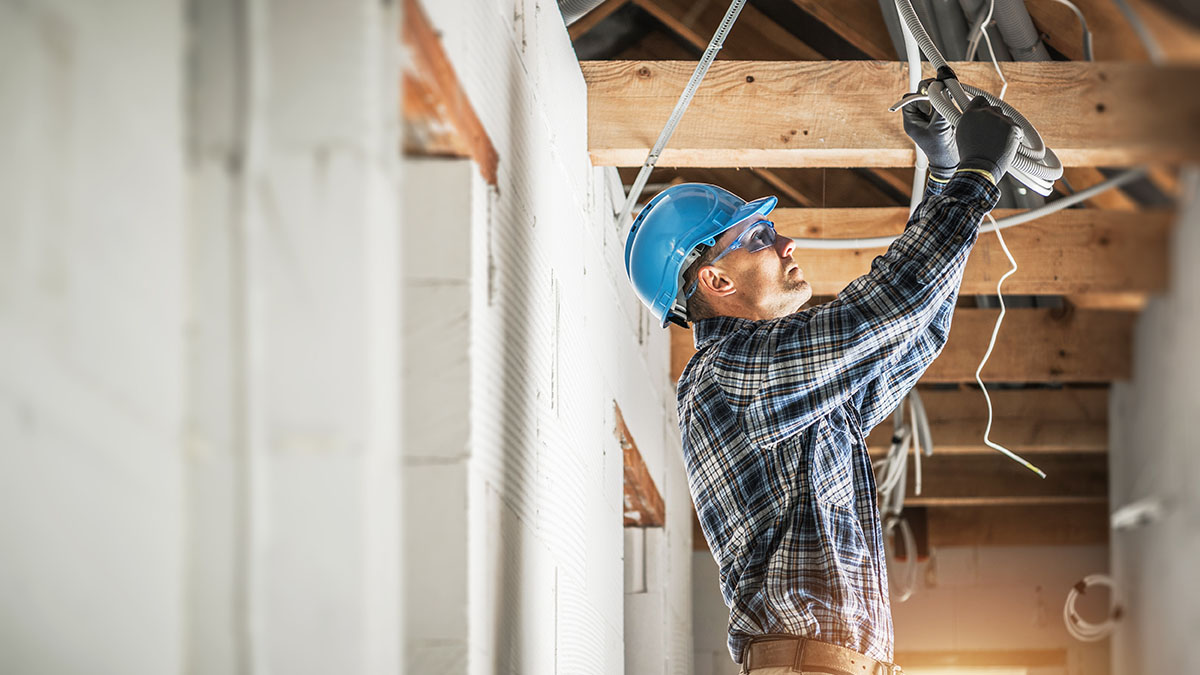
In most cases, while doing electrical projects on your building, you’ll use non-metallic or NM electrical cables. NM wiring is often referred to as Romex. However, there are times when you may need to use metallic-covered BX wiring instead. But what’s the difference?
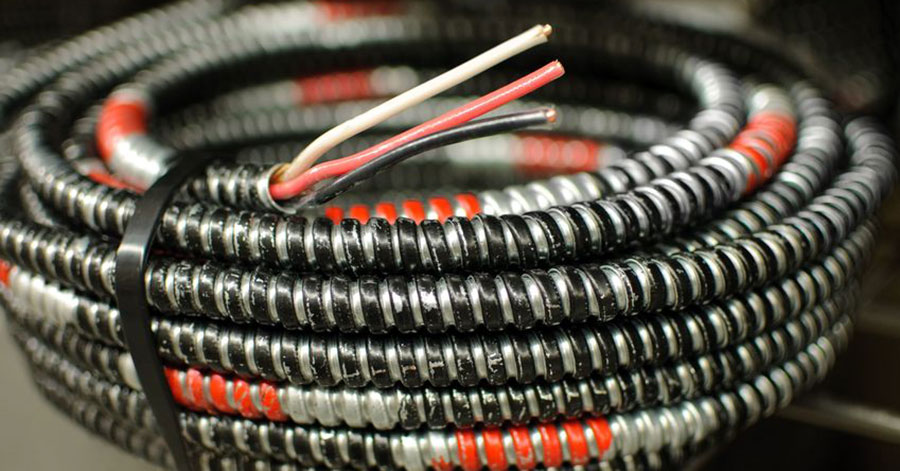
Romex wire has a non-metallic plastic protective covering that is easy to handle. BX wire has a metallic protective covering used mainly in areas where the wire is outside a finished wall and acts as an electrical conduit. In addition, both Romex and BX have plastic-coated insulated copper wires. Modern BX cable has a plastic-covered ground wire, while Romex has a bare copper ground wire.
In this article, we will look at comparisons between BX and Romex wiring.
Romex Cable Vs. BX Electrical Cable
| BX Cable | Romex Cable | |
|---|---|---|
| Ripping | These cables are hard to rip back without using a unique tool. | You can easily rip back a Romex cable using an inexpensive cable ripper. |
| Cost | A BX cable is more costly compared to a Romex cable. | Romex cables are about 25% cheaper than their BX counterparts. |
| Handling | A BX is difficult and heavy to handle. | Romex cables are light and have a slippery coating that easily pulls through holes. |
| Safety | BX cables are safer and protect against any accidental penetrations. | Romex cables have vinyl sheathing that you can penetrate easily. |
| Grounding | A BX cable usually is grounded through an internal plastic-coated ground wire or metal armor. | Grounding here is possible by separating the copper ground wire in bundles. |
| Cutting | The cable is cut using a hacksaw. | You can use a cutter on a wire stripper or a lineman’s pliers. |
| Code | NEC doesn’t accept older BX cables with internal bonding strips. However, modern BX is allowed by NEC. | NEC accepts Romex cables. |
What are BX Wire and Cable?
BX wire and cables are among the most reliable wiring options available on the market. Let’s look at more information about these cables below:
BX cable comprises plastic-coated insulated wires of about 12- or 14-gauge rolled up together and protected using a ribbon-like metal sheathing. You might hear them being otherwise called MC, type AC, armored cable, Greenfield, and metallic sheathed cable.
The BX metal sheathing runs around the wires in a twisted or helix-like manner.
A BX cable can be grounded through an outer metal casing. Therefore, you should attach the case to the metal boxes.
There are several types of these cables that you can install in exposed locations, including outdoors and indoors. It is the opposite of NM cables that you can install in enclosed environments.
It’s therefore vital that you check with the local building and electrical codes whether or not BX cables are left exposed.
BX Cable Replacement and Longevity
Like all the other cables, if you cut, shred or nick the armor, the wires found inside can become compromised. Although a BX armor is more potent than NM vinyl, it can still be pierced by an ill-placed and determined screw or nail.
Apart from electrical wires that run through metal conduits, you’ll never come across other electrical cables with a more robust outer casing than BX cables.
However, wires in the armor may show degradation of rubber insulation, more so at the exposed ends. However, if you rip the metal sheathing back, you’ll find that the insulation is in good condition.
If your old BX cable is in good condition and can still manage to carry higher power demands, you’ve no reason to replace it. The wire sheathing, in this case, won’t degrade or turn gummy over time.
Ripping Back BX Cable
You can use at least three known ways to remove the outer armor of a BX cable: manually with pliers, with a unique BX cutting tool, or with a hacksaw.
BX Cutting Tool
A BX cutting tool is essential if you expect to carry out a lot of cutting. One unique tool that you can buy is the Roto-Split. The tool will cost you about $20 to $50 and make the task of ripping and splitting back BX cable safer and easier than using hands.
To use this tool, you first insert the cable into its groove. You then turn the handle to make the cutting wheel cut away the metal sheathing. The tool is designed and calibrated to cut metals but stops getting in touch with inner wires.
Cutting by Hand
Even if you don’t have a BX cutting tool, it’s still possible to rip and cut the BX armor. Then, you can proceed to cut the outer BX armor using a hacksaw and a strong pair of pliers or wire snippers.
Using this approach, you stand the danger of nicking the inner wire’s insulation. You can also tear your fingers on the metal armor.
The History and Development of BX Cable
BX is among the earliest electrical cables designed for commercial and residential uses in the early 20th century.
Different forms and types of BX cables can still be found by people renovating their homes. It isn’t clear how ‘BX’ began to represent metal-armored cables. However, some attribute it to being produced first in New York’s Bronx borough.
Should You Purchase BX Wire or Cable?
If you’re a do-it-yourself electrician, you’ll find it easier working with Romex and NM brand cables than BX cables. However, some specific electrical codes or tasks require BX cables.
Before you settle on buying BX cables, it’s essential to understand that these wires have a corrugated surface and are heavy, thus making it hard to pull through stud holes. In addition, without severing or cutting the inner wire, it would be hard to cut the BX metal sheathing.
It’s therefore essential to only buy and use BX cables if either the task or the electrical codes require you to do so.
Using BX Cables
- Ensure that Your Local Authorities Allows you to Apply BX Cables
The industry is filled with different types of BX cables. However, not all these cables are available for application in all circumstances.
- You should ensure that you have the proper connection in place for the selected BX cables.
- Even if your location allows installation or maintenance by non-licensed electricians, always ensure that you acquire the relevant electrical permit.
- Inspectors might ask to view the ‘listing label’ for your BX cable to verify whether it conforms with the local standards and code requirements for cable installation and maintenance.
- Find the length of BX Wire Required on Your Project.
Here, you should always add an allowance of about 11.8 inches (30 cm) to cover for damage and wastage.
The National Electrical Code puts the required minimum amount of cable that should extend past the junction box. The local codes might have more requirements.
- Cut About 7.9 Inches (20 cm) of the Armor Using a Rotary Cutter or Hacksaw.
It would be best to start by cutting across the armor, excluding the spiral. It isn’t necessary at all to cut through the armor completely.
As soon as the cut is complete, grab the cable jacket below and above the cut and then twist it sharply. It breaks the armor without the saw getting in touch with inside wires.
Since the metal edges are always sharp, you should caution while cutting. It’s also essential to inspect the interior insulation to ensure that gashes or nicks expose no conductor. If you notice any damage, move back and redo the cut.
- Push an Anti-short Bushing on the Wires Where They Contact the Metal Armor
Here, you might have to employ bushings that contain an indicator tab, tailor tip.
- Repeat the previous steps at the opposite end of your cable
- Put a BX connector on the end of the cut armor and then tighten the screw for you to secure the armor.
Get rid of the threaded ring found on the connector. Most BX connectors come with a small slot or hole through which you can show the bushing’s tab, tail, or tip for the inspector to know it is there.
- Strip exposed wires and then pull through the open ends of connectors along with the knockout hole for the electrical box.
If you add a project to existing wiring, ensure that power in all branch circuits is off.
- Secure the connector on the Electrical box
At this point, new installations need to be inspected before permission is granted to install devices on the cables.
- Connect cables to your splice/switch/outlet in the electrical box
Repeat this step for the remaining connection at the opposite end. Finally, you can add cable supports such as brackets, clamps, and staples.
- Verify visually that the wiring is complete and that there are no exposed containers
Double-check this with any partner you’re working with before proceeding to the next step. It is meant to ensure and guarantee safety.
- Energize the circuit and then test it
You can arrange the final inspection.
What is Romex Wire & NM Cable?
Romex is an NM type of cable having non-metallic sheathing and is commonly used for residential wiring purposes. It’s the cable you’ll likely use to wire your house. Below are NEC regulations that apply to Romex:
- Romex cables should be clamped, protected, and secured on junction boxes, fixtures, and device boxes.
- The use of devices that might damage cables, including overdriven staples and bent nails, isn’t permitted.
- It would be best if you secured NMC and NM cables at maximum intervals of 4½ feet. It’s also critical that they remain safe within 12-inches of panels and junction boxes.
- Romex wiring is permanent wiring in houses and shouldn’t be employed as extension cords and appliance wiring substitutes.
What Does NM (Non-Metallic) Electrical Cables Involve?
The NM (Non-metallic) naming refers to the out sheathing that covers individual wires being non-metallic. It is different from conduit wiring or metallic sheathed cables, which involve individual conductors being protected and surrounded by a metal conduit or metal coil.
There are three sections of an NM cable: wire, wire insulation, and outer cable.
Cable Sheathing
The outer sheathing for a Romex cable is a 30 mil-thick PVC jacket that protects and bundles individual wire conductors. The sheathing is very tough to offer maximum protection. It is beneficial to withstand the stress impacted on the sheathing when you pull the cable through holes.
If you want to make a connection with any device, the cable sheathing is reaped using a cable ripper. After ripping, you can cut the remaining sheathing using scissors, a wire stripper, or a utility knife.
Wire Insulation
All wires found in the sheathing usually are insulated using a color-coded polyvinyl chloride (PVC). The conductors here have red, white, and black insulation.
There is also a copper grounding wire that is left bare and uncoated. The grounding wire is sometimes coated in green PVC. There is also paper added within the cable to separate the conductors.
If you want to connect any devices, you must first strip the wire insulation from copper wire using manual wire strippers. The holes of a wire stripper correspond with various wire diameters.
For instance, if you want to strip insulation from a 12-gauge wire, you should select the hole that is labeled ’12’.
Wire
The individual conductors in the cable are metallic with about 65-percent copper.
Although Romex or NM cables come in different wire gauges, most households will require a 14-gauge or 12-gauge wire having either three or two conductors inside.
For instance, a cable labeled ’14-2 with ground’ has 14-gauge wires, a copper grounding wire, and two insulated conductors. You can use this cable in 15-amp circuits.
On the other hand, a cable labeled ’12-3 with ground’ has 12-gauge wires, a copper grounding wire, and three conductors. You can use the cable in 20-amp circuits.
History of the Romex Brand
Romex comes from “Rome Cable Corp. of Rome, New York,” which produced the cable for the first time. The company was among the leading producers of cables until 2003 when it filed for bankruptcy.
Its factory was then demolished in 2010. Since then, Romex has been in production, especially by companies that took over from where ‘Rome Cable Corp’ left.
Pros and Cons of Romex Wiring
Romex wiring is mainly employed in residential wiring, although it’s still possible to achieve the task using conduit or metallic sheathed cables. The wire comes with several benefits that make it the most prevalent wiring option for homeowners.
It doesn’t mean that there aren’t disadvantages that you might experience. Here are some of the advantages and disadvantages of using these wires:
Advantages of Romex Wire:
- Romex wires are easier to handle since they are lighter compared to metallic sheathed wires.
- Since the PVC sheathing in these Romex wires is pliable, they are easier to straighten and unspool.
- They also have smooth sheathing that makes them easier for pulling through holes. There is even an added coat that creates slippery sheathing.
- Romex cables are easier to cut using side-cutting pliers. You can even use wire strippers to snip small gauges.
- Romex wires are also cheaper compared to metal-sheathed wiring such as BX wires.
- The cables are developed with plastic sheathing making them easier to rip. It’s even possible to cut the sheathing using a utility knife and then rip it back with your hand.
- They can be easily attached to framing members.
Disadvantages of Romex Wire:
- There are certain cases where you can’t use a Romex wire, such as outdoor environments or where the cable is exposed above the foundation walls. The electrical codes require conduit installations in such instances.
Conclusion
The main difference between BX and Romex is the outer protective covering. Otherwise, modern BX and Romex have positive, neutral, and ground wires. In BX, the ground wire has a plastic protective sheathing, whereas Romex, the copper wire, is bare.
BX wire serves as its conduit, whereas Romex requires a conduit if used outside of finished walls or used outside.