Does your house have a Tyvek barrier? If it doesn’t, then you should make a point of installing one. You’ll understand why it’s worth it as we explore what Tyvek barriers: requirements, use, and purpose are.
Tyvek is a brand name often used to refer to water-resistant barriers (WRB), also known as house wrap. The International Building Code (IBC) requires a water-resistant barrier to be installed behind the exterior cladding. Water-resistant plastic barrier materials are not exclusive to Tyvek, and similar products are manufactured under dozens of trade names. Other WRBs include asphalt felt and Grade D building paper, rigid foam board insulation, liquid-applied sealers; Zip System sheathing; and Delta-Dry product.
Tyvek is a reputable brand created from flash spun high-density polyethylene fibers, a synthetic material. It’s a trademark of DuPont, a registered company with a reputation for producing textiles and chemicals.
WRB plastic materials are often lumped under the Tyvek name, much like tissue is called Kleenex.
Water vapor can easily pass through Tyvek barriers, but water in liquid form can’t. It’s as a result of these properties that Tyvek is employed in different applications. Tyvek allows the building to breathe without letting water through it.
But that’s not all there is to know about Tyvek barriers. I’ll explore everything you need to know about Tyvek barriers as we move along.
WRB (Water-Resistive Barrier) Code Requirements
As per the 2006 International Residential Code and International Building Code, there must be a water-resistive barrier behind every exterior veneer. Further, the 2016 International Residential Code expanded the verbiage requiring the same thing and insists that the barrier should be developed and designed to restrict water accumulation within the wall.
Facade Considerations
Tyvek WRB performance depends on the ability of the facade to drain. Therefore, it would help to consider the following for facades.
Stucco
When installing stucco over wood-based sheathing, you need “a water-resistive vapor-permeable barrier with a performance equivalent to two layers of Grade D paper” or a layer of WRB that is split for the stucco by an “intervening layer.”
If two layers are needed as per the code, and if you use Tyvek WRB behind stucco, they must be split from stucco by felt, the second layer of Tyvek WRB, rigid foam board, “a layer of grade D building paper,” and paper-backed lath’s paper backing.
The layer that is directly over studs or sheathing functions as the water-resistive barrier of the wall system. It’s integrated with door and window flashings, any expansion joints or through-wall flashings, and a weep screed at the wall’s bottom.
You should install lath over the intervening layer. A rigid foam board will offer enhanced structural support to the Tyvek layer when installing it over the Tyvek WRB as an intervening layer. However, if you install a rigid foam board within 24 hours of the Tyvek layer, it may reduce the number of fasteners you require for the attachment of the Tyvek WRB.
Brick
As per the 2006 International Residential Code, there must be at least a 1″ airspace splitting the water-resistive barrier from the brick. There should also be at least a 2″ airspace ahead of steel stud construction and 1″ airspace before wood stud construction.
Tyvek WRB must be split from the brick veneer by a 1″ airspace Consistent with the recommendations and requirements. In addition, Through-wall and door and window flashing must be integrated with the Tyvek layer guaranteeing proper shingling.
Specific brick ties function as additional fasteners for WRB. If you install them within 24 hours of the Tyvek layer, it may reduce the number of fasteners required for initial attachment.
Stone Veneer
As per the 2006 International Building Code, there must be at least two layers of WRB behind the stone veneers (synthetic, manufactured, and natural) over frame construction.
Wood Siding
Wood siding and Tyvek WRB must be installed as per the industry standards, applicable codes, and manufacturer’s instructions. In addition, according to the recommendation by the U.S. Forest Product Laboratory and the “Western Red Cedar Lumber Association,” you should prime wood on all six sides before installation.
You can achieve enhanced water management and drainage in high exposure installations if you install a drainage mesh on a WRB, use Tyvek DrainWrap, or create a rain screen using furring strips.
Fiber Cement Siding
You must also install fiber cement siding and Tyvek WRB as per the applicable codes, industry standards, and manufacturer’s instructions. Enhanced water management and drainage in high exposure installations are possible if you install a drainage mesh on a WRB, use Tyvek DrainWrap, or create a rain screen using furring strips.
Vinyl Siding
You should install vinyl siding directly over Tyvek WRB. You should install vinyl siding as per the applicable codes, industry standards, and manufacturer’s instructions.
Uses of Tyvek Barriers
Tyvek is used for different reasons, as we’ll highlight below:
Engineering/Construction
- Large Tyvek sheets are used as house wraps to offer an air barrier between the frame or insulation and the outer cladding of the structure. It, therefore, allows water vapor to pass and, at the same time, prevents air infiltration.
- Tyvek was also in the application for protecting and covering the RCS (Reaction Control System) thruster ports from debris and water as the shuttle stack was exposed on the launchpad during the former years of the space shuttle program.
- Tom Sachs used Tyvek for the spacesuits’ outer shell employed in the space program series of artworks.
Government Use
- The US postal service uses it for its Express Mail envelopes and priority mail.
Personal Use and Fashion
- Race numbers or race bibs are created on Tyvek to have fewer chances of getting torn during competition.
- Due to Tyvek’s high washability and durability, it’s employed in textile and garment labeling.
- The Fiorucci fashion house made its entire collection from Tyvek in 1976.
- Tyvek is also used to design durable fabric in shoes.
Personal Protective Equipment
- Tyvek coveralls are one-piece garments usually worn by painters, insulation installers, cleanroom workers, laboratory workers, mechanics, and oil industry workers. They are also ideal for light HAZMAT applications, including radiation and asbestos work. However, they don’t offer complete protection like a hazmat suit.
Tyvek’s sub-brand is called Tychem, which provides higher-level protection against liquids, especially chemicals.
- You’ll notice Tyvek coats, bodysuits, and coveralls used during pandemics such as the COVID-19 pandemic and the Western African Ebola virus epidemic to protect health workers against infections. For instance, the cost of a Tyvek suit that you’ll see being used by healthcare workers during the COVID-19 pandemic costs between $5-$15.
General Tyvek Installation Instruction
The ideal time for installing DuPont Tyvek water-resistive barriers is:
- When walls are constructed
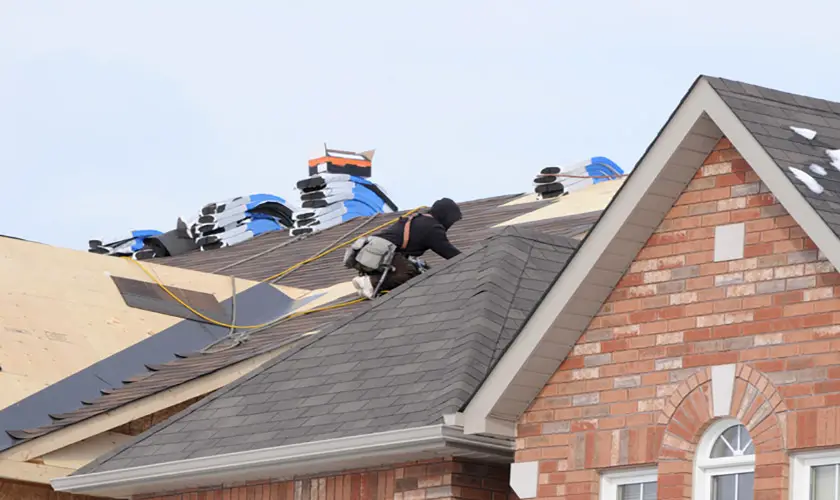
- After installing roof sheathing
- When kick out flashings and step flashings are installed
- Before setting the doors and windows
Special Considerations
- Tyvek DrainWrap and Tyvek StuccoWrap should be installed having drainage grooves vertically, going down and up.
- To minimize the R-Value benefits of Tyvek ThermaWrap, install it with a shiny metallic side facing in the direction of a clear ¾ inch airspace. Even without airspace, Tyvek ThermaWrap still performs the water-resistive barrier functions.
- DuPont requires that Tyvek HomeWrap, StuccoWrap, ThermaWrap, and DrainWrap be covered within 120 days (4 months) of its installation. However, the Tyvek CommercialWrap should be covered within 270 days (9 months) of its installation.
Tyvek Barrier Installation Instructions
Always begin at the bottom of your structure to enable proper shingling throughout the whole installation. Proper shingling is necessary for restricting water from entering the wall system and providing for water shedding.
Step 1
Unwrap the roll at the corner to leave a 6″ to 12″ vertical overlap. There are printed marks on Tyvek products to assist in aligning with studs. For instance, stud marks are 8″ apart for HomeWrap.
Step 2
The roll must be plumb. The bottom edge of the roll must extend over the sill plate interface for at least 2″. It would help if you sealed the wrap at the bottom of the wall using sealant to prevent air leakage. You can also use a DuPont StraightFlash or Tyvek Tape.
When it comes to the grade foundation, the slab should extend to the bottom of the sill plate. Integrate stucco exteriors with weed screed.
Step 3
You can proceed to secure the Tyvek water-resistive barrier to the stud. Fasteners need to be spaced at least 6″ on the vertical stud lines and no more than 18″ on horizontal stud lines. You can use the fasteners below:
- Tyvek wrap cap nails
- Tyvek wrap cap staples for stinger
- Tyvek wrap cap screws
- Use at least 1.0-inch staples when installing Tyvek over foam sheathing.
Never fasten within 9″ of the rough opening head.
Step 4
Unroll directly over your doors and windows. Here, the upper layer of your water-resistive barrier must overlap the lower layer of the WRB by at least 6″.
You must integrate Tyvek water-resistive barriers with proper shingling having window flashings if you have already installed windows. For the case where apron and DuPont FlexWrap are applied, you should install the WRB below the apron for proper shingling.
If non-self adhering sill flashing is in use, you should install WRB below the bottom of the sill flashing to manage proper shingling.
Step 5
All vertical seams should be taped using Tyvek tape. All horizontal seams should also be taped when installing as an air barrier for optimum air penetration resistance.
It would help if you taped all horizontal and vertical seams to get the DuPont Tyvek products labor and material residential 10-year limited warranty. In addition, it would be best to seal or tape all terminations, including sill plates and roof-wall interfaces.
When taping the horizontal laps for Tyvek DrainWrap, and Tyvek StuccoWrap, recommend 3″ (three-inch) Tyvek tape. For taping Tyvek ThermaWrap, you require Tyvek metalized Tape.
Step 6
After installing the water-resistant barrier, refer to the flashing systems guidelines to flash and prepare doors and windows.
Continuity
Terminations
It would help if you maintained the continuity of the WRB from top to bottom using proper shingling. Keep wrapping to the top of the structure. The whole wall surface should be covered, including unconditioned spaces.
There is the need to integrate expansion joints and weed screeds with the water-resistive barrier and flashings.
Gable Ends
Keep wrapping and cutting away excess water-resistive barriers to fully cover the gable end.
Cantilever Floors
Wrap the Tyvek under the Cantilever floor and fold it up the sides of the wall at least 6″. Proceed to tape all the corners.
Here, the top layer of the water-resistive barrier should be directed over the bottom layer at least 6″. Using a 1×4 or something similar, make the inside corner very tight.
Penetrations
Several penetrations include bathroom exhaust fans, exterior lights, dryer vents, gas lines, electrical outlets, and bathroom exhaust fans. Therefore, it would be best if you sealed the Tyvek around all HVAC, plumbing, and electrical penetrations with Tyvek tape, flashing systems products, and weatherization sealant.
Begin flashing or taping at the shingling upper tape, the bottom of penetrations, and over the bottom tape.
Handling Holes and Tears
While installing the water-resistive barrier, you might experience minor tears. It would help if you taped all the tears. You can easily cover tears using flashing systems products or Tyvek Tape of either 2″ or 3″.
If the hole is larger than 1″, you might have to cut a piece of water-resistive barrier to cover it.
Tilt Wall Instructions
Step 1
Secure and unroll the Tyvek water-resistive barrier over the wall section. Leave enough lap to guarantee at least a 6″ overlap of the water-resistive barrier for all sides, except for the top wall.
Ensure that the stud marks that have been printed on the roll and the Tyvek lineup are plumb.
Step 2
While beginning a wall section, you should fold and secure the starting side flap over the vertical stud side. Trim off any excess. The bottom flap should overhang just enough for the wall to overlap the sill plate when tilted upright.
Step 3
When each section of the wall is raised, you should ensure that the bottom side flaps are outside the house and the bottom flaps overlap with the sill plate.
Step 4
Here you should secure the bottom flap and fasten the side flaps to the foundation. To get an optimum reduction in air leakage, use a DuPont StraightFlash, Tyvek Tape, and weatherization sealant to seal wrap at the bottom of the wall.
Step 5
All the vertical seams should be taped using Tyvek tape. For the air penetration resistance to be maximum while installing as an air barrier, tape all horizontal seams.
Taping the horizontal and vertical seans is among the requirements of getting the Tyvek products Labor and Material Residential 10-year limited warranty.
While taping horizontal laps with Tyvek DrainWrap and Tyvek StuccoWrap recommend 3″. When it comes to taping Tyvek ThermaWrap, the metalized tape is required.
Step 6
After installing a water-resistive barrier, refer to the flashing system guidelines to flash and prepare doors and windows.
Flashing System Integration
To manage this process effectively, follow the steps below:
Step 1
Verify that the WRB is shingled with the apron bottom correctly. Avoid cutting through an apron or FlexWrap.
Step 2
Tape the seams well without taping at the bottom of your window. Make continuous taped seams at the head using Tyvek tape. If additional drainage is desired or if an air barrier is needed, skip-tape at the head.
Conclusion
As we have seen, Tyvek barriers involve reputable brands created from flash spun high-density polyethylene fibers, a synthetic material. If you have any construction work, you should use Tyvek barriers to protect your building. Tyvek barriers are designed from tough materials that are difficult to tear.
However, you also understand that Tyvek WRBs are slippery, and you should never use the products where people will walk on them. Since they are slippery, you can use scaffolding for exterior purposes above the first floor.