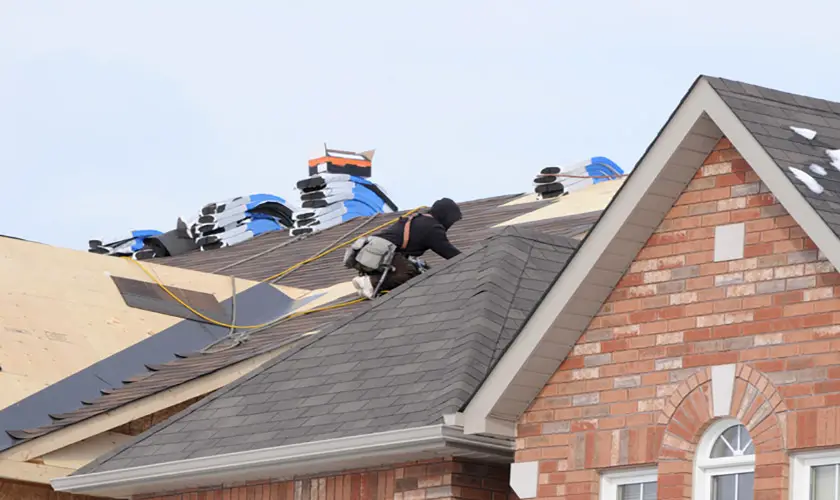
Drip edge flashing has proven to protect homes from water damage. Most roofing contractors will install new drip edge during roof replacement.
A drip edge is an angled metal flashing installed over the roof decking and fascia board. Its purpose is to redirect any water from the fascia into the gutters. If you don’t have a drip edge flashing, your basement, porch, siding, eaves, or roof decking can get damaged from excess water.
What Is Drip Edge Flashing?
A drip edge is simply a metal flashing installed under the roofing materials to help regulate water flow from the fascia and protect any underlying roofing materials. It contains a small metal flange that directs water away from the fascia. It also overhangs the sides of your roof.
Install drip edges on your roof’s eaves, gable, and rake. They elongate beyond the fascia and are fixed at a minimum of ⅓ of the gutter width.
Metal drip edges are developed from non-corroding, non-porous metals such as aluminum, copper, and galvanized steel. You can also come across some from durable fiberglass, vinyl, and plastic.
Why Do You Need A Drip Edge?
You should install a drip edge if you want to prolong the lifespan of your roof. Drip edging helps prevent capillary action, which occurs when rainwater runs down the roof surface and underneath the shingle edge behind the gutter, causing the fascia boards to rot.
A metal drip edge directs all rainwater into the gutter. Here are the other advantages of installing a drip edge on your home:
- They prevent soffit and fascia damage: As we have seen before, the purpose of a drip edge is to redirect water from the roof edge and channel it into the gutters. If you leave the fascia boards and soffit exposed, excess moisture can damage them.
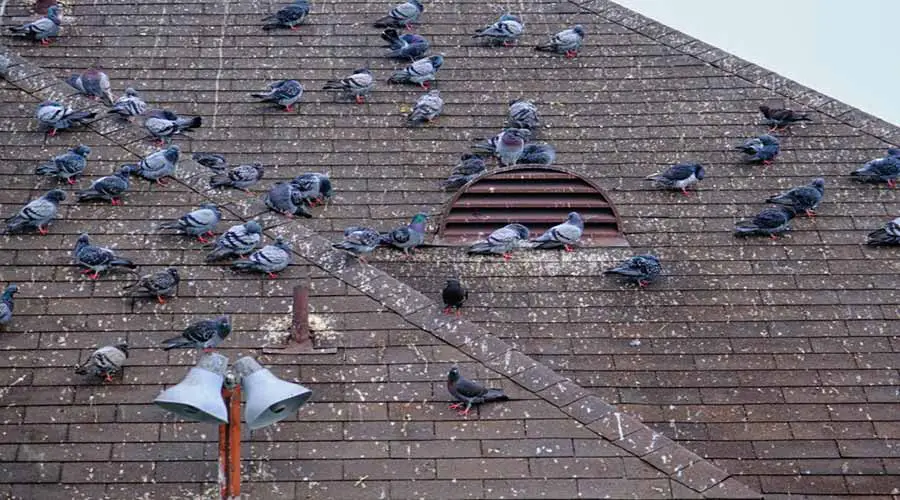
- They keep pests away from your home: You can use a drip edge to cover your roof edge and the carpenter’s gap. It is a space between the fascia board and the roof deck. The carpenter’s gap lets unwanted pests and small animals enter your home through the attic.
- They help maintain your porch dry: Since drip edges are meant to redirect water into gutters, there is no need to worry about potential downpours from your roof washing down into your deck or porch during heavy rain.
- They help to stabilize your roof: When heavy rain or wind occurs, roof drip edge flashing can assist in stabilizing your roof. Wind damage being among the reasons homeowners file for insurance claims is one advantage you shouldn’t ignore.
- They protect the roof from ice dams: We all know how dangerous winter can sometimes be. Ice dams make up the climax of ice that freezes and collects on the roof edge. Ice dams restrict snow from draining and thawing properly. Drip edge flashing provides extra protection against ice dams during winter.
If snow can drain and thaw, the moisture will get trapped and backed up on the roof, thus causing wood rot and extra weight. If the water gets into your home, it can cause mold or mildew growth. Drip edge flashing will therefore restrict ice dams from ever forming.
Is Drip Edge Flashing Required?
The IRC now requires drip edge flashing, especially for shingle roofs. An advantage of drip edge is also included in the building code involving documentation on the standards.
Drip edges, on average, are available in several colors and 10-foot lengths. The colors match the shingles of your roof very well. If you want to install a drip edge, you should comply with the standards below:
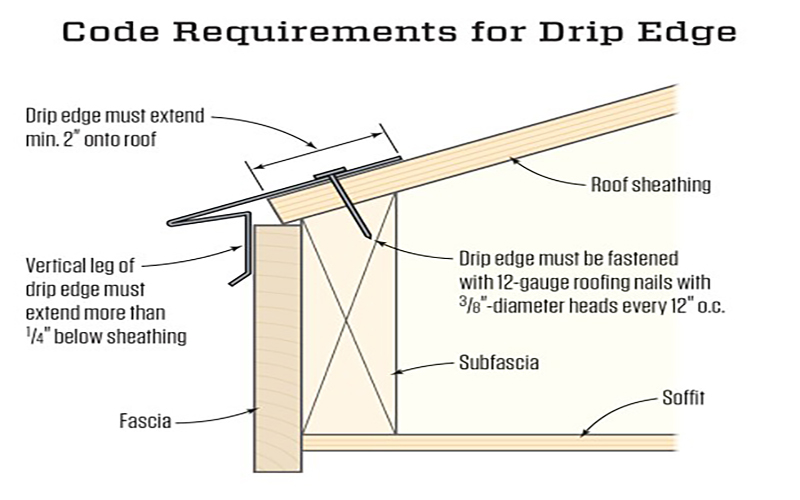
- Adjacent pieces should overlap at least 51 mm (2 inches).
- The metal should extend up the roof deck for a minimum of 51 mm (2 inches) and extend beyond the roof sheathing for a minimum of 6.4 mm (0.25 inches).
- Each drip edge piece should be fastened to the roof’s deck at a maximum of 305 mm (12 inches) apart.
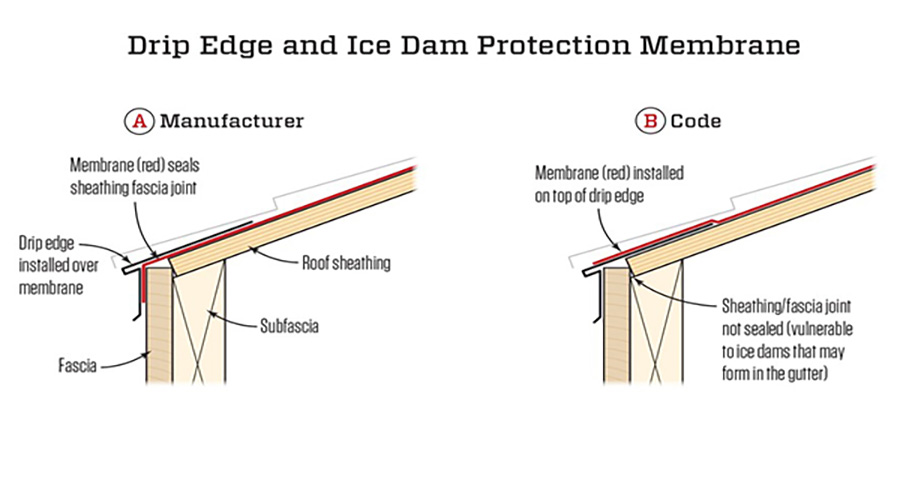
- It is very critical to where you install the drip edge. For instance, on the roofs, it should run over the underlayment. The roof underlayment runs over the drip edge on the eaves.
The building codes and standards state that the roofing shingles can be flushed unless the manufacturer says otherwise.
There are several roof flashing types, each with different installation rules.
What Does Drip Edge Flashing Do?
They have two essential purposes:
1. They Direct Water from the Fascia Boards
Due to surface tension, cohesion, and other focus. A drip edge is created to take advantage of the forces and, together with gravity, lead water into the gutter.
If your home lacks a gutter, the drip edge restricts water from flowing down the fascia and the soffit cavity. If there is no drip edge, moisture sticks to the shingles and leads to a leak.
For instance, water might cling to the fascia board and lead to rot or, in worse conditions, a severe leak into your house.
2. Protect Your Home from Wind-Driven Rain
When conditions get serious, the wind will push water around the roof. Shingles, ice, water protector, and underlayments will restrain wind-driven rain from causing harm to the roof deck.
However, the drip edge should compete with the wind on the edge. Wind can effortlessly push water up before gravity pulls it down. Without having a drip edge in place, wind-driven rain could harm the roof.
Types of Drip Edge Materials
Drip edges are developed from several metals and plastics, acceptable under different codes. However, the metal should be galvanized or corrosion-resistant.
- Aluminum: Although aluminum drip edge is not as strong as steel, it’s still one of the most used materials to develop drip edges. Aluminum doesn’t rust easily and is commonly sold in various colors matching the rest of the home.
- Galvanized Steel: Since drip edges are developed to maintain contact with water, galvanized steel should be used to prevent rust. If you want to withstand strong winds, a minimum of 24-gauge steel is preferred.
- Copper: Copper is a well-built material that provides a unique look to the roof. When applied as a drip edge, it should be at least 20 ounces or 0.69 mm.
There are some cases where vinyl, fiberglass, and plastic drip edges are used. It should be in cases where you want to manage non-roofing applications, including above windows and doors.
Types of Drip Edge Profile
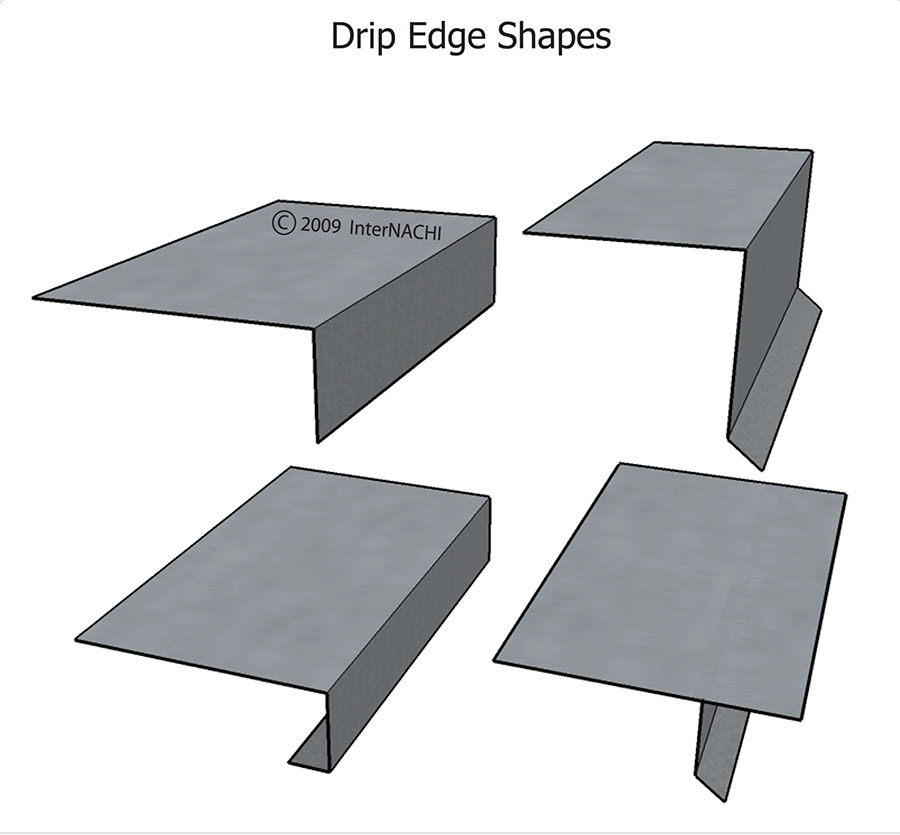
Drip edge flashing has three basic profiles, and each profile goes by at least two names.
- Type F: (gutter apron) it’s an extended drip edge having a longer leading edge. It’s helpful when installing new drip edges on rake edges or over existing shingles.
- Type C: is also called L style or classic L-shaped drip edge. The drip edge contains a lower flange at the button and is bent at a 90-degree angle.
- Type D: the drip edge is shaped like a ‘T.’ It also has a lower flange at its bottom. It’s sometimes called T-style, D-metal, or drip metal.
The ARMA (Asphalt Roofing Manufacturers Association) favors this profile to Type C because it can keep water further from the fascia. However, several other building codes still accept Type C.
Although roof drip edges are generally available in 10.5-foot lengths, they’re sometimes sold in 8-foot lengths or less. The overhang length ranges from 2 to 5 inches.
How to Install Drip Edge Flashing?
It would be best to note that the installation of drip edges is different for rakes and eaves. After preparing your roof deck and installing underlayment, you must install drip edges at the eaves.
You install the flashings on the rakes until you install the underlayment. First, go through the guidelines below on how to install drip edges:
- Install a furring strip using a Type C drip edge to increase performance. A furring edge is a one-by-two wood strip you usually install on your home’s vertical surface below the roof’s edge. The drip edge will keep the lower flange further from your house’s siding anytime you install the drip edge over the strip. The result is the keeping of water from the home.
- Proceed by installing drip edge on the eaves. You should have the drip edge down and align it to allow water to drip into the gutters. The end having the flare or flange must point away and down from the roof.
- Secure the drip edge using roofing nails. It would be best to nail high up the drip edge for the shingles to cover the nails. It means nailing almost every 12 inches. You should allow more than 16 inches between the nails at any point. The next drip edge you place must overlap the first by one inch.
- When you reach the corner where the rake and eave edge meet, cut for a proper fit. First, it would be best to have the drip edge on your rake edge to do this. Mark the part where the drip starts to overhang an inch further from that point.
- Cut the whole drip edge by the second mark to hang past the edge by one inch. Cut the topmost part of your drip edge by the first mark. Next, make a perpendicular cut to remove a square from your drip edge.
- Proceed by installing your drip edge normally. You can then bend in the flap of your drip edge to create a square. The corner will be complete when installing your drip edges on the rakes. You can install the underlayment after covering your eaves with a drip edge. Note that the underlayment is below the drip edge on the rakes. It’s also above the drip edge on the eaves.
- Proceed to install your drip edges on rakes. You should apply nails like before.
- Install the drip edge of the rake above the flap after getting to a corner where the eave and rake edge meet.
- When you get to the roof’s ridge, cut the drip edge. Make a mark when your drip edge surpasses the roof by holding your drip edge on the ridge.
- Make a straight cut through the drip edge’s bottom using tin snips.
- Finally, fold your drip edge to fit on the ridge. At this point, mark the centerline or plumb line. Create a finished look by cutting the topmost part of your drip edge. Hold your drip edge by placing a nail in the outer piece.
Always check the local building code for any additional rules and regulations you need to follow for a successful drip edge installation.
How to Replace a Drip Edge?
In case you need to replace your drip edge for an existing roof, here is how to go about it:
- Lift the shingles at the edge of your roof to locate the nails that hold the current drip edge on the roof.
- Use a hammer and flat pry bar to get the nails out of your drip edge.
- Slide your drip edge once it becomes free.
- Install your new drip edges using nails and cement, as explained above.
Like installing a new roof, you must also check the local building codes to identify any special rules you require during replacement.
Who can Install a Drip Edge?
It would be best to allow only experienced professionals to install drip edges. Water won’t flow into the gutters if you don’t install a drip edge properly. It would automatically lead to water-related damage and wood rot. The result is the destruction of your soffit and fascia boards.
Damages that result from improperly installed drip edges translate into costly future repairs. Always link up with a professional if you notice any problems.
Drip Edge FAQs
What Is Drip Edge Flashing?
A drip edge is a metal flashing installed under the roofing materials to help regulate water flow from the fascia and protect any underlying roofing materials. It contains a small metal flange that directs water away from the fascia. It also overhangs the sides of your roof.
Why Do You Need A Drip Edge?
You should install a drip edge if you want to prolong the lifespan of your roof. Drip edging helps prevent capillary action, which occurs when rainwater runs down the roof surface and underneath the shingle edge behind the gutter, causing the fascia boards to rot.
Is Drip Edge Flashing Required?
The IRC now requires drip edge flashing, especially for shingle roofs. An advantage of drip edge is also included in the building code involving documentation on the standards.
Can You Add Drip Edge to an Existing Roof?
Adding a drip edge along the rake edges is more challenging than the fascia. You may need to remove a couple of rows of shingles if a membrane also needs to be installed. If you’re inexperienced, you should consult a contractor before installing drip edge flashings.
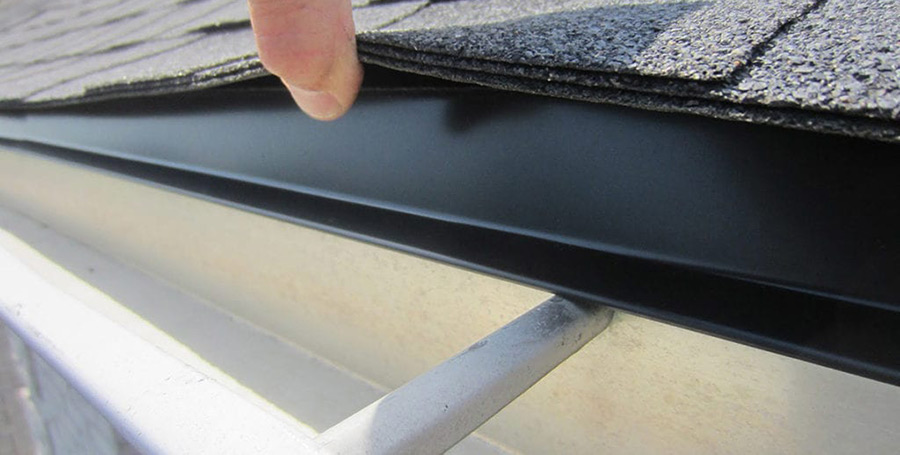
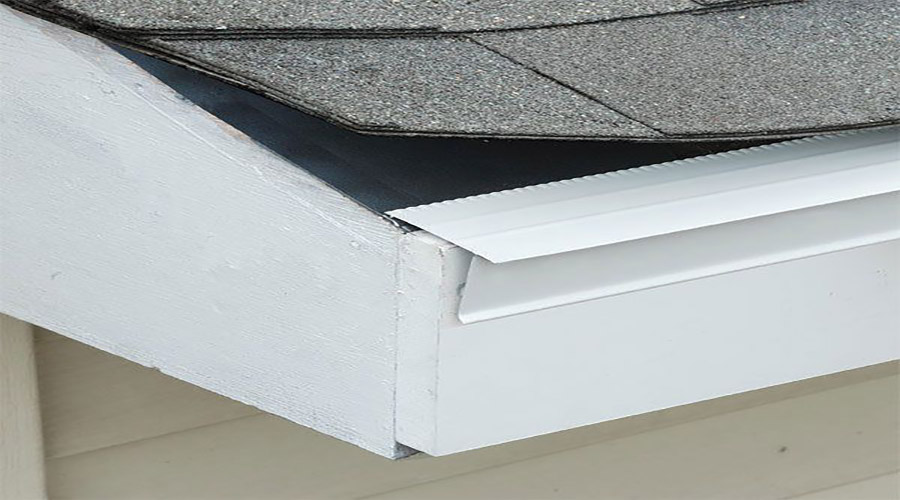
Does the Gutter go Behind the Drip Edge?
The gutter’s back wall should be directly underneath or behind your roof’s drip edge. A drip edge is a component that hangs over the roof and has an outward projecting lower edge, as shown in the image above. The drip edge keeps water from getting behind the gutter and rotting the soffit and fascia.
Should the Drip Edge be Tight to the Fascia?
It’s best to install the drip edge along the eaves first. You then add a 6-mil ice-and-water barrier (where required) or felt paper (underlayment) overlapping the drip edge. Any water that gets on the roof runs down the underlayment and over the drip edge.
How Far Should Shingles Overhang Drip Edge?
The edge of the shingles should extend more than 3/4 inches past the drip edge. This will help keep the shingles from blowing off in high winds, and it will also help keep water from seeping into rake or fascia boards.
Do You Have to Remove Gutters to Install Drip Edge?
Gutters are generally not removed during roof replacement unless damage has occurred to the eaves because of the gutter and flashing problems. Otherwise, new drip edge flashing can be installed without removing the existing gutters.
Conclusion
As we have seen, a drip edge is simply a piece of angled flashing installed on top of a fascia board. It helps to redirect water from the fascia into the gutters. The installation process is relatively straightforward. However, it would be best if you involved a qualified professional.