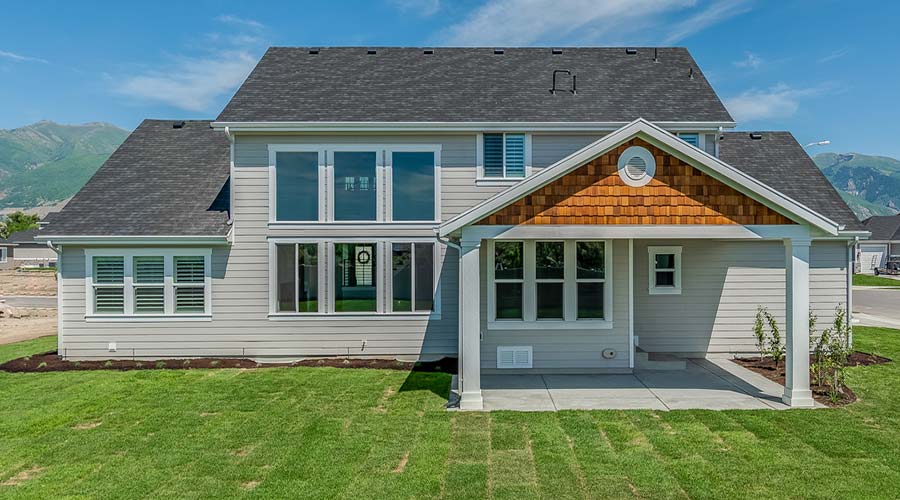
The small gable roof on the entrance of a house is part of the porch and is meant to give the building a sense of grandness, provide protection from the weather, and improve the house’s overall look.
Here are the steps I followed when I decided that it’s was time to connect a porch roof to my home. To connect a porch roof to your house, begin by:
- Building a support column to give your porch roof stability
- Attach the sill plate to the house
- Position the rafters on top of the sill plate
- Frame your porch roof
- Cover the rafters with sheets of plywood
- Choose a roofing material
- Install the roofing material of your choice
As long as you have some basic woodworking or construction skills and knowledge, it is possible for you to successfully attach a porch roof to the main top without much trouble. Let’s get right into it and take a more detailed look at how you might go about it.
What You Need To Know About Porch Roofs
While a porch is an extension on the entrance of a building and is meant to enhance its structural outlook, a porch remains a good place for the family to sit, relax and reminisce about the day.
Sometimes called a veranda, an attached porch with a roof is more structurally stable and robust than a free-standing porch. Connecting a porch roof to a house allows it to use the house roof and structure as a support to hold up some of the weight.
There are many different porch roof designs. Which one you should pick largely depends on the style of the rest of your home and your personal choice. Many attached porches have a pergola-style roof at a similar angle to the roof of the main house.
When making a decision, make sure to consider the space available to hold the porch roof and the style of your home’s existing roof. For the best resale value and look, make sure your porch roof goes well with the rest of your home and seamlessly blends into the main roof.
How Do You Attach a Porch Roof To a House?
Like when building anything else, you need a thorough construction plan before attaching a porch roof to a house. Make sure to explore all of your options before settling on a final design. Your final plan should include a list of all the tools you’ll need, detailed designs, and a project schedule.
All of this planning will help you stay on budget, know what’s next, and ensure you have all the tools you need on building day.
While in both the planning and building stages, it’s important to remember to have patience. Making designs and attaching a porch roof to a house is hard work, and the project may take two or three days, depending on your skills, tools, and workforce available.
A porch roof typically has the following parts:
- Rafters
- A Purlin
- Wallplates
- Ceiling joist
One of the steps that many inexperienced builders have trouble with is finding the right angle for the canopy. To help you find the ideal angle for your porch roof, consider the depth of the porch and the desired roof height.
Using these two measurements, along with the slope of the main house’s roof, you should be able to find a good slope for your porch roof.
Step 1: Prepare The Tools
Here is a list of common tools and materials that you will need for building a porch and attaching the porch roof to the house:
- Nail gun
- Level
- Square
- Tape measure
- Electric drill (preferably cordless)
- Wooden beams
- Rafters
- Planks
- Ledger
- Utility knife
- Lag bolts
- Black roofing felt
- Oriented strand board
Make sure all your tools work, batteries have a charge, and that you have plenty of materials and won’t need to make a mid-project run to the lumber or hardware store. Double-checking and ensuring everything is in order before starting the project will help save time and avoid preventable setbacks and headaches.
Step 2: Check The Location, Elevation, and Electrical Equipment
Before you start building anything, there are many things that you need to account for and consider. Below are a few of the things that you should check before getting started on building and attaching your porch:
- Determine the rise and run of the main house roof
- Consider the suitable roofing material to install the porch roof
- If we have an existing ground-level deck, connect the roof deck to it
- Check the electrical system and determine the requirements for electrical equipment like lights and fans
- Consider the location where we want to build the patio cover
You will have already accounted for most of these things, but it’s always good to go over them again right before beginning to work.
Step 3: Know Any and All Building Codes that Apply
Check all country, state, city, county, or neighborhood building codes or requirements before starting your construction work. Acquire all the necessary building permits before beginning construction.
Generally, your local building code office may require you to submit the building plan for approval. That’s why it’s wise to draw up your plan before starting to work on the project so you can have them more easily approved.
If your plan meets all the building codes and requirements in your area, you’ll get the green light to proceed with the construction work. If not, go back to the drawing board and make a porch design that meets all requirements.
Step 4: Build Support Columns
The next step is to build a support column to give your porch roof the needed stability.
For example, if you have a square porch, you’ll need support columns at the two corners farthest from the house. Use 2×4 studs to build a frame for columns that stand from the porch floor to the soon-to-be-built roof. Using L-brackets and concrete screws, brace the column in place.
After that, cover the column frame with siding, brick, or any outdoor material that matches the exterior of your home. Note that it is essential to select the right column design before installing them.
Step 5: Attach the Sill Plate to the House
The next step is to attach the sill plate to the house between the two side supports of the porch. The sill plate should sit flush to the top edges of the roof support columns.
Step 6: Position the Rafters On Top of The Sill Plate
It’s time to position the rafters on top of the sill plate. Joist hangers will make it easier to mount the rafters to the house.
Using screws, secure the rafters to the sill plate. When it comes to the positioning of your rafters, it will largely depend on the pitch of the porch roof.
You may decide to match the pitch of your home or have a more shallow roof pitch. If you go for the latter, you may want to use 2×6 lumber as rafters.
Step 7: Frame Your Porch Roof
Frame your porch roof by continually adding rafters until it extends one foot past your porch walls or support columns.
Now mount the fascia board on the front and the sides of your porch roof frame. A fascia is a roofing material that helps compensate when there are inevitable inconsistencies in rafter length. Hold it against rafters and hammer it in place with galvanized finish nails.
Step 8: Cover The Rafters
You can now cover the rafters with thin sheets of plywood. Hammer the plywood into the rafters until they’re secure.
Step 9: Pick Roofing Materials that Match Your Existing Roof
If you use a roofing design that matches the main house roof, it’s a good idea to use the same roofing material to make everything consistent and blend nicely.
Different roofing material functions best when installed at a specific pitch, so you should check with the manufacturer to make sure the pitch of your roof matches the manufacturer’s recommendations.
Step 10: Install The Roofing Material
It’s time to add your roofing materials to the porch roof, starting at the house and working your way out to the edge of the porch. It may be necessary to pull some of the shingles off the house to create a seamless pattern onto the porch roof.
Common Porch Roof Designs
Even though there are nearly unlimited options for designing the roof of your porch, the vast majority feature at least one of these three basic structural designs:
- Flat Porch Roof
- Shed Porch Roof
- Gable Porch Roof
Flat Porch Roof
As the name suggests, the flat porch roof extends horizontally over the porch. The structural integrity of the flat porch roof constitutes a post or pillar at each corner.
Flat porch roofs have a slight slope (about 5°) down and away from the house to allow water and snowmelt to drain off.
Adding a flat porch roof to your house can be a relatively inexpensive and straightforward project. However, the most critical issue is to ensure that the joint between the new porch roof and the house roof is waterproof.
Even though a flat roof might be your preferred choice, you should note that they are more susceptible to leaking than the other designs on this list.
Shed Porch Roof
This is the simplest form of porch roof to construct. Additionally, it’s the easiest to connect with an existing house roof. It is a single, flat plane that connects to the side or roof of your house and then slopes down over the porch.
Gable Porch Roof
This type of porch roof features a triangle-shaped front view, with sides sloping down from a ridged peak. It’s one of the most challenging porch roofs to connect with the house compared to the flat porch and shed porch roof.
You should note that it is also more invasive to the existing house roof than are other types of porch roofs.
The upside of a gable porch roof is that it requires less maintenance than the other two types of porch roofs. Additionally, it adds a sense of spaciousness to the porch that the other designs don’t provide.
What Holds Up A Porch Roof?
Support columns and rafters give porch roofs structure, while the main roof can support some of the weight and help balance everything out.
Whist the roof of the porch is attached to the fascia of the main roof, the ceiling joist beams hold up the top of the porch and distribute its weight garnered from the several joist beams and the rafters that evenly across the board.
The ceiling joist is one of the most critical beams in constructing the structure that forms the roof. A ceiling joist the beam or beams run horizontally across the base of the roof.
Every roof goes for the size of the beam that best suits the size and design of the roof, but mostly ceiling joist comes in six by two frames as these are big enough to support nearly all roofing materials.
Ceiling joists provide the following benefits and functions:
- Most importantly, it provides the base on top of the vertical posts on which the whole roof and all the roofing materials will be constructed.
- It also provides the base upon which the diagonal rafters give the roof its shape and determine the angle or pitch of the roof to originate from.
- Several beams and rafters form the outline of the porch roof sitting up there and roofing materials that are yet to come.
One would be worried about all that weight but not in this case as the ceiling joist beams hold all that up and distribute it, so no one side is overloaded.
What Is a Porch Roof Called?
The porch is noticeable with a small roof of some sort on the entrance of a house. With so many different people and places in the world, porch roofs go by many different names, including:
- Porch roof
- Canopy
- Portico
- Awning
- The eaves
- Overhang
When you look up these names, they all explain almost the same thing but with slight variations.
Porch Roof
As the name sounds, a porch roof is the natural intonation of a top belonging to a porch. Not rocket science, right?
The roofs of most homes (even older ones) are set on gable shapes, and a porch of the same design blends well with the original roof.
Aside from gable roof designs, other styles of porch roofs include:
- Hip roofs
- Shed roofs
Canopy
A canopy is described as an overhead roof structure made from glass, metal, or plastic constructed at the entrance of a building and helps direct people toward the entry of a building.
The canopy structure does not allow people to sit leisurely but acts only as a guide to a hallway.
The canopy’s primary intent was to provide shelter from the sun and the rain, plus provide aesthetic features to a building.
Portico
A portico is a structure by itself with a unique roof identified by columns arranged at precise intervals. An entrance also serves as a porch to a building and is known for other names such as;
- Porch
- Veranda
- Balcony
- Terrace
- Patio among others
Awning
The frame positioned on top of a window or door is covered on top mostly by canvas for the larger purpose of providing shelter, shade, cover, or protection from too much sun and rain.
Another name that correlates well with an awning is a canopy.
The Eaves and the Overhang
The eaves are an extension of the roof that reaches further than the edge of the porch to throw rainwater away from the building. The primary purpose of the eaves is to protect the walls of the building from the rain and shield it from the sun.
Eaves also elevate the look and status of the building, as most roofing eaves are extremely stylish and add an extra flair to the architecture.
Final Thoughts
The roof of a house always serves as the face of a building because that is the part people first notice and focus on. Their perception of the entire building is dependent on the state of the roof.
The roof of the porch, by default, becomes an extension of the main house and roof because it is located directly at the entry point of the building. At a distance, the porch roof is one of the first things you see before the rest of the roof and walls of the house come clearly into view.
All this shows that the roof of a porch is an important aspect of the house, and you should pay special care when constructing it. The porch roof is not only a structure to shade the porch from the weather, but an extension of the house.