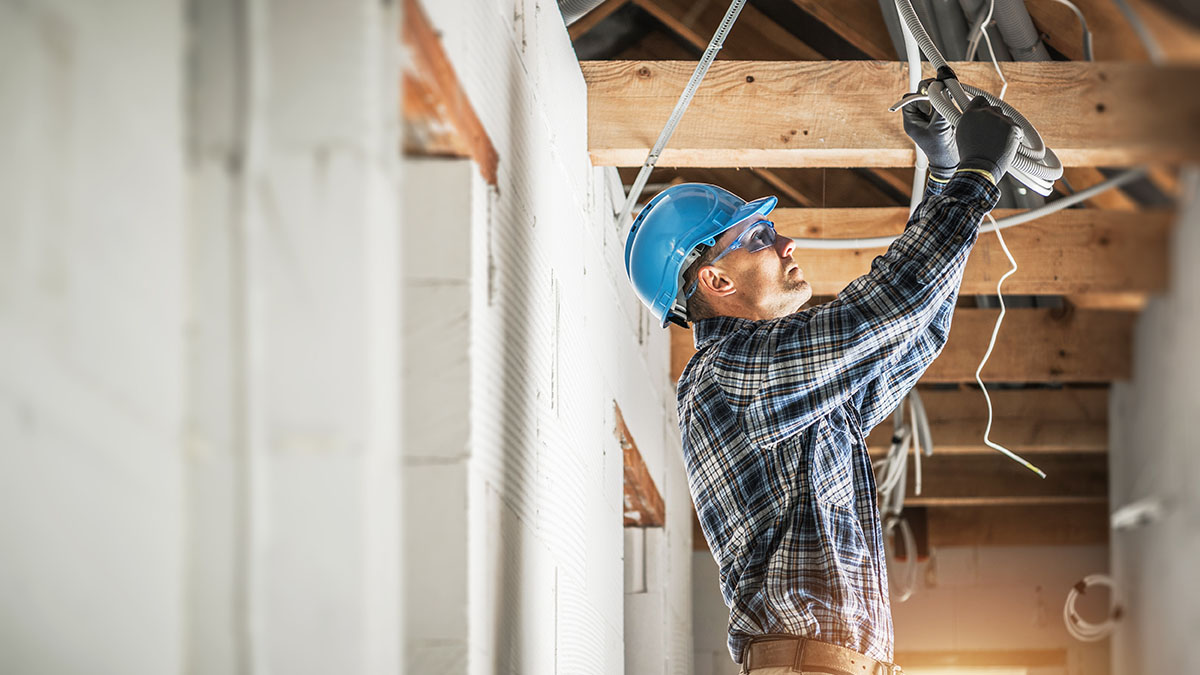
It can be frustrating when an electrical outlet or multiple electrical outlets suddenly stop working in your home. While it’s true that electrical outlets can fail, it’s rare. It’s very likely a simple repair. Don’t call an electrician just yet. In this article, we will help you troubleshoot why your electrical outlet or outlets aren’t working.
So, why have your electrical receptacles stopped working?
The most common reason that an electrical outlet or multiple electrical outlets stop working is a tripped AFCI/GFCI outlet or circuit breaker. Standard circuit breakers can also trip if the circuit has been overloaded. Other reasons include outlets that are switch operated or bad receptacles caused by faulty electrical wiring.
This article will help you troubleshoot why your single electrical outlet isn’t working or why multiple electrical outlets in your home don’t work. We will dive deep into each reason to help you get your electrical outlets back working again.
We will troubleshoot the six reasons why electrical receptacles stop working as follows:
- Tripped AFCI breaker – If your home has been built or remodeled since 2000, you may have a tripped AFCI circuit breaker or receptacle.
- Tripped GFCI outlet or breaker – If your home has been built or remodeled since 1980, you may have a tripped GFCI circuit breaker or receptacle.
- Circuit breaker tripped due to overload – If you have too many devices or appliances plugged in, you can overload the electrical circuit, causing the breaker to trip.
- Switch operated electrical outlets – Older and newer homes can have single outlets or multiple outlets operated by a wall switch.
- Loose or faulty wiring – If you have loose wiring connections, faulty wiring, or old ungrounded wiring in your home, it can overheat, causing circuit breakers to trip continuously or damaged outlets.
- Bad electrical receptacle – You could have a bad electrical outlet or have an outlet that is wired incorrectly. This can damage the electrical outlet.
If these terms seem foreign to you, we will explain them in more detail. We will be diving into more detailed explanations of the most common reasons why electrical outlets stop working. So let’s get started.
Before we get started, let’s verify the outlet does not have power. To check the outlet, plug another device or lamp into the outlets to confirm the outlet does not have power. If you still don’t have power, let’s continue below.
Tripped AFCI Breakers
Arc fault circuit interrupter (AFCI) protection has been growing in homes built since 2000. Today, in most areas, every room in a new home has to have AFCI circuit breakers to meet building codes and receive a certificate of occupancy. The problem is AFCI breakers are prone to what is known as nuisance tripping.
Nuisance tripping occurs when the flow of electricity through the circuit is less than its suppose to be. This causes the breaker to trip. AFCI breakers have a built-in sensor that monitors the flow of electrical current through the circuit. When even a subtle change occurs in the electrical current, the AFCI breaker will trip.
How To Fix Tripped AFCI:
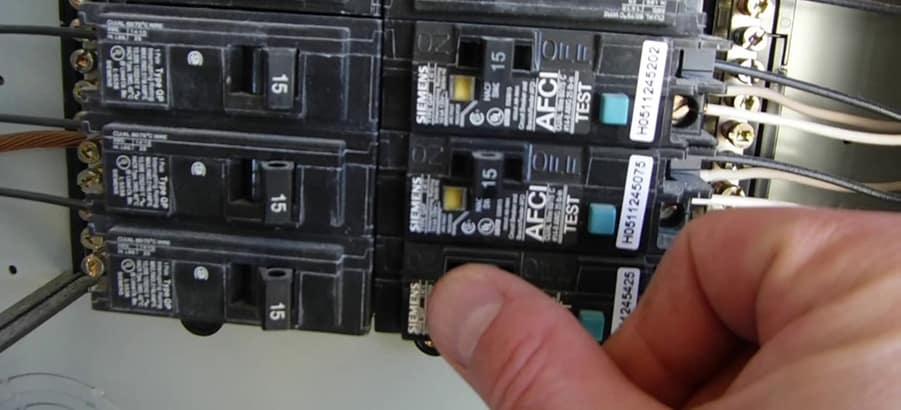
- Check the AFCI breakers located inside the electrical panel box to see if any have tripped. AFCI breakers will be labeled as such and will have a “Test” button. The lever on a tripped AFCI breaker will be in the center position and will not be fully engaged in the “On” position.
- To reset the AFCI breaker, flip the lever fully to the “Off” position then back into the “On” position.
- If the breaker stays engaged, recheck your outlets by plugging in a lamp or other device. If your outlets are now working, your repair is complete.
- If the breaker doesn’t stay engaged, you likely have a bad AFCI breaker that needs to be replaced. Replacing an AFCI breaker isn’t too hard. However, this may not be the source of the problem. It is a good idea to call a licensed electrician for further examination and repair.
If your breaker stays engaged but then trips frequently, you could be overloading the circuit. Think about what you have plugged into the circuit routinely or what you are routinely doing when the breaker trips. Vacuums are notorious for tripping AFCI circuits due to the amount of electrical current used.
Tripped GFCI Outlet or Breaker
Ground-fault circuit interrupters (GFCI) are electrical outlets designed to immediately trip when ground faults occur to stop the flow of electricity to prevent electrical shock. GFCI is located in wet areas such as bathrooms, kitchens, garages, exterior, laundry rooms, etc.
Much like AFCI protection, GFCIs have a built-in sensor that monitors electricity flow through the circuit. When a ground fault occurs, the GFCI will trip and stop the electricity flow through the circuit, causing other outlets downstream from the GFCI also to lose power. We will troubleshoot GFCI outlets first, then GFCI breakers.
How to Fix GFCI Outlets:
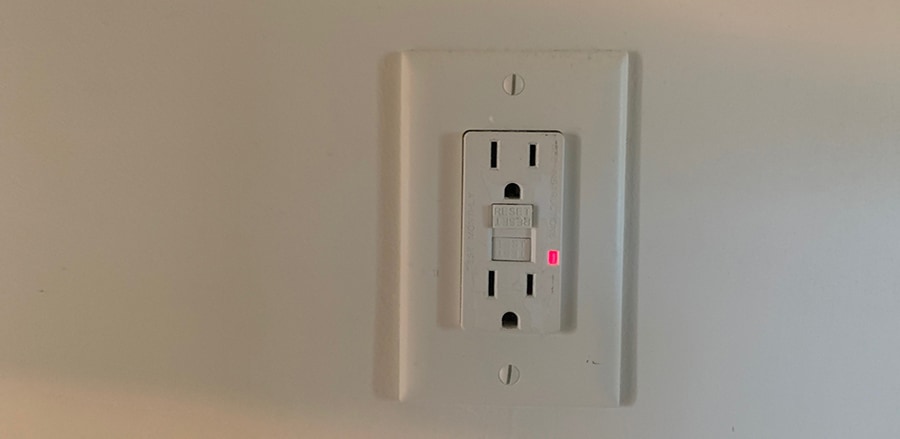
- Locate and check the GFCI outlets to see if the outlet has tripped. Newer GFCI outlets will have a blinking red light when tripped. Older GFCI outlets could have a flashing yellow light. Some of the first GFCI outlets do not have indicator lights, only the “Test” and “Reset” buttons.
- On all GFCI outlets, if tripped, the “Reset” button will be popped out. If tripped, press the “Reset” button to engage the outlet.
- If the outlet stays engaged, recheck your outlets by plugging in a lamp or other device. If your outlets are now working, your repair is complete.
- If the outlet doesn’t stay engaged, check any other GFCI outlets and your panel box for GFCI breakers. Occasionally in some homes, I’ve seen multiple GFCIs on the same circuit, which will prevent a GFCI outlet from resetting. When this happens, one GFCI won’t reset until the lead GFCI has been reset first. So check all GFCIs before calling an electrician.
- If the GFCI RESET button still doesn’t engage, you likely have a bad GFCI outlet, and you should replace the GFCI outlet. You can follow the outlet replacement instructions below or call a licensed electrician for further examination and repair.
How to Fix GFCI breakers
Some homes have GFCI breakers instead of GFCI outlets.
- Check the GFCI breakers located inside the electrical panel box to see if any have tripped. GFCI breakers will be labeled as such and will have a “Test” button. The lever on a tripped GFCI breaker will be in the center position and will not be fully engaged in the “On” position.
- To reset the GFCI breaker, flip the lever fully to the “Off” position then back into the “On” position.
- If the breaker stays engaged, recheck your outlets by plugging in a lamp or other device. If your outlets are now working, your repair is complete.
- If the breaker doesn’t stay engaged, you likely have a bad GFCI breaker that needs to be replaced. Replacing a GFCI breaker isn’t too hard. However, this may not be the source of the problem. It is a good idea to call a licensed electrician for further examination and repair.
Circuit Breaker Tripped Due to Overload
When an electrical outlet loses power, one of the most common reasons is a tripped circuit breaker. In older homes, it’s not uncommon for multiple rooms to be on the same circuit. This can make it easy for circuits to become overloaded, causing the circuit breaker to trip.
One of the ways an overload can occur is using multi-plug adapters on electrical outlets. Multi-plug adapters can allow upwards of 6 or more receptacles where only 2 outlets exist. This is often done because older houses don’t have enough outlets in certain rooms. If you lose power to your outlets, let’s check the circuit breakers.
If your electric box has no empty breaker slots, it may be time to consider an electrical panel upgrades.
How to Fix a Tripped Breaker:
- Check the breakers located inside the electrical panel box to see if any have tripped. The lever on a tripped circuit breaker will be in the center position and will not be fully engaged in the “On” position.
- To reset the circuit breaker, flip the lever fully to the “Off” position then back into the “On” position.
- If the breaker stays engaged, recheck your outlets by plugging in a lamp or other device. If your outlets are now working, your repair is complete.
- If the breaker won’t stay engaged, you likely have a bad circuit breaker or an electrical wiring issue and should call a licensed electrician for further examination and repair.
Overloaded circuits can be a fire hazard and are unsafe. When an electrical system gets overloaded, there is too much current passing through one circuit. This can also result in the melting of the wires, which can lead to an electrical fire.
Try to unplug all devices plugged in and then switch the breaker “On” again. If everything works fine, you can probably use it without a problem. If the problem persists, get an electrician to check your electric systems, they might have started to deteriorate due to constant or repeated overloading.
Switch Operated Outlets
This is one of the overlooked reasons that electrical outlets don’t work. Many homes have switch-operated outlets in some rooms, commonly known as a lamp outlet in rooms with no overhead lighting, and the switch would allow you to control lamps via a wall switch.
In older homes, the entire outlet may be off if the switch is off. The lower receptacle will have constant power in newer homes, and the upper outlet has switch-operated power. New homes do this to meet the electrical code requirements when builders do not provide overhead lighting fixtures.
How to Fix Switch-Operated Outlets:
If one or more of your outlets is not working, check all the wall switches nearby to verify they are in the “On” position. The switch controlling the outlet should be within eyesight of the receptacle. You’ll often find that switch-operated outlets are installed with the grounding prong on the top, making the outlet appear to be upside down. However, this is not always the case.
Loose and Faulty Wiring
Working with electricity is dangerous and can be deadly. Do not attempt to work on an electrical outlet without turning the electricity off at the breaker first and confirm power is off with a voltage detector or multi-meter.
After going through the above troubleshooting steps and your outlets still don’t work, there’s likely a problem with a loose wire or faulty wiring. We do not recommend any homeowner examine their electrical wiring. Examining electrical wires requires removing the outlet to examine the connections and be done by a licensed electrician.
With that said, examining the outlet is not too difficult and can be done if you’re handy.
How to Fix Loose Wire Connections
- Before we begin, be sure to turn the circuit breaker OFF.
- Use a flathead screwdriver to remove the outlet faceplate and remove the screws that hold the outlet in place.
- Pull the outlet straight out from the junction box far enough to see the wire connections.
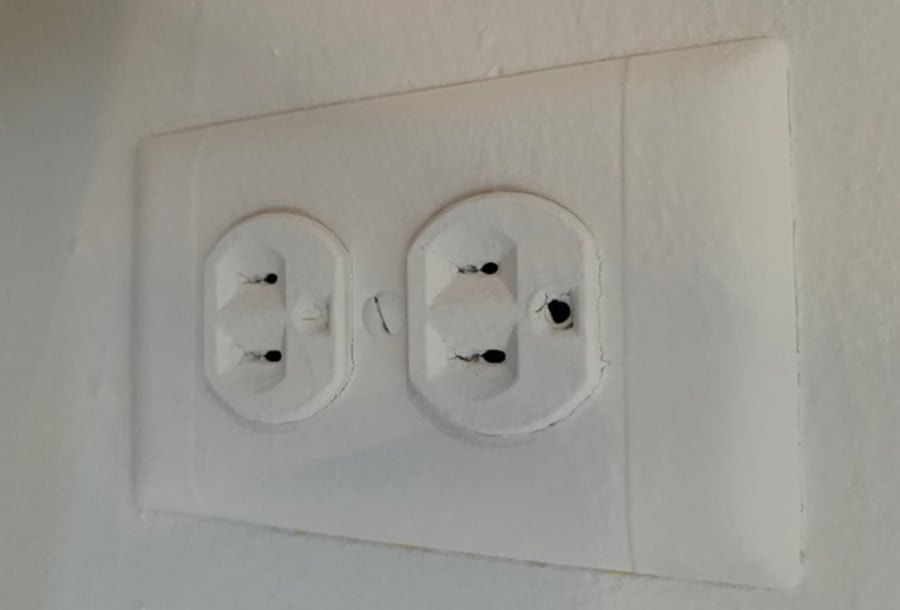
- Look at the ends of the wiring and verify the wiring is firmly attached to the outlet. Do you see any burn marks on the sides or back of the outlet? Do you see any charring or melting on the wiring? Loose wire connections will always create overheating that can damage the outlet. This is true for both screw terminal or stab-in connections.
- If so, the electrical outlet needs to be replaced. This is a good time to call in an electrician. However, if you’d like to replace the outlet yourself, see the instructions below.
How to Replace a Bad Electrical Outlet
Once you’ve completed the troubleshooting steps above and confirmed that the electrical outlet is bad, it’s time to replace it. We confirmed the outlet was bad because:
- the GFCI outlet will not reset
- there was electricity to the outlet, but the outlet doesn’t work
- there are burn marks on the outlet or connections
- there was melting on the wiring at the connection joint
Removing and Inspecting the Electrical Outlet
- Turn the breaker to the room you are working on “OFF.” If you aren’t sure which breaker to turn off, switch off the main disconnect off, or if you don’t have a main disconnect, turn off all the breakers until you finish working on the outlet. You can also use a voltage detector or a multimeter to confirm the power is off.
- With a flathead or Phillips head screwdriver, remove the old outlet by disconnecting the black “hot wire” first, then the white “neutral wire,” and finally, disconnect the bare copper ground wire.
- If the wires’ ends are clean with no melted sheathing or charring, proceed with installing the new electrical outlet.
Installing a New Electrical Outlet
- To install a new electrical outlet, loosen the side connection screws to enough to receive the wires. Bend the wires to form a hook and place the wires on the correct terminals.
- Connect the black “hot wire” to the brass screw, the white “neutral wire” to the silver screw, and the bare ground wire to the green ground screw.
- Place the wires on the terminals clockwise to hook screws and then tighten.
- If the electrical outlet had two hot black wires and two neutral wires connected, create a pigtail connection by connecting the like-colored wires and a third six-inch length of like-colored wire under a wire nut connector. This reduces the chance of a loose connection in the future.
- Bend the pigtail wires to form a hook and place the wires on the correct terminals outlined above.
Inspect and Repair New Stab-in Connections
Many electricians use the stab-in connections on the back of the outlet to connect the wires. While this is an approved method, it can cause wires to come to loose easier, leading to problems later.
- Check to see if the stab-in connections are tight by gently pulling on each wire on the back of the outlet.
- If you find a loose stab-in wire connection, remove the wire fully and strip a new connection at the end of the wire.
- Using the method outlined above, remove each stab-in connection and secure the wiring to the side screw terminals.
If your home has aluminum wiring, do not attempt to repair it yourself. Aluminum wiring has a dull gray color and is known to expand and contract with heat causing loose connections. Call in a licensed electrician to thoroughly examine the electrical system and make any repairs.
Check Your Work
- Check all your connections by tugging on the wires to be sure they are tight.
- Verify that the black wire is secured to the gold screw on the side of the outlet. Verify the white wire is securely connected to the silver screw on the other side. Verify the bare copper wire attaches to the bottom of the outlet. If loose wires are present, reposition the wires under the correct screw and tighten them in place.
- Return the outlet to a secured position and replace the faceplate before turning the breaker back on to test the outlet.
- Turn the breaker back on to test the outlet by plugging in a lamp or small electrical device. If you have power to the outlet, you’ve completed the repair.
- If the breaker stays engaged, but the outlet still doesn’t work, turn the breaker back off and continue troubleshooting. If the breaker trips immediately after you turn it back on, there’s a fault somewhere in the wiring connections, and you should contact a licensed electrician for repair.
In Closing
I can’t state it enough that working with electricity is dangerous. You can discover why your outlets don’t work and fix the problem by taking the proper precautions. If you are unsure or lack technical confidence, we can help you find a licensed electrician to get your outlets working again.