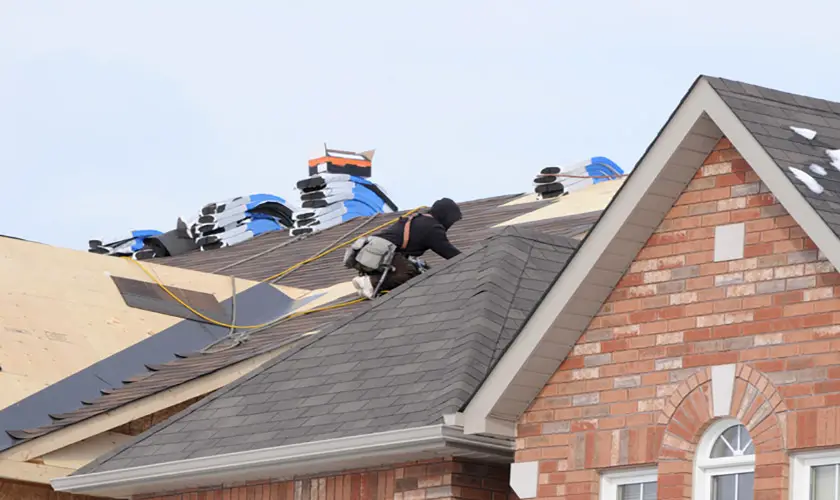
Roofs come in all slopes and angles. Besides the risk of harsh weather during roofing, there is also the added risk of slipping and suffering a horrendous workplace injury. However, there is a solution. Roof jacks will not only improve your accuracy in roofing, but you will also have a safe stepping ground during your work.
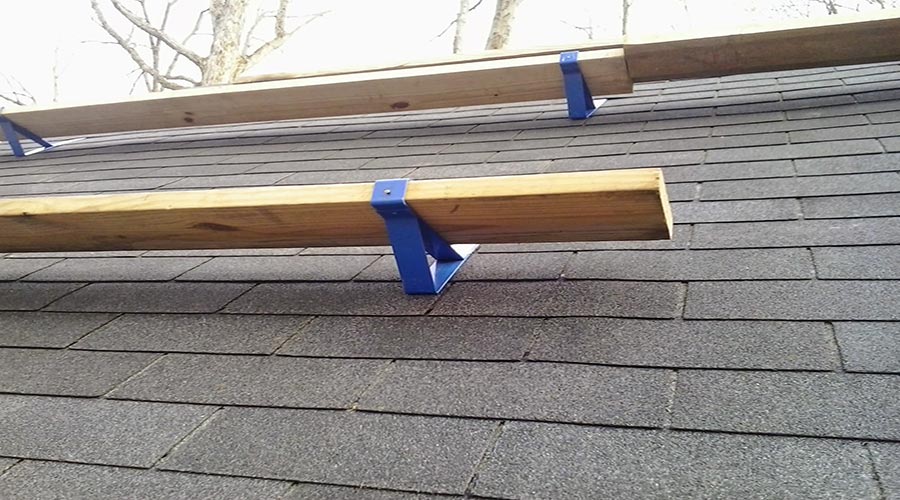
Roof jacks are metal devices designed to create a stable platform while working on roofs. They are J-shaped on the long end and curved on the other for easy installation and quick removal. They provide the roofer with foot support and a stable anchor for additional tools such as a roofing ladder.
There are two kinds of roof jacks. There are roof jacks that prevent water from dripping into the house through roof leaks, and there are roof jacks used as a safety, support, and leverage tool by roofers.
In this article, we will be looking at the safety roof jacks, their installation, and how to use them.
How Do Roof Jacks Work?
Roof jacks provide a stable platform to step on without slipping on the slope of a roof. Ideally, you should set up individual roof jacks spaced equally across the roof area you intend on working. Once all the jacks are secure, you should place a stable wooden plank to support your weight and movement.
Roof jacks are adjustable. They have holes that can give your feet a better angle to leverage. This is usually in response to the slope of the roof. It is also a way to use a wider stepping plank in case you need one.
You nail down the wide flat attachment strap of the roof jack to the underlying roof framing. Space out a comfortable section and nail down another roof jack parallel to the first. The roofing jack is installed at the lowest level of the roof to provide a safe starting point as you ascend the roof slope.
How Do You Jack Up A Roof?
1. Pre-install The Roof Jack
When you start your roofing, get a ladder to get you high enough to the roof surface.
From the edge, count about five rows of the roof shingles. This is where you’ll place the first set of roof jacks. Lift the sheathing to locate the rafter line. The rafter holds the nails in place and reduces damages to the shingles.
2. Secure The Jack And Nailing
Secure the first roof jack using the attachment strap. Nail down the attachment strap on the board with 16d nails.
(Please don’t use roofing nails)
The attachment strap has three holes. Nail down each of them on the same rafter line for more stability. You can angle the nails to mirror the roof’s slope such that the roof jack is resting on the bottom of the nail head.
How you nail the roof jack is crucial to your safety. The nail’s head needs to be flat on the jack’s attachment strap. Make sure your nail’s head is as close as possible to the top of the teardrop of the roof jack. Otherwise, you risk the nail not being secure enough to hold the jack.
The first nail holds the roof jack into the rafter so that the other three nails are only for additional support.
Space out the next roof jack by about 4 feet. Install it like the first one. You can install the next roof jack moving upwards.
3. Place The Board
Place a sturdy board on the J-end of the roof rack. 2×8 or 2×10 boards are the best boards to use with roof jacks. They provide enough surface to move across, and they are strong enough to hold your weight. Depending on the size of your roof jack spacing, get a board that leaves a 6-inch overhang on each side.
The board should fit the curved end of the roof jack. The curved end has a hole. Drill a nail into it to secure the board to the roof jack. Be gentle with the hammer when you prop the roof jack.
4. Remove The Roof Jack
Hammer the jack upwards so the nail shaft moves to the broader section of the jack hole.
Hit the nail to sink it such that the head is completely flat against the roof. Pulling out the nails will damage the roof.
Pro Tip: Install scrap shingle between the roof jack attachment strap and the roof shingle. Pieces of wood-siding shingles also work to prevent damage from nails and scratches on the roof.
How Many Roof Jacks Should You Install?
The angle of the roof determines how many roof jacks you should install. A 45-50 degree angle roof needs about three roof jacks going up. Length-wise, you should space out the roof jacks by at least 2 feet. Spacing them too far apart stretches you out while you work, increasing your risk of falling.
When Do You Need Roof Jacks?
You don’t need roof jacks for all your roofing projects. Some professionals can walk on roofs if the roof isn’t steep. For instance, a 4/12 slope roof doesn’t need a roof jack. The 4 inches represents vertical rise, while the 12 represents horizontal run.
However, even if you are a professional roofer, consider using roof jacks every time. You can avoid workplace injury and disability using that simple tool.
Extremely angled roofs such as church roofs and some residential roofs have a 10/12 slope.
These roofs need different roof jacks.
Types Of Roof Jacks
| Type of Roof Jack | Roof Steepness |
|---|---|
| 45-Degree Roof Jack | For 3/12 to 6/12 slopes |
| 60-Degree Roof Jack | For 6/12 to 16/12 slopes |
| 90-Degree Roof Jack | For 10/12 and above slopes |
| Slate Roof Brackets | 33-55 degree roof angle |
The 45-Degree Roof Jack
This is a great roof jack if you are working on a roof with a gentle slope. Any slope starting from 3/12 to 6/12 is befitting for this roof jack. One of its perks is that it’s adjustable. It has four bracket holes for each of the four welds for better adjustment. They are made from high-grade steel to support the weight of the roofer.
The 60-Degree Roof Jack
These roof jack brackets are appropriate for roofs with a 6/12 slope up to 16/12 slope. They are made from 1/4 “steel that provides enough support for various weight classes. These need 16d nails to secure them firmly on a roof.
The 90-Degree Roof Jack
These brackets can hold a 2×6 board at a 90-degree angle to the roof. You might want to bring out these if you are working on an extremely steep roof such as a 10/12. They are also adjustable by up to 3 slots.
Slate Roof Brackets
These are the brackets you bring out when you have 2×12 planks. The key advantage of using slate roof brackets is they are suitable for a 33-55 degree roof angle.
How Do You Use Roof Jacks On An Existing Shingle Roof?
You can use roof jacks on an existing shingle roof without removing all the shingles. You’ll need extra shingles to prevent damage when nailing down the roof jacks.
This is how to put roof jacks on an existing shingle roof:
- Climb up your ladder to the nearest rafter line. You can see the rafter nail when you look at the long side of the roof. This is your first line to set up the roof jack.
- Place the roof jack where you intend to nail it. Lift the shingle that is closest to where the first nail goes. It’s best to remove it carefully using a flat tool, so you don’t damage it.
- Nail the roof jack on the rafter line. Once all three nails are in, you can snip the shingle according to the size of the jack — usually about two inches — to cover the roof jack. This is optional since you can replace the removed shingle.
- Place a spare wood board at the back of the roof jack to prevent any damage to the underlying shingle when you remove the jack.
- Nail the roof jack using 16d nails on the narrowest part of the roof jack’s teardrop. Ensure the head of the nail lies near the surface of the bracket. Test out if the jack is moving. Nail down the other nails.
- Align the next roof jack on the next rafter line. Make sure they are on a straight line between 6 and 8 feet apart. Otherwise, your board will have a lean when you install it.
- Place your board and nail it through the hole on the J-curve end of the roof jack.
- Hammer the roof jack upwards to remove the jack through the broader part of the roof jack teardrop.
- Nail down the 16d nail into the rafter.
- Replace the shingle and nail it with roofing nails.
However, these steps might be different during cold weather. Unlike during hot weather where the shingles can bend, cold weather makes roof shingles vulnerable to cracking. You have no choice but to nail the roof jacks right into the shingle.
- Take an extra piece of shingle (shingle scrap) and place it below the roof jack. Nail the roof jack as you would – on the roof rafter.
- However, pull the nails after removing the roof jacks. Cover with roof cement-coated metal flashing the area you had nailed. This covers the holes and prevents leakage.
- On the shingle’s holes, apply dollops of cement.
- Scrape the shingles for color granules and apply them to the shingle holes. Let them dry with the cement. You’ve just covered the damage on the shingles and restored the color pattern.
Can You Use Roofing Nails For Roof Jacks?
You should never use roofing nails for roof jacks. Roof jacks are installed using 16d or 10d nails. Roofing nails are made to go deep into the rafter and nail the roof, leaving no gaps when shingles overlap.
There are three reasons you can’t use roofing nails.
Height
Roofing nails are short. Since roofs and shingles are usually not thick, roofing nails are short enough to go into the rafter and nail the roof into place. You need at least 3-inch sinker nails to hold the roof jack and support the roofer’s weight.
Small Diameter
Roofing nails are made to cause as little damage as possible to the rafter and the roof. Therefore, they come in a smaller diameter. Thin nails cannot support the roofer’s weight for a long time. Even when they’re driven into the rafter completely to the hilt, they might bend during hammering on when the roofer walks on the board.
Light Heads
While a wide head is best to cover a large surface for roofing, it is not the best for roof jacks. Roof jacks require a strong head that will support the roof jack. Roofing nails’ heads pop off easily to be safe for roof jacks.
Roof Jack And Roofing Precautions
- Don’t install a roof jack and work on the roof when it’s too hot, windy or when the roof is wet. Extreme hot weather softens and sometimes weakens shingles. Wet roofs have the added hazard of slipping even when you’re standing on a board.
- Use appropriate rubber-sole shoes to maintain a firm foothold on the board.
- Avoid using weak boards. 2×6 and 2×10 wood boards are suitable for use with roof racks.
- Once installed, the roof jack cannot be moved or adjusted horizontally. Therefore, make sure you have all your measurements correct before you start.
- Unless you are a professional roofer, stay off roofs that are too steep.
- Make sure there are no weak spots on your roof jacks. Rusty roof jacks might endanger your work. Clean them immediately you notice rust spots.
- Never drop roof jacks from the roof or high places when you’re done. It could damage the bracket.
Final Thoughts
Roofing is risky when you don’t have the right tools. Roof jacks are a low-cost investment that you can get for as low as $10. If you are a professional roofer or you’d like to do roof maintenance as a DIY, roof jacks are some of the tools you should have in your garage.
Always call a professional roofer to fix your roof issues with the proper safety equipment.