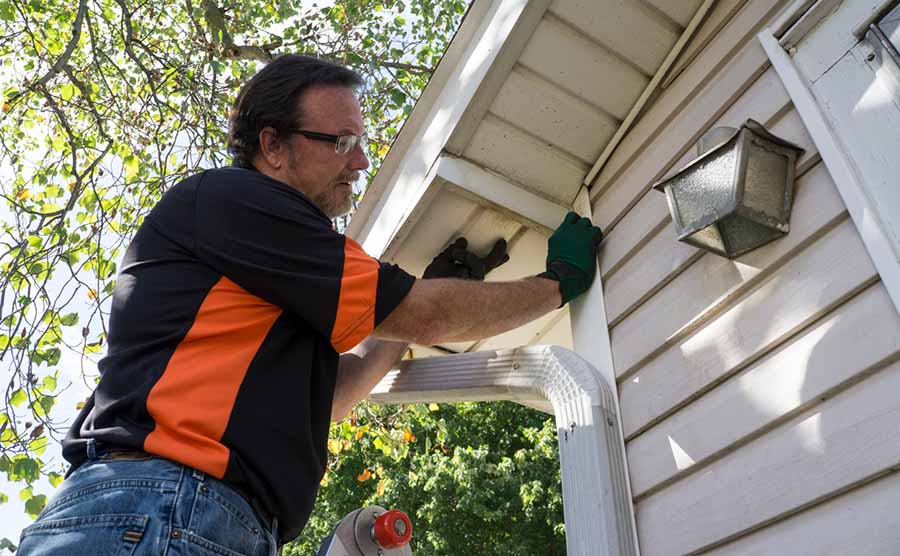
J-Channels are valuable pieces of vinyl siding securers. You will not only hang the siding from J-Channel, but you will also use it to steer runoff from rain and other precipitation. Without using J-channel, you cannot hang siding effectively. You will trap moisture between the siding and your drywall, which will lead to moisture damage.
Ideally, it would be best to not put J-Channel at the bottom of your siding. Its primary functions are to mount siding and direct runoff away from the siding. J-Channel comes in multiple sizes. The size of the face is relevant to aesthetics. Finally, you can cut J-Channel to any size you need.
Read on to discover everything you need to know about J-channels.
Do You Put J-Channel at the Bottom of Vinyl Siding?
You will primarily use J-channel around windows, doors, soffit, fascia, and walls. It would be best if you do not use J-channel at the bottom of your siding because it will trap moisture in the track of the channel, which will lead to moisture damage.
If you already have J-channel at the bottom of your siding, then you should drill ¼” weep holes every 24″ so that the trapped moisture can escape from the channel. You definitely should not use J-channel where the siding meets the foundation.
Instead, it would be best to use a metal starter strip, but this requires a whole piece. Some contractors will not do this and use J-channel instead to line the siding up and make it look even.
If you decide to use J-channel on the bottom of your siding, you should follow these steps:
- Measure the distance between the wall and the farthest edge of the J-Channel
- Slide the vinyl into the vertical J-channel
- Fully extend the vinyl panels
- Level the piece of vinyl
- Mark where the vinyl should be
- Measure the horizontal J-channel
- Mark where the horizontal J-channel will be
- You may need to remove a ¼” from each side of the J-channel, cut on a 45-degree angle, which will allow the J-channel to expand and contract during extreme temperatures.
- Put the J-channel along the line you marked and into the vertical J-channel.
- Use a 1-¼” exterior screw to secure the horizontal J-channel, starting from the center of the center gap in the J-channel.
- Wiggle the horizontal J-channel to ensure that it has some room for expansion
- Drill the centers of the holes that are 8″ from the center gap of the J-channel in both directions
- Ensure that the J-channel can wiggle
What is J-Channel Used For in Vinyl Siding?
J-Channel is used to mount siding and a small gutter for water runoff. You can use J-channel to mount siding on corners, where the siding meets the ground and the roof, and around windows and doors.
Complete the corners first when using J-channel. Follow these steps to use J-channel around corners::
- Measure from the bottom of the ground to the top of where the corner ends
- Leave about ⅛” on the top and bottom, so the piece has room to expand and contract
- Cut the corner J channel and stand it up on the corner at a 90-degree angle
- Manipulate as needed to make both sides of the corner look plumb
- Place a nail in the corner piece, adding a pin every 16 inches
- Ensure that the siding can wiggle and expand but is also tight against the corner
Start at the bottom of the siding meets the ground and work up. Beginning the process at the bottom instead of the top or side will prevent the J-channel from taking on moisture. The bottom piece could gather water if you started in the middle. Follow these steps:
- Cut it and lie it horizontally at the bottom next to the vertical corner piece
- Nail the same way you would as a corner J channel, every 16 inches
- Ensure that siding can wiggle and expand but is also tight against the side of the house
- If needed, use another piece of J channel to complete the horizontal.
- Place this piece of J channel as close to the other horizontal J channel as possible and nail it into place the same way as the first one was
Then, first put down the starter strip in areas where the siding meets the roof. Some professionals prefer to use left and right-hand kick-out J-Channel for the left and right corners of the top of the house. However, other professionals prefer a piece called a J’d Out Kickout.
Regardless of which piece of J-channel you choose to use, follow these steps after you put the starter strip down:
- On the left corner, use a left-hand kick out J-channel or a J’d Out Kickout
- Align the bottom channel on the J’d Out Kickout with the edge of the drip
- Put one nail through the roof to hold it in place
- Cut the shingles tight to the J’d Out Kickout
- Tape the kick out to the roof
- Run J-channels into the pocket of the J’d Out Kickout by running them under eaves
If the J-channel diverts runoff from the rain into the gutter, you have installed the J-channel correctly.
To put J-channel around windows, start from the bottom and work up. Follow these steps:
- Cut the J Channel at the entire width of the window
- Place the J Channel against the windowsill and nail in place, ensuring room for the piece to move slightly and expand
- For the sides of the windows, measure down to the J-channel under the windowsill
- Make a relief on the left side, bend the cut part back, and cut it off. Making a relief allows the siding to hang from the side
- Make a relief on the horizontal piece going across the top of the window, but do not remove it
Finally, to set up J-Channel around doors, follow these steps:
- Put the J-channels around the door as you would a window
- To fit the siding, cut to where it will fall inside the J-channel
Remember that without J Channel, it is impossible to hang vinyl siding.
How Wide is Vinyl J-Channel?
You primarily measure J-channel by the width of the face. J-channel comes in standard, lineal, and flexible sizes. Here are the measures of the three channels:
| Type of J-Channel | Face Width | J Opening | Notes |
|---|---|---|---|
| Standard | 1″-2-½” | The J opening could be from 0.5″ to 1.5,” but you usually use a ¾” or a ⅞” gap | 1-¼” or 1-½” J openings are on foam paneling |
| Lineal | 3-½” to 5″ face, | The J opening could be from 0.5″ to 1.5,” but you usually use a ¾” or a ⅞” gap | |
| Flexible | ¾” J opening. | Usually used to line round windows |
How Long is J-Trim in Vinyl Siding?
J-trim can be from 47.7″ to 94″ in length. You use it to cap the top and bottom skirting and the sides and tops of windows. You also use it to cover raw panel edges where there is no runoff. The J-trim fits behind the J-channel.
If you are attaching the J-trim under an eave, follow these steps:
- Cut to length with tin snips
- Cut at 45 degrees if you will attach the trim under an eave
- Remove any remaining ridges around the diameter
- Slip into the vertical J-trim leading up to the eave on the side you are working on
- Take the side with the miter cut and join it to the other J-trim in the middle of the roof
- Secure it to the top of the house, using a siding nail every 16 inches
- First, install a drip cap above the door
- Work from the bottom up
- Cut the piece of J-Trim long
- Overhang the trim at least an inch on both sides
- Square the ends of the J-Trim by removing extra nail flanges, then cut across the radius
- Center the J-trim
- Secure by placing nails under the right and left sides of the doorway
- Ensure that it has room to move
- Run a vertical piece down into the squared side
- Make a miter cut on both sides of the vertical piece
- Repeat for the other vertical piece
- Slide the trim above the top into the two vertical pieces
- Cut off the excess, making two flaps that bend over the vertical side pieces
- Make a miter cut at both ends of the horizontal piece
- When placing the J-trim, the flap should go to the inside of the vertical J-Trims
- Put a roofing nail in all four corners
- Secure all J-trim parts with siding nails, one nail for every 16 inches
- No J-trim is needed if there is a deck under the roof.
What Size J-Channel Should I Use?
While a J-Channel should always be cut down to size to fit the area you are using it around, the key is the size of the J openings and whether you are going to lay it horizontal or stand it on the vertical. Here are the standard J opening sizes for each.
| Type | Opening Size |
|---|---|
| Vertical | 3-8″ – ½” |
| Horizontal | ¾” – 1″ |
| Corners | Combine the two J-Channels to make a corner post |
Final Thoughts
J-Channel is an essential tool for vinyl siding. When placing it around openings on your house, it redirects runoff so that water does not get trapped between the drywall and the siding. This runoff redirection ensures that your home will not get water damage from rain.
While some contractors differ between whether J-trim should be hammered snugly to the outside wall, we recommend securing J-channel needs to be more loosely to the exterior walls. While the J-channel should be attached to the wall, it also needs room to expand and contract during times of extreme temperature.
If the J-channel does not have the room to expand or contract during extreme temperatures, the siding will also not move. This inflexibility will cause your siding to warp and crack, which will ruin the aesthetic value of your house.
The lengths of the openings on the sides of your house determine the type of J-channel you will use. This choice is also determined by how it looks on the doors and windows. Without J-Channel, you cannot hang vinyl siding. Vinyl siding would be impossible to use and a waste of money if you decided not to use J-channel.
Sources: