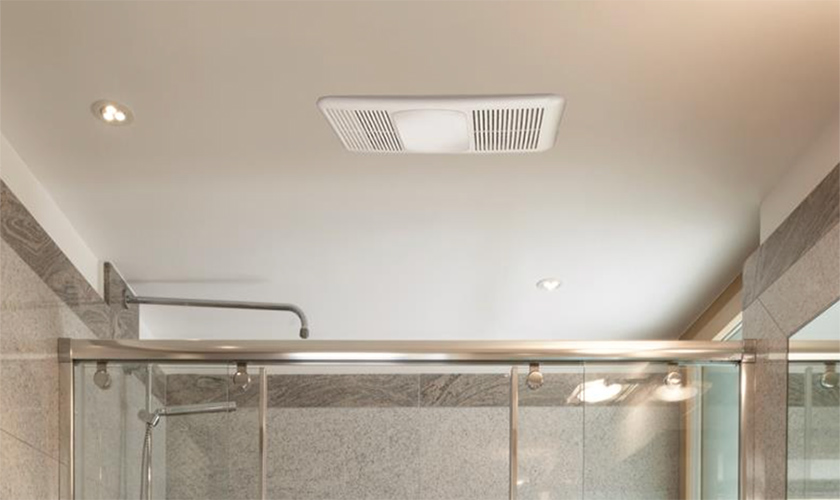
Bathroom exhaust fans are one of a bathroom’s most important yet overlooked aspects. Bathroom fans are a critical part of your home’s ventilation system. It’s important to select a good location in your ceiling for your fan. The fans’ location and how it vents will affect your indoor air quality.
You can vent your bathroom fan three ways: up through the roof, through a side wall, or out an exterior eave. Each method has its advantages and disadvantages, and how you build your house will determine your method of venting.
We’re going to look at the advantages and disadvantages of each venting option and, hopefully, give you enough information to determine your course of action.
You can consider a ventless fan with a replaceable carbon filter if you don’t have outside access when venting your bathroom exhaust fan. An example would be a basement bathroom or an interior first-floor bathroom.

Get FREE quotes from the best local handyman services in your area today. Whether you need a ceiling fan installed, a fence mended, closet or garage organization, minor painting, etc., We Can Help! All handyman services are screened, licensed, and insured.
Where Do Bathroom Vents Take the Air?
The job of a bathroom exhaust fan is to take air inside your bathroom and vent it outside of your house. Bathrooms are hot spots for humidity, moisture, and bad odors. Bathroom fans help to protect you from each of these things and potentially save your house.
Here’s why a bathroom vent is necessary for every bathroom.
Removes Excess Moisture and Humidity
The number one purpose of a bathroom exhaust fan is to get rid of excess humidity and moist air. Anytime you run hot water to shower or wash your hands, the heat will cause humidity, which gravitates upward. If you don’t have a bathroom fan to vent this moist air outside your home, the high humidity levels cause peeling paint, mildew, and mold growth on bathroom ceilings and walls.
It Helps Get Rid of Smells and Odors
No matter who you are or what you eat, you must use the bathroom for bowel movements. These BMs will inevitably cause a foul stench you want to get rid of as soon as possible. While it may eventually dissipate on its own, a bathroom vent fan will help eliminate the smell faster and reduce the risk of your bathroom smells spreading throughout the house.
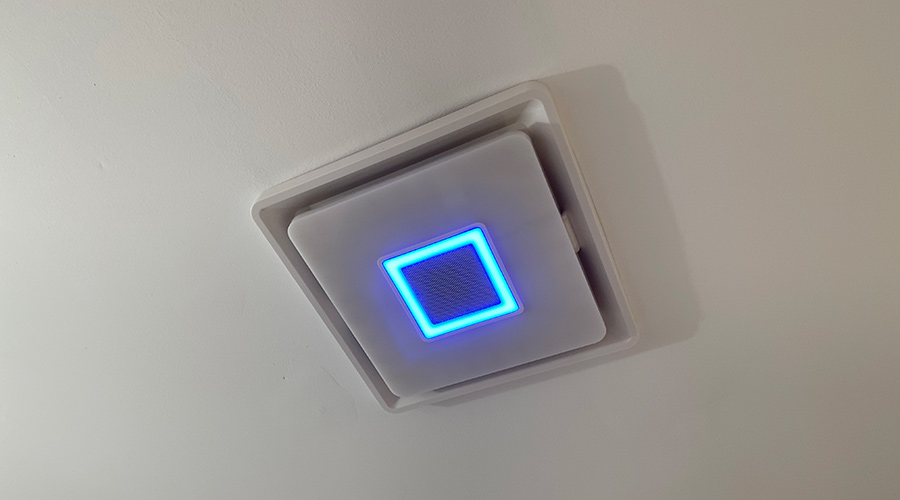
Adds Light and Comfort to your Bathroom
While bath ventilation fans remove smells and moisture, they can also add light and comfort to your bathroom. Manufacturers make newer fans aesthetically pleasing, and many have a lighting option. Bathrooms can feel dark and dank without proper lighting; a bathroom fan will help avoid this problem.
Keep your Glass Surfaces Clean
Another purpose a bath fan serves is keeping your mirrors, windows, and any other glass surfaces clean. Water vapor in one form or another will likely accumulate on glass surfaces, and a bathroom fan will help eliminate this extra vapor.
Why do Bathroom Fans Need Venting Outside?
Bathroom fans should always vent outside rather than through the ceiling and into your attic. Venting your bathroom fan into a wall cavity or attic runs the risk of mold growth.
Building codes require new homes to vent bathroom fans outside the house. Even where this isn’t the case, the best practice is always to vent to the outside.
Venting a bathroom fan is achieved with a 6-inch or 4-inch duct, depending on the fan CFM rating (cubic feet of air movement per minute), connecting to the back of the fan housing and an exterior vent hood.
Can a Bathroom Fan Vent through the Roof?
Venting your bathroom fan vent through the roof is a viable option. While this venting method is more complex than other venting methods, you might not have another option.
Venting your bathroom fan through the roof is usually a last resort simply because of the difficulty involved. When a bathroom is in the middle of the house, and you don’t have the option to go through an exterior wall or eave, the roof is your only option.
Venting through the roof might be more aesthetically pleasing too. Some people don’t like the idea of vents sticking out of the outside wall and prefer the less visible option of going through the roof.
Many contractors don’t like venting through the roof as it creates a vulnerable place for roof leaks to develop.
How to Vent a Bathroom Fan through the Roof
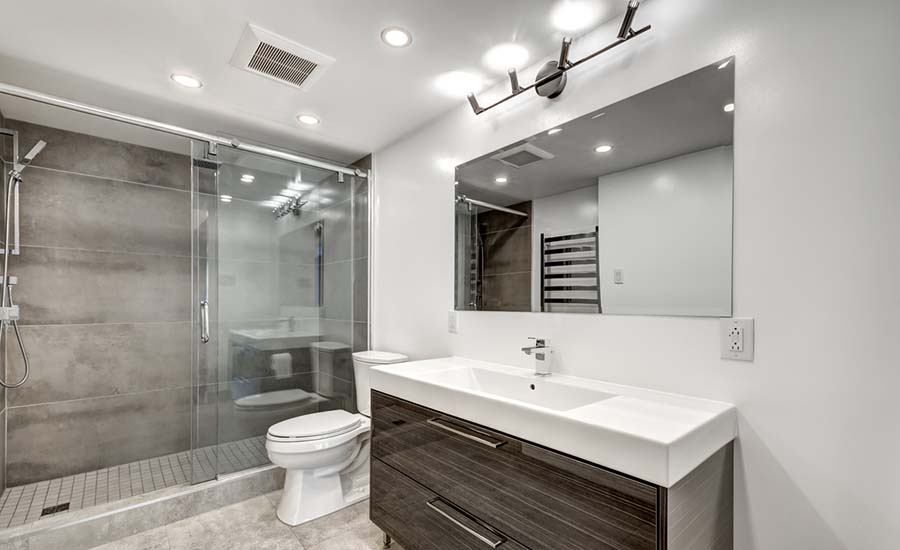
- Determine the location in the bathroom of your ceiling vent. Make sure to pick a spot that is aesthetically pleasing and practical. This location is usually between the shower, the toilet, and the lavatory. Sometimes, a large bathroom might require multiple bathroom fans.
- Install the bathroom fan in the ceiling. Installing the fan is more difficult if you’re doing a remodel because you’ll have to cut the drywall. Make sure to cut your hole large enough to accommodate the fan but small enough so the fan cover will cover any exposed beams. Cutting your hole right will make it so that you don’t have any drywall repairs.
- Determine the size that your bathroom fan vent needs to be. It will almost always be a 3″ pipe or a 4″ one. Because you’re going through the roof, your vent will travel through an unconditioned attic. Exposing the vent pipe to unconditioned air will require you to insulate your vent pipe.
- Connect one end of the insulated duct to the bathroom fan’s three- or four-inch end. To properly make this connection, you’ll need duct tape, a clamp, or zip ties. The goal is to form an air-tight connection between your duct and the exhaust fan.
- Determine the location of the exit point for your exhaust fan. Pick a spot on your roof where the pipe sticking through is out of the way but easy to access for service and installation.
- A roof vent for any exhaust fan will require a special kit you can purchase at most hardware or home improvement stores. Make sure that the kit you buy fits your exhaust pipe size.
- Once you have purchased your roof exhaust vent kit, cut a hole in your roof large enough to accommodate the pipe sticking through from the outside. Stick the pipe through to see if you need to cut any additional roofing or if you’re good to go.
- The most important aspect of venting a pipe through a roof is properly sealing the hole. You’ll need a putty knife, blackjack roof sealant, a caulk gun, and a screw gun.
- Ensure that the pipe has enough room to go through the roof and reaches into the attic far enough to connect. Next, place the decorative covering from your vent kit on the pipe and secure it with duct or sheet metal tape.
If neither of these is available, take whatever measures necessary to ensure the cover can never come loose from the pipe. The cover will keep rain from getting into your vent pipe and causing serious issues.
- Put a thick bead of blackjack roof caulking around the bottom of your vent cover. Make sure to put the bead where it will contact your roof. Firmly press the vent cover down to ensure a complete seal and avoid rain entering your attic.
Most vent kits will have screw holes to attach the vent securely to the roof. For good measure, you can dab caulk on top of your screws and around the perimeter of the vent cover.
- Wait until this point in the process to connect the insulated vent pipe inside your attic to the vent pipe coming through your roof. You want to do this to ensure that you have enough play to get your vent cover on the roof right where you need it.
- Once everything is secured and sealed on the roof, you’re ready to make the final connection between the insulated duct and roof vent pipe. Follow the same methods to make this connection when connecting the other end of the duct to the fan. Place the flexible part of the duct around the perimeter of the pipe and firmly secure it with duct or sheet metal tape, a hose clamp, or zip ties.
- After connecting the flexible inner portion of the duct to the pipe, slide the insulation over the top of it and secure it with a zip tie. Doing this will ensure that the insulation stays firmly in place and keeps your pipe from condensing.
Once you do this, your bathroom fan is installed and ready for operation. As you can see, the overall process is very involved and might require the assistance of an HVAC, plumbing, or electrical professional.
Can a Bathroom Fan Vent Through the Eave?
Venting a bathroom fan vent through the eaves or soffit of your house is also a viable option. This is often a preferred method because it is the easiest way, but that doesn’t mean it’s the best. Venting through an eave does have several advantages over the roof or side wall, but it has one glaring disadvantage.
Tip: Venting a bathroom fan to a soffit is best when you can do so away from the soffit venting. Many newer homes have continuous vented soffits, but most older homes have soffit vents every 4 to 8 feet. You don’t want the bathroom venting next to the soffit vent because it will draw the moist humid air back into the attic.
Installation and Venting are Much Easier
Venting a bathroom fan through the eaves or soffit of your house is much less involved than going through the roof or wall. I’ll go through the process step-by-step, as I did with the roof vent.
It’s Less of an Eye-Sore than other Methods of Venting
The final look of an exhaust fan installed in a soffit is neat. Covers are available that get fastened directly to the soffit of your house. These covers are flat, and you can purchase or paint them to match the color of your soffit.
It Makes for an Inconspicuous Venting Option
When you vent through the soffit properly, most people won’t notice it unless they’re looking for it. Soffit vents are low-profile, and you can make them match the color of your soffit. When done correctly, the vent will go unnoticed by the general public.
How to Vent a Bathroom Fan into the Soffit
- Through 4 are the same for ceiling fans, no matter where you are venting it. Pick a suitable location for the bathroom fan, cut your hole, install the ceiling fan itself, and attach one end of your flexible duct to the fan.
- Once again, make sure to wrap the inside, flexible portion of the duct around the pipe on the fan and secure it with duct or sheet metal tape, a hose clamp of appropriate size, or zip ties. Once secured, pull the insulation over the top of the duct to ensure condensation doesn’t occur.
- Whether your duct is running through an attic to the eave or your ceiling joists, you should insulate your pipe. While not common, air can blow through the outside vent and mix with air flowing through the pipe inside the house. If your duct isn’t insulated, it can cause moisture to form and drip onto your drywall ceiling. It’s always better to be safe than sorry with vents.
- With one end of your duct connected to the bathroom fan, take the other end of the duct to where you want it to terminate to the outside.
- Go outside and cut your hole in the soffit at the desired termination location. Cut your hole just large enough for the inner portion of the flexible duct to fit through comfortably.
- Purchase a soffit vent kit at a hardware or home improvement store. Make sure that the color matches your soffit, or paint it accordingly. The goal is to be low-profile and inconspicuous. The vent kit should include the cover and a three or 4-inch pipe to connect to your flexible duct. The size of the pipe should correlate with your fan and duct.
- Pull your duct through the hole you just made and cut it to the appropriate length to connect it to the soffit vent kit. You want it long enough to make the connection outside the soffit but short enough so that it doesn’t bunch up and kink when you push the excess duct back into the soffit.
- Once the duct to pipe connection is made and properly sealed with your sheet metal tape, hose clamp, or zip tie, securely fasten the solid pipe to the vent cover. Push the vent cover-up against the soffit until it’s flat against the soffit surface.
- Use rust-resistant screws to fasten the vent cover to the soffit, and your process is complete.
- While this exhaust method might seem complicated, it’s pretty simple as long as you have easy access to the soffit. Venting your bathroom fan in this manner can save you time and money and make an outcome pleasing to the eye.
Can a Bathroom Fan Vent through a Side Wall?
You can vent your bathroom fan through a side wall of your house. A side wall is your best option when you don’t have access to the eaves of your home and don’t want to go through the roof. This venting method is more accessible than a roof vent and slightly more complex than going through the soffit.
The proper way to vent through a sidewall is almost identical to that of a soffit. The only difference is that you’ll have to drill a hole in the side of your house through the siding instead of your soffit. You should drill your hole just big enough for the outside vent cover to fit through so that it sits flat against the house siding.
You’ll make all your connections inside and outside the same as with a soffit vent. Make sure you put a protective bead of silicone caulking around the top and sides of your vent cover when you make your outside connection. It would be best to seal it with silicone to prevent water from leaking inside your house.
As with a soffit and roof vent, the best practice is to use an insulated duct to ensure that condensation doesn’t occur. Insulating your duct isn’t always required by building code, but you’ll rest much easier knowing that water damage is not likely with a properly insulated vent pipe.
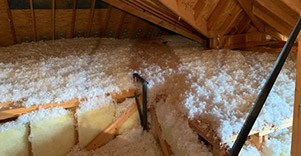
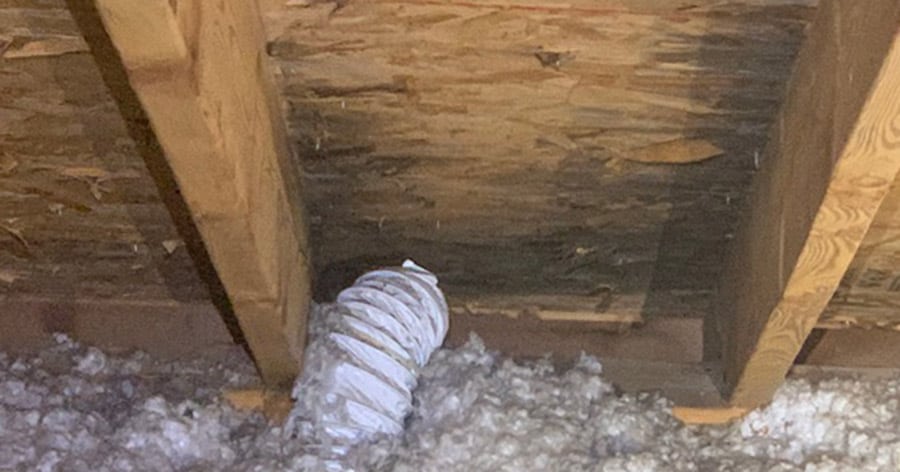
Can a Bathroom Fan Vent into the Attic?
Your bathroom fan should never vent to the attic under any circumstances. In years past, venting a bathroom fan to the attic was acceptable. Since then, we’ve learned more about how condensation problems cause roof sheathing and mold damage.
Your attic is an unconditioned space, which means the air temperature will be similar to the outside air temperature. The moist bathroom air flowing out of your bathroom exhaust vent will more closely match the air temperature inside your house. When these two airflows meet, they can create condensation due to the temperature difference.
Condensation happens most commonly during hot or cold days when the temperature difference is more substantial. You’ll have a layer of insulation between your attic space and the ceiling of your house. This insulation layer will buy you some time before water eventually drips through and damages your drywall, but it will happen eventually.
The best way to prevent moisture damage and a mold problem is to vent your bathroom fan outside your house with an insulated duct.
How to use a Wall-Mount Bathroom Fan Option
While most bath exhaust fans are installed in the ceiling, options are available to mount your fan directly to your bathroom wall. There are two options when it comes to wall mount fan vents, and we’ll take a look at both of them.
Through the Wall Fan Vents
This type of wall vent will look similar to a roof exhaust fan vent. It will come in a kit with vent covers inside and outside your house. The kit should also include the pipe attaching the two. You can use through-the-wall vents in bathrooms, kitchens, mudrooms, or anywhere you want to vent air outside your house.
Installing this type of vent is fairly straightforward. You will cut or drill your hole according to your vent kit’s pipe and covers. Next, you’ll stick the pipe that came in your vent kit through the hole and connect the outside cover. You’ll also want to connect it to the inside cover. Make sure to seal around the hole on the outside to keep rain and other things outside your home.
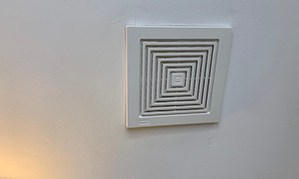
Low-Profile Wall Fan Vents
Low-profile vents are similar to through-the-wall vents in their installation, with the main difference being the inside vent cover. The inside cover is designed to sit flat against the wall, making for a more “low-profile” installation.
Do I Need a Vent Fan if I have a Window?
If you have an operable window, you still will benefit from a bath vent fan. It was common in older homes for a bathroom to have a window for ventilation. Window ventilation is referred to as passive ventilation. However, for windows to be effective, they need to be open, which isn’t practical in hot, cold, or rainy weather.
Building codes for new construction now require mechanical ventilation even with an operable window. Proper bathroom ventilation helps control mold growth and prevent related health problems that an open window can’t.
A bathroom ventilation system is still a good idea for existing homes, even where building codes are not required.
Final Thoughts
Bathroom fan vents are a necessary commodity for each bathroom in your home. In cases when you need more than one fan per bathroom, you can connect them with a Y in your attic and run them out through the same termination point. Multiple fans in a large bathroom will ensure it stays dry, clean, and odor-free.
Always follow best practices, no matter how you decide to vent your bathroom fan. Insulate your duct, make air-tight connections between your duct and your fan and termination pipes, and keep the length of your venting pipe as short as possible. There’s no strict rule regarding length, but the shorter it is, the better it will function.
Get FREE quotes from the best local handyman services in your area today. Whether you need a ceiling fan installed, a fence mended, closet or garage organization, minor painting, etc., We Can Help! All handyman services are screened, licensed, and insured.