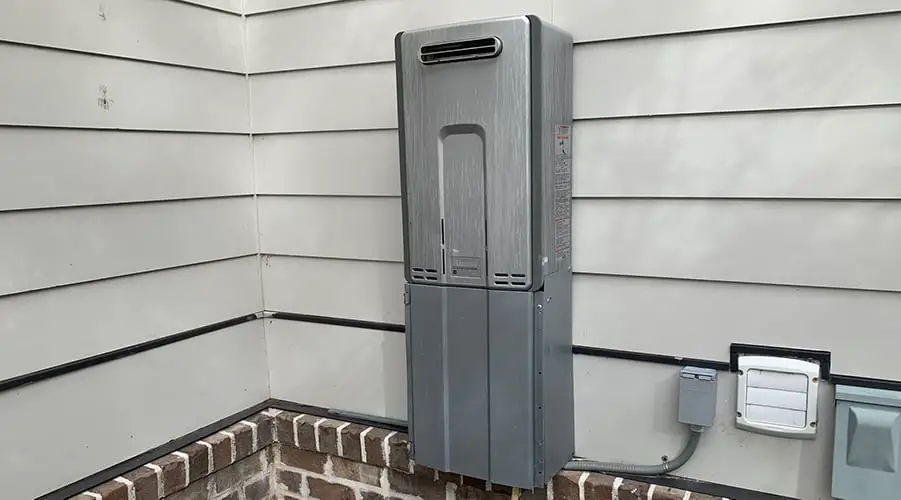
A little ‘how-to’ knowledge goes a long way to keep your tankless water heaters running efficiently. This saves you money on plumbing system bills and prolongs the life of your tankless water heater. Right now, you may be wondering what maintenance your tankless water heater needs?
Do tankless systems need annual maintenance?
Tankless water heaters do require proper maintenance. Descaling your tankless water heater is done by removing limescale and other mineral deposits from the burner system inside the tankless water heater. If you have hard water or your family uses a lot of hot water, you can expect to do this once a year. Families of 1-2 people can do this once every 2-3 years. If your water is soft or has a water softener system installed, you can do this once every 3-5 years.
Get FREE quotes from licensed Plumbers in your area today. Whether you need a new water heater, a sink repair, or a toilet fixed, We Can Help! All Plumbers are screened, licensed, and insured.
It is possible to service and clean a tankless water heater yourself. Let’s take a closer look at this in more detail below. We’ll go over removing limescale and other mineral deposits step-by-step, so it’s easy to follow. We’ll also discuss how often you should service your unit and whether or not a tankless water heater is worth the money.
Do You Need to Flush Your Tankless Water Heater?
Most people have heard they need to flush a tank-style water heater. However, most do not know they should also flush their tankless hot water heater.
Yes, tankless water heaters do need to be flushed. Flushing removes limescale buildup on the burners inside the tankless water heater. In most cases, flushing is necessary about once every 2 to 3 years. Tankless water heaters will shut down and display an error code when flushing maintenance is required.
Minerals travel in the water supply. The amount of minerals in the water supply contributes to the hardness of the water. The more minerals in the water, the harder the water is. Like in a tank-style water heater, this sediment separates from the water as it heats.
However, the sediment has no tank to settle inside with on-demand water heaters. The sediment collects on the burners inside a gas tankless unit or on the heating elements inside an electric tankless water heater. Sediment that doesn’t collect inside tankless systems ends up inside your faucet aerators, clogging the aerators and reducing your water pressure.
If you consistently clean your aerators, it’s time to descale your tankless water heater. A family of four will probably need to flush mineral buildup about once per year. A family of two can probably get by flushing their tankless water heater every 18 months.
The exception is those that have a water softening system installed. With a water softening system installed, you may be able to get by flushing your water heater every 3-5 years.
So, if you’re ready to learn more about properly maintaining your tankless system, let’s get started!
How to Flush and Descale a Tankless Water Heater
Keeping a tankless water heater running efficiently requires routine maintenance. The following steps will help you to flush your tankless water heater to clean and remove mineral deposits in the burner system:
Supplies You Will Need:
- 2 clothes washer hoses
- channel lock pliers
- 5-gallon bucket
- 3 gallons of pure white vinegar or descaling solution
- sump pump
This convenient kit includes a 5-gallon bucket, 2 hoses, a descaling solution, and a sump pump.

You can purchase a flush kit. We found one on Amazon, the My PlumbingStuff – Tankless Water Heater Flushing Kit Includes a 32-ounce J.C. Whitlam FLOW32 Flow-Aide System Descaler solution, Zoeller 42-0007 Floor Submersible Pump, a 5-Gallon Bucket, and a user manual.
Directions for Flushing Tankless Water Heaters:
- The cleaning process will take about 2 to 3 hours
- Difficulty Level: Easy
Step 1: Access your tankless water heater connections
Remove the cover to access the connections under the tankless water heater. Some tankless models may not have a cover installed. The cover protects the piping where it enters the bottom of the heating unit.
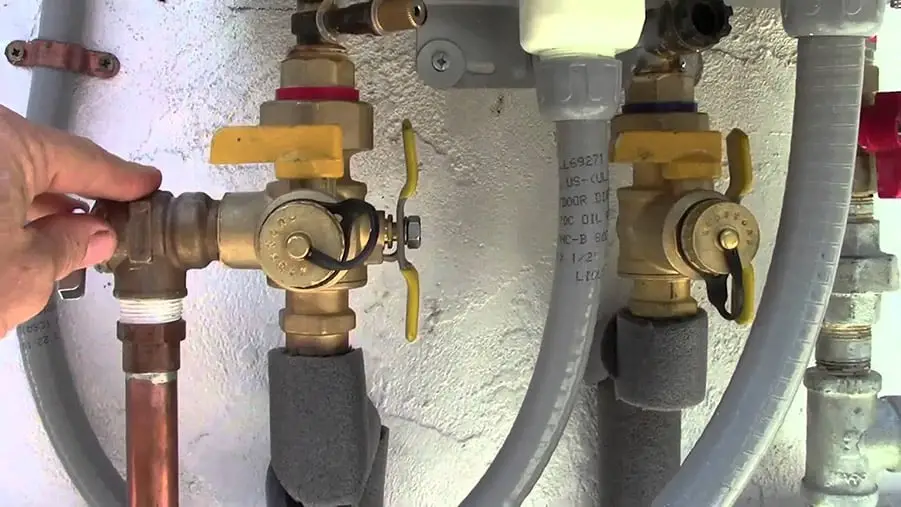
Step 2: Verify your tankless water heater has isolation valves installed
Verify that your tankless water heater has the isolation valves installed. If these valves are not present, you’ll need to stop and call a licensed plumber to have these installed. These valves let you shut off the water and connect the flushing hoses.
Step 3: Turn off the propane or natural gas supply
Turn OFF the main gas supply to the tankless water heater. You’ll need to turn the fuel supply perpendicular to the fuel line. You do not need to turn off the power to the electric thermostat.
Step 4: Turn off the water supply
Close OFF the cold water supply valve that supplies water to the tankless water heater. This prevents cold water from flowing into the unit.
Close OFF the hot water supply valve that supplies hot water from the tankless water heater into the house. This prevents hot water from flowing into the house.
Insider’s Tip: Take this opportunity to check your temperature and pressure relief valve (T&P valve) is ensure it is working properly. If replacement of the T&P valve is needed, now is a good time to do it.
Step 5: Open the flushing valves and connect the hoses
Remove the caps on the flushing valves. This is necessary for releasing any built-up pressure inside the valves.
Connect the hoses to the flushing valves and use channel lock pliers to verify tight connections. Be sure the rubber washers are in the tubing to seal the connection and prevent leaking.
Open the flushing valves by turning them 90 degrees at right angles (or perpendicular) to the cold and hot valves’ current positions.
Step 6: Setup the bucket and sump pump
Fill the 5-gallon bucket with descaling solution or 3 gallons of white distilled vinegar.
Lower the sump pump into the 5-gallon bucket filled with descaling solution or distilled vinegar and turn the sump pump on.
Step 7: Flushing the tankless water heater
Allow the sump pump to run for 30 minutes if using a descaling solution or 1-2 hours if you use vinegar. This will pump the cleaning solution through the water heater to clean the piping.
Upon completion, turn the sump pump off. Remove the hoses and empty the bucket of cleaning solution.
You’ll need to fill the bucket with clean water to flush out any remaining descaling solution. You’ll need to repeat this process until the water flushing through the system is clear.
When done, turn the sump pump off and discard the remaining solution.
Step 8: Finishing up and closing the system
Remove the hoses from the flushing valves.
Replace the purge port caps securely and tighten them securely. Take care not to break the rubber seals inside the caps. If you do, you must replace them immediately.
Step 9: Check the sediment filter
The sediment filter is located on the cold water inlet coming into the tankless unit. Unscrew and remove the sediment filter, then clean it thoroughly if needed. Replace the filter when completed.
Step 10: Open the water supply to the tankless water heater
Open the cold water supply and hot water supply valves by rotating each so they are inline (or parallel) with the piping.
Step 11: Turn the gas on to the tankless water heater
Finally, open the gas supply valve so that the valve is inline (or parallel) to the piping.
Turn on the hot water tap. This will force out any excess air that is trapped in the pipe. Run the water as long as it takes for all of the air to escape, approximately 2-3 minutes.
Clean and store away the items for next year.
And there you have it! A do-it-yourself way to clean and maintain your tankless water heater. Not only have you increased your handyman knowledge, but you’ve also saved yourself a plumber fee!
When Should You Descale a Tankless Water Heater?
There is no exact timetable on when your tankless water heater will need to be descaled. This will depend greatly on the water quality in your area. Water hardness is measured by the mineral content of the water supply.
Your tankless water heater should be descaled once a year in areas with very hard water. Areas with softer water can get by longer before descaling.
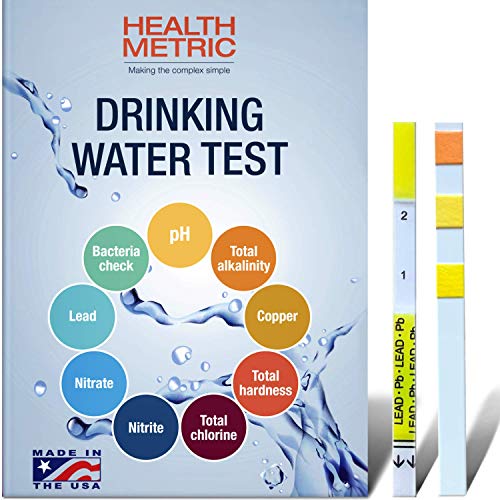
Do you know if you have hard water? The Health Metric Drinking Water Test Kit for Home Tap and Well Water is an EPA-recognized at-home water analysis kit that you can use to determine your water source’s quality coming into your home.
If you have hard water, you can expect to descale your tankless water heater once a year. If your water is soft or has a water softener system installed, you can expect to describe your tankless water heater once every 3-5 years.
Clean the Air Filter
- Turn off and unplug the tankless water heater.
- Remove the front cover. The air filter is typically located at the top of the water heater.
- Once you’ve located the air filter, remove it to inspect to see if it is dirty.
- If needed, clean the air filter using a soft-bristled brush and mild dish soap and water solution.
- Rinse it with clean water and allow it to dry on a lint-free towel
- Reinstall the filter, reinstall the cover, plug the water heater, and turn it on.
Clean the In-line Water Filter
- Turn the gas off to the water heater by turning the valve perpendicular to the supply line.
- Turn the valve perpendicular to the supply line off the cold water supply to the water heater.
- Locate the in-line water filter at the cold-water inlet. Unscrew to remove the filter from the cold water line.
- Clean the water filter under running water or wipe it with a cotton swab.
- Reinstall the water filter, reopen the cold-water supply valve, and reopen the water heater’s gas line.
How Much Does it Cost to Service a Tankless Water Heater?
Professional repairs or regular maintenance of tankless water heaters can be expensive. A professional plumber, on average, charges $200 to $800 per service call. A service fee for cleaning a tankless water heater will likely cost $300 to $400. If you can do the job yourself, this will save a lot of money in the long run.
Can I Use CLR to Clean My Tankless Water Heater?
There are varying opinions on using CLR to clean a tankless water heater. Some, like Jason Fleming, marketing manager at Noritz America, a manufacturer of tankless water heaters, says, “We recommend a 60-minute flush, using white vinegar as the descaling material,” advises Fleming. CLR-type products can be harsh on the copper heat exchanger within the water heater. 1
However, I’ve spoken with many licensed plumbers explaining that vinegar alone may not be strong enough to remove build-up in water heaters that aren’t serviced regularly.
You can use small amounts of CLR with distilled vinegar to clean a tankless water heater. It safely removes calcium, lime, and rust deposits from several household wares, including coffee pots, showerheads, toilet bowls, and washing machine basins.
These three minerals, commonly found in tap water, build up in your water heater pipes over time and must be removed regularly. CLR will safely eat away at these mineral deposits that collect at the bottom of the heater, eliminating the need for excessive scrubbing.
Adding one capful of CLR into each gallon of white vinegar can help remove tough deposits inside your water heater.
Is Cleaning a Tankless Water Heater Worth the Time and Money?
It’s a fact that the initial cost of a tankless water heater (which costs, on average, around $1,750) is higher than that of a traditional tank-style model (averaging about $1,000). However, it will save you a lot of money down the line. The long-term benefits outweigh the higher price tag, making them a better investment.
The United States Department of Energy has estimated that gas-run tankless models use less energy and save approximately $108 per year in heating costs, making them from 24% to 34% more efficient overall. Electric tankless water heaters save about $44 a year, which is still reasonable compared to conventional storage tank models. The bottom line is that they are indeed worth it in the end.
Tankless water heaters, if properly maintained, can last 20 years or more. The parts are also easily replaceable and, if cleaned regularly (once a year), can last another 5 or 10 years. This is in sharp contrast to traditional storage tank units, which last a mere 10 to 15 years. Your best bet is to opt for the tankless version with all things considered. A well-maintained tankless water heater could last up to 30 years.
As the old saying goes, an ounce of prevention is worth more than a pound of cure. Maintaining your tankless water can help your water heater last about two times that of a water heater without maintenance.
Final Thoughts
Servicing and maintaining a tankless water heater is relatively easy, with the right materials and some handyman know-how. You can safely and effectively clean your unit with a simple step-by-step method to save you hundreds of dollars in plumbing fees.
You can also invest in a descaling kit or flushing system that is readily available online and has everything you need to clean your unit. This kit can be reused, saving you even more money for years to come.
Get FREE quotes from licensed Plumbers in your area today. Whether you need a new water heater, a sink repair, or a toilet fixed, We Can Help! All Plumbers are screened, licensed, and insured.