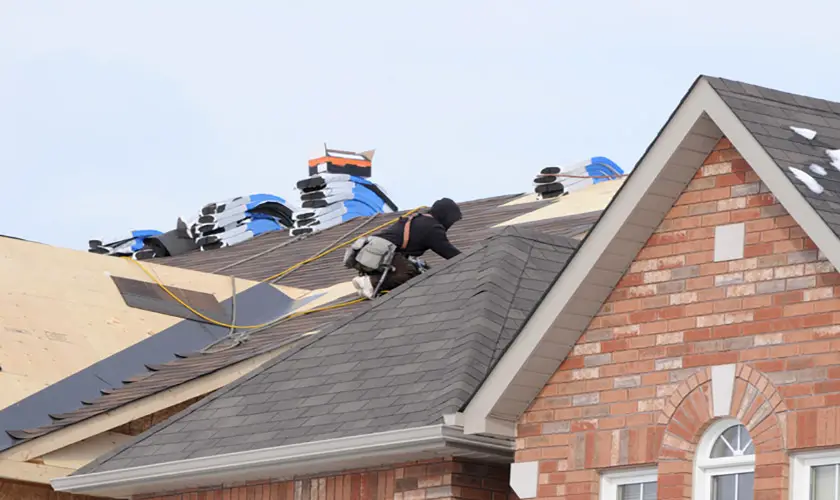
The rubber or metal flashing around your plumbing vents can rust or deteriorate over time, leading to water leaks in the process. Leaks at vent pipe flashings can damage the roof decking and your home’s interior.
Vent pipe flashing is a vital component of a roof and should be repaired or replaced as needed. The lifespan of the vent pipe boot flashings depends on the flashing material. Rubber boots can become brittle and crack after 7-10 years, with other types lasting the roof’s lifespan. Your vent boot flashings need to be inspected annually and after major weather events. There are repair options available that will allow you to repair the boot without replacing it.
During roof replacement, the best thing you can do is ensure that the flashings are correctly installed and are of the right quality.
Here, we’ll focus on discussing how you can replace vent pipe flashing.
What Is Flashing A Roof?
Flashing is used to represent metals that are employed on your roof. They are thin and flat materials used to restrict water from entering cracks or openings on a roof. Flashings are placed under the shingles, and they redirect to a different location.
Roof flashing is developed from metals, including stainless steel, copper, and galvanized steel. A roofing professional can install them around chimneys, windows, gutters, and doors.
There are different types of flashings, including:
- Counter flashing
- Apron flashing
- Step flashing
- Pipe flashings
- Valley flashings
- Drip edge metal flashings
- Kick out flashings
Flashings make the most vulnerable areas of your roof because they cover joints where roofing elements meet or holes in the roof. It’s, therefore, one part that your roofers should install appropriately without making mistakes.
Most of the leaks in older roofs result from flashings that were installed improperly or have deteriorated.
Since most roofs have a minimum lifespan of between 25 to 30 years, you should replace your flashings every time you reroof your home. Replacing all the flashings ensures that they don’t experience any leakages in the future.
Pipe Flashings
Pipe flashings seal around pipes that go through the roof – usually a radon vent or bathroom vent. They are, therefore, key to the performance of the roof since they cover holes in the roof. If this flashing fails due to installation or material defects, water can quickly get through the roof into your attic.
The classic flashing type to employ here is stainless steel base together with a black rubber ring around the pipe. The only challenge is that the rubber gets frozen in the cold and baked in the sun. Over time, the rubber cracks and becomes brittle.
We recommend that you use an all-metal flashing that can wrap the whole pipe. This type of flashing is bound to last forever. They also look great, and you can paint them to match the color of your roof.
Valley Metal
A valley is a point in your roof where two horizontal planes connect at a right angle. It creates a seam where you are forced to blend the two sides. It’s also a weak point in your roof.
The flatness of plywood creates a sharp corner in the valley. When you lay shingles on top, there’ll be an air pocket between the shingle and plywood. If you put anything in the valley, it can break it and create a massive hole in your house.
Since water from your roof runs into the valley, it can cause a massive problem in your house. For this reason, you should install valley metals in the valleys.
You can either use a concealed valley metal that works efficiently with lighter-weight shingles. There is also a chance of using an exposed valley metal that you must paint to match your roof. Exposed valley metal is perfect when you’re using heavier weight shingles.
Types of Flashing Materials
Roof flashing is developed from the following three materials:
- Aluminum: Aluminium is easy to install and lightweight. Your professional contractors can install aluminum after they have coated it with concrete and masonry to prevent corrosion.
- Copper: Copper is easy to solder and malleable. It’s also highly durable and has a long lifespan. However, as it ages, it vanishes into a patina.
- Steel: It is the primary material that is used for flashing. Apart from being aesthetically appealing, it’s also malleable. It’s galvanized to prevent corrosion.
How Do You Flash Around A Vent Pipe?
The process of flashing around a vent pipe is easy if you follow the instructions. Go through the steps below to complete the task:
- Remove Old Shingles and Clean Pipes
Remove the shingles from your flashing carefully. Ensure that you clean the pipe’s outer surface to remove the old caulk.
- Install Underlayment
Here you should use water and ice shields around the penetrations. It has a rubbery substance that wraps around the nails, thus preventing water from getting through.
- Install Roof Cement
Apply a line of roof cement at the aluminum base. It assists in preventing water from entering the sides.
- Pipe Flashing
After placing the flashing on your pipe, ensure that the pipe doesn’t move and pull the rubber gasket out of position. Nail the flashings in areas that can’t be touched by water easily.
- Shingles
Cut your shingles to leave ½-inch around the base. You should leave the flashing’s bottom exposed and cover only the top and sides with shingles. If you notice a split in the shingle, proceed to caulk the flashing’s edge.
How Do You Install Vent Pipe Flashing On An Existing Roof?
The main reason you should replace or install vent pipe flashing on your existing roof is to prevent or stop leaks. It may also extend the roof lifespan.
After some time, the flashing around your plumbing vent can deteriorate or rust, thus the need for replacement. Getting the repair completed as soon as possible will save you a lot of money and reduce the possible water damage. However, you must ensure that the nearby shingles and flashings fit correctly.
Vent pipe flashing is cylindrical and has a flanged and large base meaning you can lap it into the shingles quickly. Installing or replacing flashing on your existing roof is an excellent way of maintaining its health without spending a lot of money.
If you want to keep the flashing up-to-date, you should always inspect the other parts of your roof. If you don’t have the knowledge and skills to complete the project, you should contact a professional contractor to help you.
The Required Tools
Before installing vent pipe flashing on your existing roof, it would be better to ensure that you have all the relevant tools. It’ll assist you in having the task done efficiently and quickly.
Here are the relevant tools you need for the task:
- Pry bar
- Putty knife
- 4-in-1 screwdriver
- Caulk gun
- Hammer
You should ensure that you gather these tools even before you start the work.
Installation Process
After assembling the materials and tools, it’s now time to install or replace the flashing. You can follow through the steps below if you seek to install vent pipe flashing on your existing roof successfully:
- Step 1: Start by loosening the shingles. Use a pry bar to pry back the shingles on both sides and above the vent pipe. There is no need to bend back the shingles found under the pipe.
- Step 2: Proceed to place your new flashing in its correct position over the vent. You must install the flashing under the side and top shingles. However, you should lay above all the shingles below the vent pipe. If you want to make your installation easier, turn the flashing as you lower it into its perfect location. The flashing’s neck must fit around your pipe snugly.
- Step 3: Hammer the nails into the sides and top of the flashing. Ensure that the side and top shingles are bent back before you hammer the nails. It’ll prevent you from hammering through the shingles accidentally.
- Step 4: You can hammer your nails into the bottom edge of your flashing. You should ensure that your flashing is above the shingle located below the vent pipe. After that, use roofing cement to seal the nails’ heads.
- Step 5: use roofing cement for sealing around the edges of the flashing.
If you decide to do the task yourself, ensure that you’re more careful. It will also be best if you apply nails developed from the same material as your flashing. Dissimilar materials can hasten corrosion by reacting with each other.
How Do You Fix A Flashing Vent Pipe?
Vent pipes are usually flashed using a sleeve and lead flange (boot or collar). You should install the lead boot over your vent pipe and then turn the top of the lead boot down inside the stack.
You can also install counter flashing using the lead that extends 4-inches down the outside of your pipe or 2 inches down the inside of your pipe. Most roofers fold the sleeve into the pipe.
You can also use a rubber flange to flash vent pipes. This flashing is common in metal roofs. The diameter of the vent pipes here is 11/2-inches to 3-inches.
Where there is a vent pipe, you must install shingles till the bottom edge of your pipe. If, by any chance, the shingles run into the flashing, you’ll have to cut holes in them so that they can slip over your pipe.
There is also an instance where you might install the flashing above your pipe and the underlying shingles. Here, you must install the bottom section of the flashing above the shingle installed under the pipe.
Place the flange in the roof cement and install the shingles. The shingles over the pipe will overlap the top part of the flange, while the flange’s top half will lie directly over the underlayment. Remember to install a shingle that’s full-width.
Keep shingling around and above the pipe. You can trim the shingles where necessary for them to fit around the pipe. Proceed to nail the shingles on the vent pipes to prevent nails from going through the flashing.
When trimming the shingles, you should allow a space of about ½ inch between the sleeve and the shingle. It ensures that no debris gets stuck between the vent pipe and the shingle. There is no need to cover the bottom section of the flange using shingles. An exposed flange isn’t easy to trap debris.
However, an exposed flange isn’t neat at all. Many roofers recommend that you leave the bottom third of your flange exposed.
If you’re installing larger vents, including ff-ridge vents or heater vents, remember to nail down the bottom edge of the vent. You should also employ roofing cement alongside the flange. Never nail into the flange.
What Is The Best Roof Pipe Flashing?
There are so many roof pipes flashing on the market that you would be spoilt for choice if you decide to buy one. However, you need to understand that the best product is one that seals better and lasts longer. Let’s look at some of the great products that you can buy:
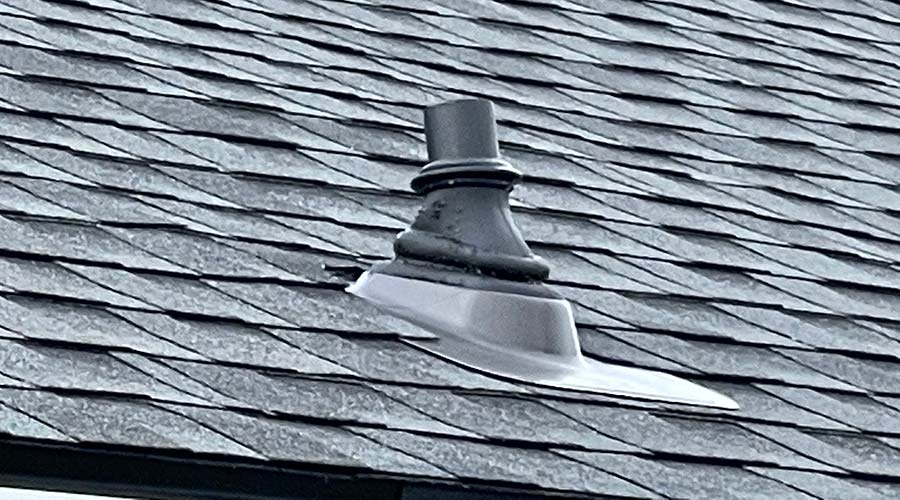
Our Top Pick: Perma-Boot Vent Repair
Perma-Boot vent repair is a gasket-less two-piece pipe boot repair system that repairs leaks caused by damaged gaskets around plumbing vent flashing. They are designed to slide over the existing roof vent boot, preventing future leaks from occurring. PermaBoots are easy to install, and no tools are needed.
- The Perma-Boot fits 1.5″, 2″, 3″ and 4″ vent pipes. When measuring your vent pipe, be sure to measure the inside diameter.
- The Perma-Boot does not waterproof anything, but does provide a hard shisld around the boot and pipe that prevents water from gettign to the vent flashing.
- The Perma-Boot is made of hard plastic and is a permanent solution for gasket failure.
- The PermaBoot are only guaranteed to work with pvc piping.
Dektite Round Pipe Flashing
This is one of the best products that you can access on the market. It has the following features:
- Has a continuous service temperature of between -58F to +239F
- Roofing pipe flashing fits ¼ inch to 2-½ inch outside pipe diameter
- The flashing base diameter is 4-¾ inches
- Pipe flashing never cracks or breaks
- EPDM rubber flashing has a flexible base
- It easily seals against any uneven metal roofing
- It offers reduced maintenance
It is applied for chimneys, air conditioning, stove pipes, electrical, heating, exhaust vents, and plumbing. The manufacturer offers a 20 years warranty against any defects.
Oatey ThermoPlastic Base Flashing
The ThermoPlastic base flashing is another top product that is available on the market. It boasts the features below:
- The products are non-rusting, non-cracking, and non-fading
- It has approval for type B installations
- It isn’t for built-up roofs
- The ring collar tears off, thus letting flashings seal various pipe diameters
Dektite Retrofit Round Base Pipe Flashing
If you are looking for a customizable product, then this is the solution for you. You will interact with the features below:
- Has a continuous service temperature of between -58F to +239F
- The product has a base diameter of 6-⅓ inches
- Pipe flashing fits between ¾ inches to 2-¾ inches outside pipe diameter
- It boasts a pipe flashing size that is easily customizable on the job site with heavy scissors or shears
- It is possible to cut flashing along the seam and then reseal using provided clips
Conclusion
As we have above, it would help if you removed rusty pipe flashing and replaced them with new ones. It would therefore be helpful to inspect the condition of vent pipe flashing at all times.
If you want to replace the vent pipe flashing successfully, check for rust gaps around metal vents. You should also inspect cracked or brittle rubber vents. Always ensure that the flashings that you’re installing are of the right quality.
If you don’t have the right skills to inspect or replace vent pipe flashing, you should always contact a professional roofer to help you out. We hope that you have a successful vent pipe flashing replacement.