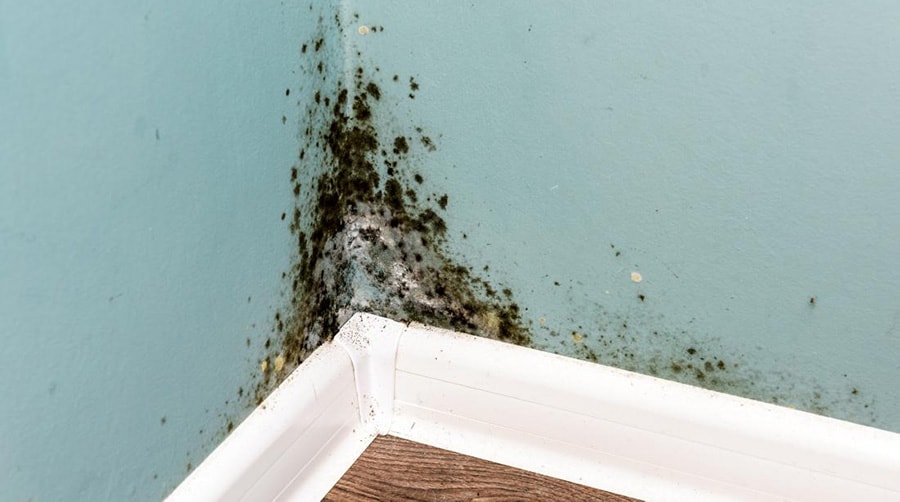
Have you ever noticed a musty smell in your house or apartment? Maybe you have peeled back a broken tile in your kitchen or bathroom and noticed that there are black spots underneath?
These are all clear signs of mold and should be taken care of immediately to ensure a better life within your home. But the question we need to ask ourselves today is whether molding under flooring is truly dangerous or not?
Whether you spilled a cup of water and weren’t able to clean it up right away, or in your shower where the tiles are subjected to steam daily, mold can grow in moist and humid conditions with little to no ventilation and build up over time. If someone did not correctly lay your flooring down, mold could build up in these areas, and it can be dangerous if you have allergies or asthma.
Now you may have other questions, such as adequately taking care of mold under the flooring planks or how it can be known that mold is under your floors from the get-go. We are going to walk through the basics of each one and more.
How Can You Tell If You Have Mold Under Your Floor?
When you suspect you might have mold, you may be wondering how you can tell. There are a few ways you can tell, and we will be going over them in bullet points:
- Odor smell: If you have mold under your hardwood floor or tile, you can experience a musty odor throughout your home. This is due to the mold itself releasing gasses that can smell quite unpleasant. Many homeowners have described this smell to be earthly, dirty socks, rotten wood, or meaty.
- Visible water stains: A big give away that you indeed do have mold under them. Mildew is caused by liquids that sit for too long before cleaning and can cause your floors to have a spongy texture when you walk over these spots.
- Carefully pulling up the planks: The most prominent way of knowing that you have mold growing under your flooring is to carefully pull up the hardwood planks or tile that you suspect to have mold underneath. Pulling the planks can be done by yourself, or you can call specific cleaners in your area to come out and check for you.
- Get a mold test detector: They can help identify the mold you have and how many mold spores you have in the air.
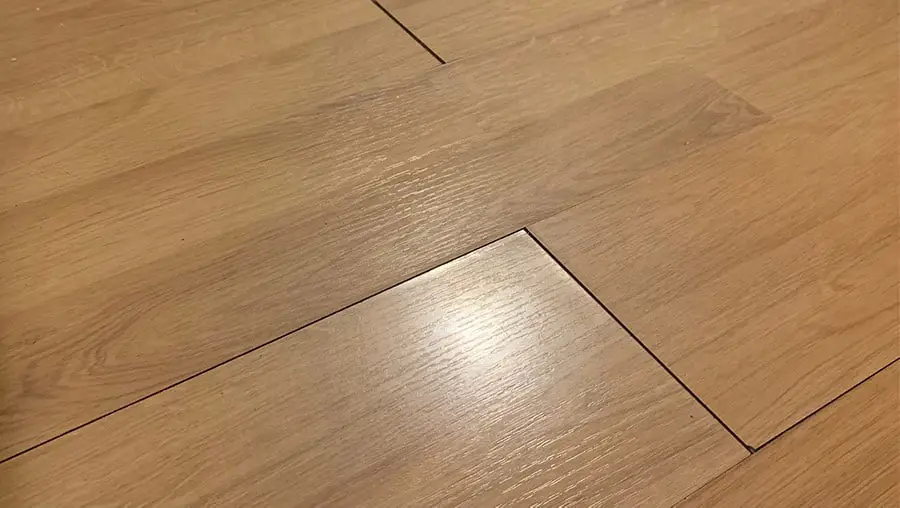
Can Mold Grow Under Vinyl Flooring?
Vinyl flooring is trendy, so this is an excellent question to ask. As many homeowners might already know, vinyl plank floors are incredibly durable, and they can easily withstand temperature and water. However, one of the main questions that remain is if mold can grow UNDER the planks.
The tricky thing about mold is that it can pretty much grow anywhere that has the right conditions. As for vinyl flooring, although it is resistant to moisture, mold can still grow around the edges where the floor meets the wall or in between the cracks if liquids are allowed to stagnate and sit for long periods before cleaning. Mildew can also happen if there are liquids on the concrete underneath the vinyl when it is installed.
If you believe you have mold under or around your vinyl floors, look for black growth coming from the edges of the planks, as well as discoloration or bubbling of the material. It would be best if you also inspected for water stains or other signs of water damage frequently, especially around high-humid areas in your home, like around the toilet or sinks in the kitchen or bathroom.
How Can You Tell If Mold Is Dangerous?
Thinking that mold is dangerous is a common misconception. Most mold is not hazardous or toxic. Some molds produce mycotoxin, which does give these molds a poisonous effect. There are also more dangerous molds that are very toxic. However, these mold forms are sporadic, and even these specific forms of mold are only harmful to infants and the elderly.
Although mycotoxins are indeed toxic, other molds can be either allergenic or even pathogenic. Mold allergies can be fairly common, so if you are highly allergic to molds, you may find yourself worse off than someone who isn’t in contact with the rare strains of toxic molds. Meanwhile, someone with an immune deficiency that has come in contact with a pathogenic mold may be in the same boat as someone with a severe mold allergy.
How Expensive Is Mold Removal?
There are various ways you can go with mold removal. While it can be cheaper if you do it yourself, it is always best to call professionals, as they will get it right the first time, which saves you the hassle of repeated attempts.
However, it can be costly, depending on the mold’s severity that needs to be cleaned. You can expect a median cost to be approximately $1500. But it is known to be as cheap as $500 for your bathroom to around $2000 for a full basement clean. The most expensive mold removal is up to $7000 for an attic, including new insulation and repairs. Be sure to call your local mold removal professionals for accurate quotes.
Cleaning The Mold Yourself
We looked at the prices, and you may be thinking, “that is just too expensive for me!” If you wish to remove mold from wood yourself, there are many tools you need before starting, so make sure you have the following:
- Gloves
- Goggles
- Overalls or long protective clothing
- Change of shoes
- Plastic sheeting
- Tape or nails and hammer
- Large garbage bags
- Box fan
- Two large buckets
- Spray bottle
- Borax
- Scrub brush or broom
- Disposable rags
- Dehumidifier
STEP 1: Clothes & Shoes
The first thing you should do is place your clean pair of shoes outside of the room you will be cleaning. Having clean clothes prevents mold particles from sticking to your boots while moving furniture and walking in and out of the infested room or area. Make sure you have the extra pair of clothing to protect your home further as well.
STEP 2: Remove Furniture From The Room
Next is to remove any furnishings that have come in contact with the mold. Items such as rugs, throw pillows, or maybe even some small side tables or cabinets. You want to take these items and seal them into garbage bags any way you can and immediately remove them from your resilience.
You should throw away items that can be easily replaced unless they were of importance to you. Other things like clothes and rugs should be placed outside in the sun until you finish cleaning your residence.
STEP 3: Sealing The Room
Now you need to seal the room off from the rest of your house. Do this by hanging a sheet of plastic or tarp over the entrance and securing it with duct tape or hammer and nails.
Then you’re going to have to open a window in the affected room and place your box fan in the window or prop the fan up at an angle pointed towards the open window. In doing so, it allows ventilation in the room. You should also avoid facing the blowing fan at the mold directly, which causes more spores to be released.
STEP 4: Pull Off Trimming & Floor Boards
Start getting ready to treat the affected area by gently pulling off the wall trimming and removing the flooring as gently as possible, depending on the type. It is advised to remove the floor from the entire room for several reasons.
However, if you are confident that the affected area is relatively small, you can choose to remove that small portion of flooring with an additional 1 or 2 feet further. Removing a bit more flooring is to make sure that the mold is only growing in that small area, but be prepared to remove the entirety of the floor if you find evidence of the mold spreading further than you expected.
Start at the edge of the room and work your way towards the opposite corner.
- Pry up hardwood boards or tile.
- If carpeted, start ripping up the carpet and the padding.
- For vinyl or linoleum, start by cutting long slits across the whole floor or affected area.
Then use a scraper to help peel the vinyl or linoleum off. Once you get to the molded area, lightly spray it with plain water. This will weigh the mold down and help prevent it from spreading. You should throw away linoleum, vinyl, or carpet in heavy-duty garbage bags. If you have hardwood or tile, inspect it. If they are still in good condition, you can choose to put them aside and treat them later for further use.
STEP 5: Remove The Mold
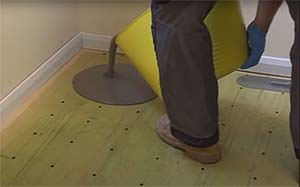
Now it’s time to start the mold removal process. Start by mixing 1 cup of borax per 1 gallon of water in a large bucket. You can use this solution to put it into spray bottles for small areas, or you can work out of the bucket for broad coverage.
Dip a brush or broom in the solution and swab the infected area. Allow for the mixture to sit for 10 to 15 minutes. This will saturate the mold, weighing it down so that spores do not release while also allowing the borax to kill the mold.
Now scrub the mold itself with said brush or broom before applying another layer of the fresh borax solution and allowing it to sit for another 10 to 15 minutes before scrubbing it one final time. By now, the borax should have killed the mold, and the scrubbing should have worked it free from your subflooring. If you have infected hardwood boards or tiles, do the same to these.
STEP 6: Vacuuming
Now you should vacuum up all of the dead mold particles. Preferably with a HEPA vacuum. Using a vacuum helps trap the small particles of mold that may have been lucky enough not to be killed by the borax solution you made.
If you do not have a HEPA vacuum or a vacuum at all, you can make more of the borax solution and rinse over the floor and wipe it up with disposable rags. However, it would help if you tried to avoid over saturating the subfloor as this will provide favorable conditions for mold to return when you replace your flooring.
Once you have removed all of the dead molds, spray your subfloor with the borax solution lightly and allow it to dry over the next 24 to 48 hours. You can turn up the heat and run a dehumidifier to make this step go faster. Once everything is dry, the leftover borax will remain and prevent mold from regrowing in the future.
STEP 7: Replace The Flooring
Replace the flooring and trim with new or clean pieces, and treat the items you removed earlier in the borax solution with the same steps as previously described, and rewash any fabrics after the drying process to remove the excess borax. Let it dry again entirely before moving it back into your residence.
Final Thought
Mold can be dangerous under the right circumstances, such as those who are highly allergic or have an immune deficiency. At most, mold may cause slight headaches or bright about some difficulty with breathing, which should be taken care of as soon as possible. Whether you choose to go the professional route or take the task up yourself, you can reassure that mold will not grow back into the affected space either way.