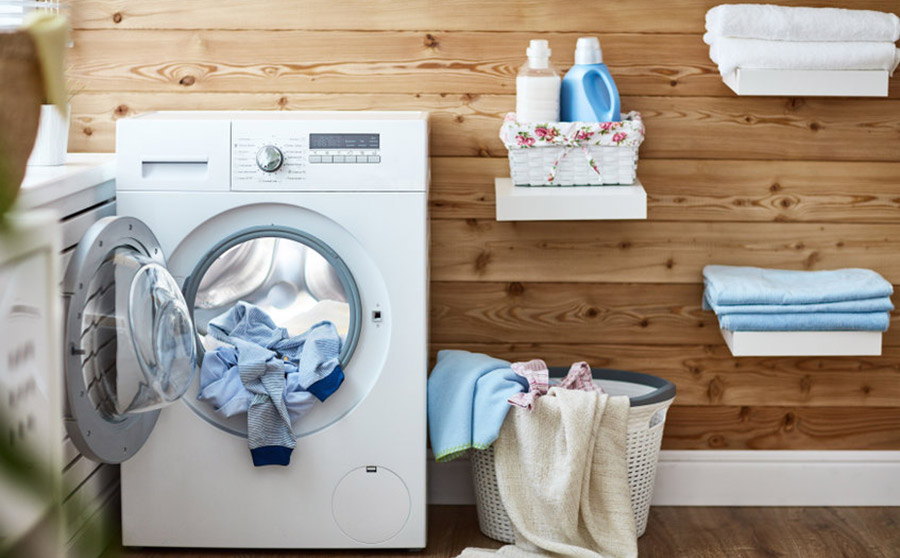
Dryers are an excellent commodity that nearly everyone has access to, whether it’s at home or a laundromat. Most people don’t think about how the dryer vent works until installing it themselves. The way it’s installed, and the total distance of the pipe affect your dryer’s ability to operate correctly.
A dryer vent shouldn’t be longer than 35 feet in total distance from the dryer to the exterior. Adding things like 90-degree angles and 45-degree angles reduces the entire length that your pipe can run. 90-degree turns add 5 feet and 45-degree turns add 2.5 feet. Anything longer than 35 feet requires the addition of a dryer booster fan.
Installing or running a dryer vent is no small task, and there’s lots of stuff to keep in mind. Having a qualified professional do the job for you is preferable, but it’s also something that DIYers can attempt. The most important thing to keep in mind is to do everything correctly and pay attention to the rules about dryer vents.
Can You Run a Dryer Vent Up?
As long as the total distance of the dryer vent doesn’t exceed 35 feet, you can run a dryer vent up. Dryers can vent in whatever direction is necessary because every situation is different.
Here are some scenarios that might require running a dryer vent up:
- The dryer is in the middle of the house
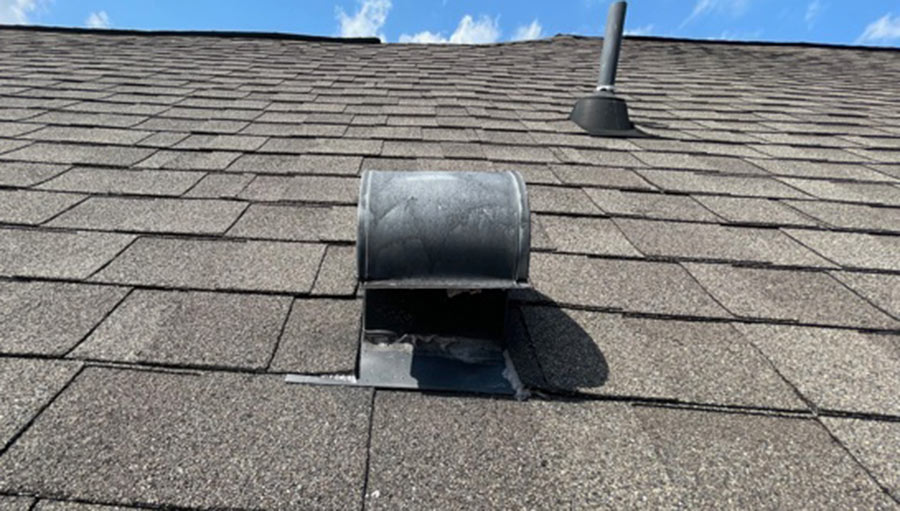
I’ve worked on many houses and apartments where the laundry room was not along an outside wall. In cases such as these, the only option for installing the dryer vent was to go through the roof. While this isn’t preferable, you can do it. Whenever possible, laundry rooms should be located along these outside walls to make dryer venting easier and more effective.
- Your house is on a slab
If your house is on a concrete slab, then it’s not possible to install your vent by going down through the floor. When going down isn’t possible, the only option left is to go up. The critical thing to remember is that the same distance rules apply going up as they do going down. Turns and twists add extra length, and it should never exceed 35 feet.
- Things inside the house prevent going down or sideways
There are also times when running your vent upward will make for a more aesthetically pleasing end product. Not everyone wants a dryer vent sticking out the side of their house close to the ground. If this is the case, then you’ll have to run your vent vertically through the roof or out the side of your house.
How Long is Too Long for a Dryer Vent?
The maximum distance that a dryer vent can run and still be effective is 35 feet, but shorter is always better. As a general rule, you should try to keep the total distance of your dryer vent under 25 feet. Just because you can run your vent 35 feet doesn’t mean that you should. There are several advantages to having a shorter dryer vent instead of a long one.
- Work more efficiently
The longer your dryer vent is, the harder your dryer has to work to expel air and lint through the termination. Difficulty removing hot moist air means that your dryer might have to run longer on certain cycles than it would have to with a shorter vent. Running your dryer longer and more often will add money to your monthly electric bill and could end up being costly.
- Dry your clothes better
The longer your dryer vent, the longer it will take to dry your clothes. Shorter vents will always dry your clothes faster than longer ones, so it’s a good idea to keep them as short as possible.
- Less likely to clog
Long dryer vents also have a greater potential for clogging than shorter vents. Dryer lint gets pushed from the dryer to the vent termination, and dryers struggle to push air and lint beyond 35 feet. Any extra lint that doesn’t get expedited by the dryer fan will end up clogging and present a fire hazard. The shorter the vent, the less likely it is to clog.
- Less likely to have moisture issues
Along with dryer lint, the vent also carries warm air from the dryer to the outside of your house. As warm air travels through the vent, there’s a chance that it will form condensation and moisture, resulting in water damage if left unattended.
Can You Add Angles to a Dryer Vent?
Turns and twists are okay in your dryer vent. As long as you don’t create a trap, angles, or okay in a dryer vent, keep in mind that they add additional length to your vent. A trap is when you go up, then down, then back up again, and form a valley and a hill in the same vent line.
Another thing to remember with adding angles to your vertical dryer vent is that it’ll be more difficult to insulate properly. If your dryer vent runs upward and into an attic, you’ll have to wrap the pipe in insulation to keep condensation from forming. When the hot air inside the vent combines with the cooler air during cold days, condensation and water damage are possible outcomes.
The only way to keep this from happening is to wrap your dryer vent with insulation. If the vent is running low enough to immerse in your attics’ insulation, then you don’t need to add further insulation. However, when this isn’t possible, you’ll have to add an extra layer of insulation.
Are There Booster Fans for Dryers?
Luckily, booster fans are explicitly made for dryers to assist venting when the total length exceeds 35 feet. While these fans are somewhat pricey, they’re a lot cheaper than having water damage or fire damage due to your vent being too long. You can install a dryer fan on a vent that’s shorter than 35 feet as well if you want your clothes to dry faster and prevent clogs from happening in your vent pipe.
Installing one of these fans isn’t especially difficult, but you’ll need specific tools and skills to complete the task. Here’s a step-by-step process of how to install a booster fan.
How to Install a Dryer Booster Fan
- Pick out the fan.
There are many different options for dryer booster fans, but most of them will fit any dryer. The significant differences are in the brand name, and different brands will perform better than others. The best option is to go with a brand with the design to work with your dryer brand. You can find out which fan you need by asking the store where you bought your dryer.
- Cut the duct and install the fan.
Your first step in the installation process is to cut the duct and install the fan. You’ll want to pick a spot that’s at least 10 feet away from the dryer but within 25 total feet, factoring in elbows and 45s, from the end of the vent. You’ll also want to pick a spot in the duct where you can easily support the weight of the dryer fan.
Your fan should have a bracket that accompanies it that gets fastened to wood or a support beam. The fan is surprisingly heavy, so it is essential to support it correctly. Once you’ve picked your spot, it’s time to cut the dryer vent.
To do this, you’ll need to cut the vent on either side of the fan installation location. Mark both sides with a marker or pencil where you want to make your cuts. Then, use a Sawzall or similar tool to cut the dryer duct. If possible, pick a spot close to one of the joints so that you can undo the tape or whatever is holding the dryer vent together, and take it apart at a joint.
However, if cutting is necessary, cut with caution and be careful not to cause damage to the dryer duct itself. Once it’s cut, mount the dryer fan where you want it and resecure either end of the duct to the fan. Take note of which side of the fan is the inlet and which side is the outlet, and turn the fan accordingly.
If you’re happy with the mounting and position of the fan and you reconnect the vent, it’s time for the next step.
- Connect the tubing from the duct to the fan.
There is a small, clear plastic tube that accompanies your dryer fan. One end of the tube gets attached to the fan itself, and the other gets inserted into the dryer vent. When the dryer turns on and starts to blow air, this tube acts as a pressure switch that notifies the fan when it needs to turn on. Not correctly installing this switch will significantly impede the fan’s ability to function.
- Make the electrical connections.
With the fan installed and the pressure switch tubing inserted, it’s time to make the electrical connections. Your fan is an electrical appliance and needs to have constant power running to it so that it can turn on at a moment’s notice. The best way to do this is to take power from a nearby outlet and run an extra wire from there to the fan.
Before opening the outlet and making any connections, make sure that power is off to avoid electrical shock. If there isn’t a nearby outlet, you may have to run an electrical wire from the fan to your panel box. Running a wire this far is the last resort, and there’s almost always a closer source of electricity.
- Make sure everything is secure and sealed.
Once everything is hooked up to the fan and has power, it’s time to go back through and double-check your work. Ensure that the fan is securely mounted, both ends of the dryer vent are fastened and sealed to the fan, you ran the electricity properly, and installed the pressure switch correctly. If all of this checks out, it’s time to give your dryer booster fan a test run.
What Types of Pipes Can You Use for a Dryer Vent?
When it comes to dryer vents, there are several different types of pipes and materials that you can use. Pretty much all dryers require a 4″ vent, so here’s a list of acceptable options in that size. Each option presents its advantages and disadvantages, and it’s up to you to decide which option is best.
1. Aluminum Round Pipe
In my many years of experience installing dryer ducts, the aluminum pipe was my material of choice. It’s easy to put together, lightweight, and easy to take apart when maintenance or repairs are needed. The aluminum duct also offers little resistance to the air and lint traveling through the dryer vent. An aluminum duct makes for fewer clogs and moisture problems when properly installed.
2. Sheet Metal Round Pipe
Sheet metal round pipes are similar to an aluminum pipe, with a few differences. The vent system gets connected similarly, but the sheet metal is heavier and offers more resistance to air and lint. While there’s not a big enough difference in air resistance to choose one over the other, I often opted for aluminum simply because it was lighter and easier to work with.
3. Aluminum Foil Duct
An aluminum foil duct is a good option for short portions of the vent, such as near the beginning of the end. The aluminum foil duct is fairly flexible and bendy, so it will need to be supported much more often than rigid pipes. Aluminum foil duct also offers more resistance than rigid duct, which is why it should only be used for connections to the dryer if possible.
4. Slim Metal Duct
The slim duct is a material you shouldn’t use unless it’s the only possible way to run your vent. The slim duct looks like a round duct that has been stepped on and nearly flattened. It’s ideal for installations in tight spaces or running up or down outside walls where you only have limited wall space of 3 or 4 inches. It would be best if you didn’t use a slim metal duct more than is necessary, but it’s suitable when needed.
Final Thoughts
Installing a dryer vent might sound like a lot of work, but it isn’t. The job’s difficulty depends on each particular situation, as does the method of installation. You can run your vent vertically, sideways, or downward depending on your desires and situation. Always remember that you shouldn’t exceed 35 feet in length with your vent and that shorter is always better.
For an efficient and speedy clothe-drying experience, add a booster fan for any vents over 25 feet and over 35 feet. As long as you remember the tips, tricks, and rules about installing dryer vents, it’s a relatively easy task that’s achievable for most DIYers.
Sources:
Dry Clothes Faster with a Dryer Duct Booster (DIY) | Family Handyman