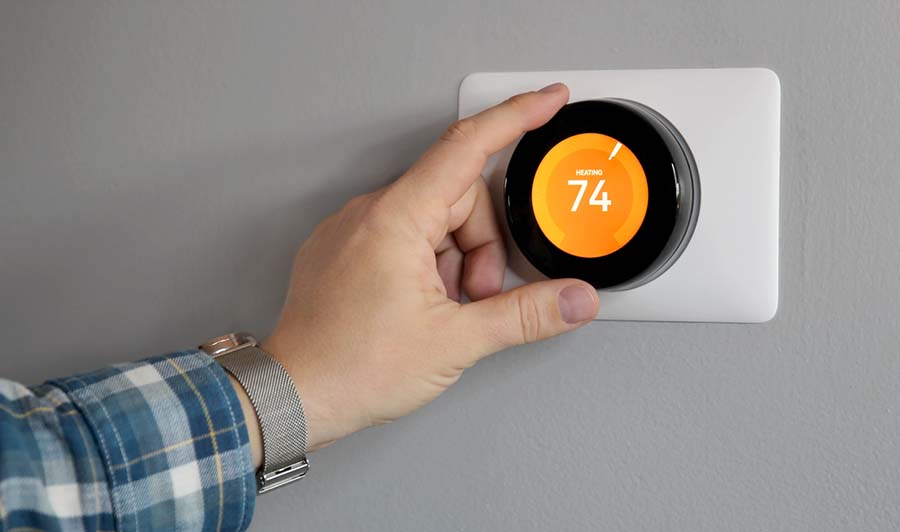
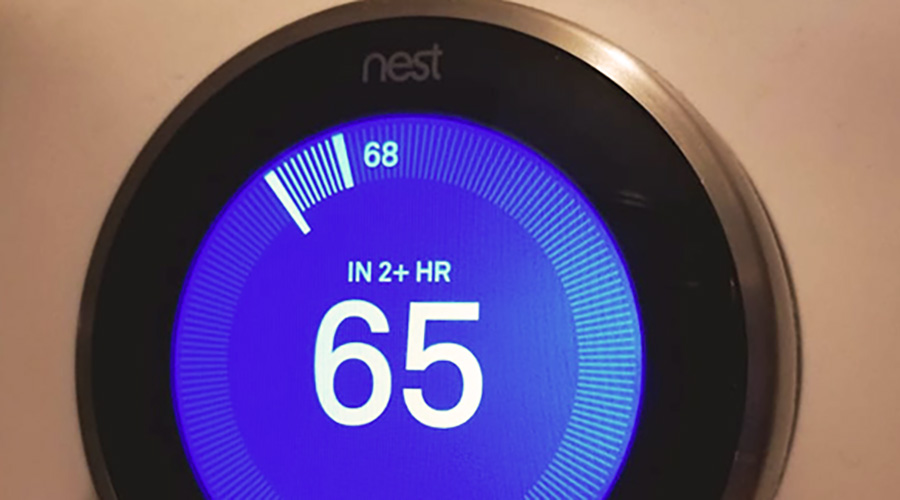
You can program the Google Nest Thermostat to hold a specific temperature using the Google Home app or on the device itself. Below I’ll explain exactly how to set your Nest thermostat to hold the temperature:
- Set your Nest to Heat, Cool, or Heat * Cool mode
- Click the Hold Temperature feature, which looks like a small clock face
- Select the current temperature, or Eco
- Select the time you want this temperature hold to end
- Select “None” when in Eco mode to have the temperature hold indefinitely
- Tap “Confirm” to complete Hold
There are many fascinating features of the Nest thermostat that allow users to create the perfect setting for their daily activities, but getting the hang of these adjustments can be a learning process for both you and your Nest.
How to Set Your Nest Thermostat to Hold the Temperature
The Nest Thermostat, also called the “Google Nest,” came on the market in 2011. Like every thermostat of days gone by, you can program the Nest to control the temperature in your home. It can crank up the heat or drop the air conditioning to comfortable levels throughout the house.
Thanks to its Wi-Fi-enabled programming, the Nest Thermostat offers much more than comfortable temperatures. It actually can “learn” your schedule and set the temperature in your home based on the time of day, the number of people in your house, and even determines the most economical settings based on interior and exterior factors.
But sometimes, it doesn’t make sense for the Nest to operate on its regular schedule.
Are you going away for an extended vacation? Are you having a large group of friends over to your house? It might make sense to have the Nest hold its temperature or operate manually in these instances. Here’s how you can take over Nest settings temporarily.
You can program the Nest Thermostat to hold a specific temperature using the Google Home app or on the device itself. As long as your Nest is in Heat, Cool, or Heat * Cool mode, you can select the Hold Temperature feature, which looks like a small clock face.
You’ll then select the current temperature or Eco if you’d like to keep your heating and cooling bills down. Next, you’ll choose the time you want the temperature hold to end, such as when your guests have left or once you’ve returned from vacation.
You can select “None” when in Eco mode to have the temperature hold indefinitely, but don’t forget to end the hold once you’re ready for the Nest to return to its regular schedule. Once you’ve made your selections, tap “Confirm” and enjoy the ambiance!
How Do I Lock the Temperature on My Nest Thermostat?
Locking the temperature on your Nest device can be helpful when you want to make sure that no one else tampers with your settings. Whether you have a house full of guests or children attracted to the colorful Nest device, locking temperatures will ensure that the comfort level doesn’t budge, no matter how much twirling and tapping occurs on the Nest device.
You’ll assign a four-digit PIN to the system when you lock the temperature. You’ll need to remember the PIN to unlock the Nest later.
When you’ve set your device to either Heat Mode or Cool Mode, you’ll be able to choose a temperature range for any manual modifications. When using the app, the minimum range is five degrees. But if you lock your Nest via the wall unit, you can choose any range, down to a single degree.
If your device is in Heat * Cool Mode, you can choose a range of two degrees or greater.
To Lock the Temperature on the Device Itself:
- Tap the ring so that the Quick View menu opens.
- Rotate the ring to select the Settings gear wheel, then tap to open.
- Tap to select the Lock feature. Tap again to confirm.
- Enter a four digit PIN. This can be any combination of digits you’ll remember when you’re ready to unlock the Nest.
- You will enter your PIN twice to confirm it.
- Enter the minimum and maximum temperatures in your preferred lock range.
- Tap Done once you have made all of the necessary changes.
Your Nest thermostat will confirm you have locked it by displaying a small lock icon.
To Lock your Nest Thermostat from the App:
- Open the app and select the correct device.
- Choose Settings from the menu in the top right corner.
- Tap the Lock option in the menu.
- Enter a four digit PIN.
- Use the slider bars to set your minimum and maximum temperature range.
- To confirm your settings, tap Lock at the bottom of the screen.
You’ll be able to determine you are in lock mode via the app because you will no longer have the option to lock your Nest thermostat. These setting selections will change to “Unlock.”
To Unlock your Nest device, make sure that it is online. You will enter the PIN on the Nest itself by rotating the ring, then tapping to enter the final PIN.
The PIN is not required when unlocking the thermostat from the app. Instead, those with app access to your device will be able to select “Unlock” from the menu via the same steps above.
How to Control a Nest Thermostat Manually?
There isn’t a proper “Manual” setting, in the sense that you can control your Nest by hand at all times. However, you can interrupt the Auto Schedule. To do this, you’ll select the Schedule calendar icon from the main menu on the device, then use the wheel to scroll to the day you would like the updates to start.
Once your screen displays the time and temperature you would like to adjust, tap to access the menu. Your Nest will ask you if you would like to
- Change
- Remove
- Cancel
You will tap “Change” to control the temperature from now on manually. Scroll to change the time at which the temperature changes, then tap to confirm. Scroll again to adjust the temperature itself, then tap to confirm.
You can also delete an existing schedule point by selecting “Remove” from the adjustment menu.
Another way to control your Nest manually is via the app. Again, you will need to override the existing Auto Schedule. However, if your Nest thermostat is not locked, you should use the slider features to change the temperature from your app screen.
The best option is to use the Hold Temperature feature we discussed first, then make slight updates and adjustments as best for your home and your comfort. Remember to keep your device on Heat*Cool Mode so that you can access a full range of temperatures from your HVAC system.
If you are having issues with other individuals changing the temperature outside of your ideal range, consider using the lock feature and setting a PIN that only you know.
Why Does a Nest Thermostat Keep Changing the Temperature?
The Nest thermostat learns your schedule. Therefore, it will attempt to pick temperatures that match what you typically choose for that time of day. If you enjoy cooler temperatures in your home at night, for example, the Nest will automatically “learn” to drop the temperature after a particular time of day.
Suppose you would prefer the Nest not to adjust the temperature automatically but instead hold a consistent temperature. In that case, you will need to disable the learning feature by turning off the Auto-Schedule feature. You can always turn this feature back on once you have enjoyed your temporary temperature hold.
How to Disable Learning on a Nest Thermostat?
The learning feature depends on the type of Nest thermostat you have.
| Auto-Schedule | Nest Thermostat ENest Learning Thermostat |
|---|---|
| Basic Schedule | Nest Thermostat E |
| Quick Schedule Savings Finder | Nest Thermostat |
To turn off the Auto-Schedule feature available in the Nest Thermostat E and Nest Learning Thermostat, you will do the following:
- Choose “Settings,” represented by a gear wheel on either the Nest App or the device itself.
- If you are using the app, you will tap on Auto Schedule from the Settings menu to deactivate it.
- If you are making changes from the device itself, choose:
- Nest Sense
- Auto Schedule
- Off
You may also wish to clear any existing schedules to ensure they do not override the temperature hold you want to place. To do this, you will want to access the Schedule feature. Press the ring itself, choose Schedule, or first Settings, then Schedule if you have a Nest Thermostat E.
If you want to wipe out the schedule altogether, you will tap either “Reset” or “Clear,” depending on which Nest version you have.
Once you have cleared the schedule, make sure you choose a comfortable temperature to carry forward.
How to Create a Schedule or Edit One That I Already Have?
Though one of the most popular features of the Nest thermostat is its ability to create ambient temperature based on your needs and daily schedule, it is sometimes a good idea to create a manual schedule for your home. It is helpful for abrupt changes in your daily routine or during sudden changes in the outdoor temperature.
To do so in the Nest app, you’ll want to open the app and choose the correct device first. Then you’ll select the Schedule feature, which resembles a calendar page with a clock face.
From here, you’ll be able to enter the temperatures you prefer based on the time of day.
You can also perform this task from the Nest device itself. You’ll start from the Quick View Menu and select Schedule, Settings, then Schedule, depending on which Nest version you have.
Bear in mind that Nest thermostats default to Eco Temperatures when no one is home to help you save money on your heating and cooling bills.
What Are Eco Temperatures on a Nest Thermostat?
Eco Temperatures maximize cost savings from your heating or cooling system. They range from 40-70 °F (4-21 °C) when the device is in heating mode and 76-90 °F (24-32 °C) for cooling mode.
You can tell that your system is utilizing Eco Temperatures because the screen will display a small green leaf, along with the letters ECO.
You can teach your Nest system to use Eco Temperatures in the following ways:
- Automatically, when Nest senses that no one is home
- Automatically, when you tap the “Away” feature on the Nest App
- Manually, when you’re home, but would like to save a bit of money on your HVAC bills
Remember that once a Nest is set to Eco Temperatures manually, it will not adjust until the following scheduled temperature change. Therefore, it’s essential not to forget the changes you have made and edit the overall schedule as needed.
How to Set My Nest Thermostat to Auto?
The Nest thermostat provides heat or cooling temperatures within your range. However, if you set the thermostat to the “Heat” setting, it will only choose temperatures through your furnace or heating system.
If you set your thermostat to the “Cool” setting, it will use only cool air and air conditioning systems. To explore a full range of temperatures to create your ideal comfort range, consider using the Heat*Cool setting, which will use both systems to meet the temperatures set in your ideal range. Select the “Auto Schedule” feature from the Settings menu to turn on Auto Schedule.
Using the Auto Schedule feature of your Nest thermostat will help it learn which settings you prefer. There are just a few things to remember before getting started:
- Auto Schedule is only available on the Nest Thermostat E and Nest Learning Thermostat models.
- The Nest Thermostat E offers pre-programmed schedules while the Nest Learning Thermostat does not.
- The Nest Thermostat E will continue to hold your chosen temperature until it is manually changed or until the next temperature change in the program you have selected. Manually changing it in Auto Schedule when a program has been selected will teach the Nest when to override the program.
- The Nest Learning Thermostat will hold a temperature until it is manually changed during the early stages of Auto Schedule.
Your Nest thermostat will require around one week to learn your patterns and preferences. It understands the frequency with which you make changes to the temperature and apply them daily or weekly.
If you make the exact change two weekdays in a row, the Nest will continue to only make the same changes on weekdays. If you make the same change on the same day of the week, two weeks in a row, the Nest will make that change each week on the same day. If you make the exact change on a weekday and a weekend day consecutively, Nest will make that change every single day.
What are the Best Settings for a Nest Thermostat?
The Nest thermostat makes the most out of your heating and cooling budget. Therefore, it’s a great idea to take advantage of some of the settings that can help extend your dollar without sacrificing your overall comfort within your home.
The Eco Temperature settings on the device and the Savings Finder on the app can both make handy suggestions to help you find the correct settings for your home and budget.
Depending on your device, there may also be some additional features that can help you find total comfort.
| Early-On | This feature ensures your home has reached the scheduled temperature before the assigned time. For example, if you want your home to be a cozy 75 degrees when you return home from work at 5 pm, Early-On will make sure your home is exactly 75 degrees at precisely 5 pm, instead of starting the climb to 75 degrees at 5 pm. |
| Presence Sensing | This feature uses the Nest activity sensors and the presence of any phone or device connected to the Nest to determine if anyone is at home. This is only available on the Nest Learning Thermostat and Nest Thermostat E. |
| Energy History | This feature provides a reading of your usage over the past ten days. The orange bars indicate when your HVAC system came on and how long it was on each time. You can compare energy reports to review how the changes you make to your Auto-Schedule are impacting your energy usage. |
Remember that using Eco Temperatures will help you get the most out of your Nest thermostat. Avoid the temptation to use exceptionally high or low temperatures. A common misconception is that raising or lowering the temperature beyond your preferred setting will help your house warm or cool itself faster.
This is not true because your HVAC system will respond to the setting as programmed. If you want your home to reach a specific temperature faster, consider updating the schedule or using the Early-On feature.
Final Thoughts
The Nest thermostat is a handy tool for those who enjoy the ease of automated features but appreciate manually overriding those programs when necessary. Depending on the version of the Nest thermostat you purchase, you may be able to enjoy pre-programmed settings, as well as settings that set a comfortable temperature that’s within your budget.
You can frequently adjust or lock your Nest thermostat to ensure no one else makes changes for you and you get the most out of your system. While your ideal settings may vary based on season, your location, the daily weather, and the construction of your home, you can always adjust your Nest thermostat to keep everyone cozy indoors.
Sources
- How to Set Nest Thermostat to Hold Temperature?
- Nest Thermostats Energy Savings Tips