You have finally decided to renovate your garage, which has been building up dirt for years. As you look at everything you will have to do to complete a proper renovation, you realize that you have no idea how to remove epoxy flooring from your garage floor.
It has started to turn yellowish or is just perhaps outdated. Is It too late to remove it now?
You can remove epoxy by dissolving it with dichloromethane in minutes to half an hour, depending on the exact type of epoxy and the liquid concentration on your garage floor.
Epoxy was a prevalent flooring coating material about ten years ago. Though it is often used, especially in schools and hospitals, many people want to remove the epoxy from their garage to upgrade the design or install higher-quality flooring.
If you want to learn how to properly remove your epoxy flooring in your garage or need some extra tips, this article is for you!
How Do You Remove Epoxy From Garage Floor?
In this part of the article, we will go through 9 steps of garage epoxy cleaning, which will serve as a map to clean and epoxy-free garage floors!
1. Clean Up Before You Start
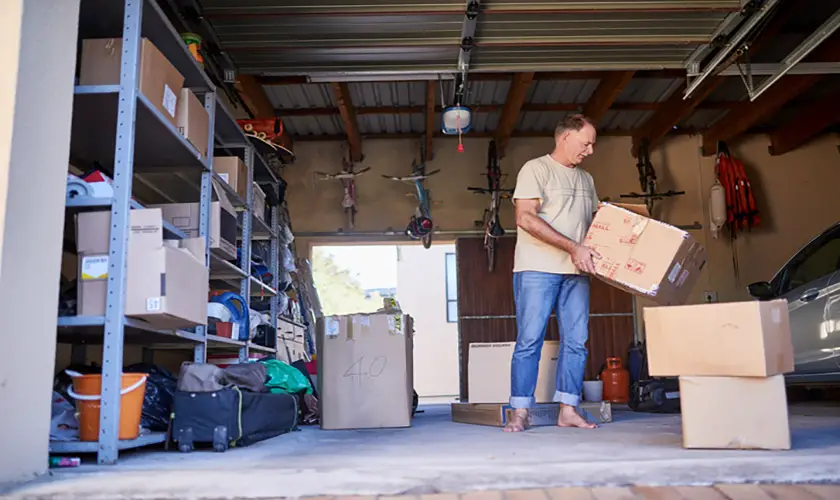
Before cleaning up the epoxy, you should have all furniture, tools, car, and everything else you might have in your garage temporarily placed somewhere else.
If you want to do a thorough and high-quality job, you will want to remove the epoxy from the entire floor of your garage, so clean it out as much as you can.
Dust and other materials have “sedimented” over your epoxy coating over the years, so cleaning the garage epoxy floor first is best.
Although there are multiple ways of cleaning epoxy, many people will use a sanding machine or rotary device to remove the unwanted layer of epoxy. In the friction created by the motion of these devices, many harmful chemicals and particles become airborne. Leaving dirt on the epoxy will make it messier and more likely to throw toxic materials around in the air.
On the other hand, if you will use thinners, acetone, or other chemical substances to remove the epoxy flooring, you can never know how the chemical might react with the dirt on the ground.
Another step that many people tend to forget is cleaning the walls. Walls, especially in places like a garage, are dirtier than you think.
Once you start working on your epoxy floor to remove it, you will likely get stuff flying all over the place from the walls, which can react with your stripping liquids or thinners or even cause damage to the equipment you are using. Ensure the garage cleaning process is thorough to avoid any possible complications.
2. Get the Appropriate Tools
There are many ways to remove epoxy from the garage floor. And to know what tools to use, we need to first identify the exact method we will use to remove the epoxy.
We haven’t thus far covered all the ways you can remove epoxy. For a quick rundown, we will first cover the common ways to remove epoxy from garages.
The first method, one of the most common, is using thinner to loosen up the epoxy and then a scraper to take it off.
You can use multiple liquids to thin out epoxy, but the most effective is a methylene chloride stripper, also known as dichloromethane. It contains methyl ethyl ketone or MEK, which makes these strippers better than traditional paint thinners.
You can also use acetone if you can’t find one of these since it also breaks down epoxy.
If you use dichloromethane or acetone, you will need some rugs, scrapers (preferably metal scrapers), and protective gear since you will be dealing with chemicals.
If you don’t want to use strippers and solvents, you can also use a heat gun, which will melt the epoxy, making it easier for you to peel it off the floor. You can consider buying one if you don’t own a heat gun. An average, well-functioning heat gun doesn’t cost very much, and it can be helpful in other situations aside from melting epoxy.
The last way, the most common one found on YouTube in tutorials, is by sanding. Often, people won’t scrape entire garages since those can be large. In such cases, using a sanding machine might be the best solution.
I would recommend using a buffer, also known as a floor grinder. It is easier to work with than a smaller, hand-held buffer or polisher because of the larger surface area. It is also easy to hold and control.
To remove epoxy with this method, you will need protective gear, the buffer/grinder, and the discs (usually a diamond abrasive disk and then finer grain disks).
3. Prepare the Garage for the Process
Take safety measures to avoid problems while working in your garage. Removing epoxy can (and usually does) releases materials and particles into the air, which are harmful to breathe in.
You need protective clothing and gear to avoid possible complications, but you also don’t want these particles, fumes, and mess to get near other people.
Dichloromethane, for example, is classified as a neurotoxin, which can cause severe nerve damage if consumed. It also releases fumes, so opening a window or two is necessary when working with such a chemical.
Open windows for ventilation as long as the outside wind doesn’t blow the dust inside your house.
That way, you can let fresh air in and decrease the concentration of the harmful materials in the air without harming yourself or others around you.
Once you have cleaned the garage, have all your tools, and checked all windows and doors, it is time to remove your epoxy floor.
4. Soften the Epoxy
In removing epoxy, you deal with potentially dangerous tools and chemicals, bringing us to safety gear’s importance. We cannot stress this enough: do not start working without safety gear!
Dichloromethane, for example, is not only a neurotoxin but can also harshly irritate your lungs, eyes, and skin.
A heat gun can easily cause severe burns. It can light simple clothing on fire.
We will now talk about thinning and softening the epoxy.
We have mentioned that dichloromethane is the best thinning or stripping liquid to use when removing and softening epoxy. It breaks down the epoxy enough to peel off relatively easily, but you must soak the liquid for up to hours on the epoxy.
A critical aspect of removing epoxy is the thickness of the material. If you have an eighth-of-an-inch thin coating, you can dissolve that with dichloromethane in minutes to half an hour, depending on the exact type of epoxy and the concentration of the liquid.
Whereas if you have an inch-thick layer of epoxy coating, you won’t get any results after at least an hour or two of soaking.
So yes, to start removing the epoxy, you need to soak it in the liquid for quite a while, which is why I don’t recommend soaking the whole floor at once.
If you do, you can severely damage some other garage components, and the amount of neurotoxic material spread in your garage all at once is too much; it is a mess. I recommend you soak a part of the epoxy floor with the liquid first, a large enough part you can work on to get started, and then work your way to the end.
The good part about working with thinning and stripping liquids is that they don’t leave a residue. Since they cover and break down the whole epoxy, you won’t have strips of it remaining on your cement floor since those will quickly come off with the scraper. However, the bad part is that it will take longer than to sand the whole thing down.
When working with a heat gun, which is, in my opinion, the simplest and most practical way to remove epoxy, you need to plug it in and take out your scraper. Start blowing the hot air onto the epoxy to soften it slowly.
There are many types of epoxy, but the most common ones start to soften at around 140 degrees Fahrenheit. If you have a high-heat epoxy installed, it might handle up to 600 degrees. Epoxy also doesn’t become liquid, nor does it separate its two base components (resin and hardener), but it softens and then chars above a certain heat.
When removing epoxy from your garage floor with a heat gun, try to heat it just enough so you can easily scrape it off with a metal scraper. Ensure you have a protective respirator since heating resin often produces poisonous gases. A dust mask isn’t enough, so make sure you have an actual respirator that can filter out micro particles like silicone dust.
When using a grinder or buffer, regardless of the size and type, there are two things to keep in mind:
- Always hold it level to the ground to avoid damaging the material under the epoxy (usually concrete or cement) or the machine itself.
- Always have a vacuum suction device (heavy-duty vacuum cleaner) connected to the machine since grinding the epoxy will send millions of harmful particles flying around the air. You do need a respirator, nevertheless, but the vacuum will take care of most harmful particles.
5. Start Removing the Epoxy
Once you’re dressed up in protective gear from head to toe and softened the epoxy, it is time to get to work. From here, it is pretty straightforward, whichever method you have chosen to use.
Now that the epoxy is softer or easier to break off in pieces, a strong metal scraper will easily pop up and scrape off shards and chunks of epoxy. We recommend you soak a couple of square yards of epoxy and soak another part while working on the previous one.
Place the heat gun directly above the epoxy you want to soften, and turn it on. Don’t blow too much in one single spot. Instead, take two fist-sized chunks at a time, heat them and peel them away from the concrete using the scraper.
Watch not overheat your heat gun and get a more robust scraper that won’t break from the strong epoxy resin since it is tough to even warm and soft.
If you are working with a buffer or grinder, I recommend choosing a diamond abrasive disk with oversized teeth for the first round of grinding. This should take care of most of the epoxy on your floor, but it will also leave imperfections and create cuts and marks in the cement below. Make sure you get all corners with the machine as well.
6. Evaluate the Results
After probably hours of work, you may now have successfully removed a thick epoxy layer from your garage. It is time for the first evaluation, where you have to check whether you have left any smaller chunks and pieces behind or if there is something else to perfect.
After soaking the epoxy with dichloromethane and meticulously scraping it, you likely won’t have much epoxy remaining on your floor. The first evaluation is more about checking whether you have mopped up and cleaned up all the chemicals used to soak the epoxy.
The heat gun method can lead to remaining chunks or streaks of epoxy here and there. Check where these are, clean up a bit so you don’t encounter any unnecessary mess along the way, and start perfecting the epoxy removal.
The first evaluation is probably the most relevant when working with a grinder since here, you have to change the first disk, maybe even multiple times, if you want the best results.
In the first round, you probably used a diamond abrasive disk to remove most of the epoxy, but some minor streaks or spots might be left, or you might have just cut the cement or concrete under the epoxy. Take a look at the result of the first round and decide whether you need to polish up the concrete a bit or perhaps remove a couple of patches of epoxy.
7. Complete the Removal
After checking what you have accomplished in the first round of epoxy removal, you can finish the process. Remove the last tiny remnants of epoxy if needed, with whichever technique you want to use, or polish up the concrete with a buffer for a clean finish to the project.
Some key areas to check are the corners or the garage since those are the most challenging parts to remove the epoxy from most often.
8. Clean-Up Again
Your garage is probably a mess of chemicals, dust, epoxy powder, and more. It is even more crucial to have a squeaky-clean garage before installing new flooring than to have it clean before removing epoxy.
If you plan to install a new type of flooring, clean it as best as possible. The remaining dust can also be hazardous, so ensure thorough.
9. Dispose of the Epoxy
Cured epoxy is considered non-hazardous, which means that if the ratio of resin and hardener is correct, you can take your epoxy debris to regular trash. This is the case for most garages because a properly combined epoxy is what you are trying to remove.
However, if you used dichloromethane or other chemicals like acetone or paint thinner, there is a chance that the epoxy itself is coated with these chemicals or has soaked in them.
In this case, you should find a place to dispose of this material safely since it can be highly hazardous to people, animals, and nature.
Tips to Remove Epoxy From Garage
That concludes the primary steps for removing epoxy from your garage, but here are some tips to help you along the way!
- Watch out when handling epoxy. It can easily get on your hand and stick to it. In the case you have epoxy stuck to your hands, you can either use vinegar, acetone, or citrus-based waterless hand cleaners
- Throw out any clothing and fabric used to clean up dichloromethane, and if it has made contact with your skin, wash it generously with warm water and soap. Dichloromethane can be dangerous, so use it with care.
- Don’t use too much heat when using a heat gun, as you might overuse the equipment. When heating the epoxy, up to 150-200 degrees F is usually enough.
- When working with epoxy, have at least two windows open if possible, and if you can, set a fan in the airflow direction to help ventilate the garage.
- Don’t buy a floor buffer to remove epoxy. Many hardware stores and construction-related firms rent them, which is a much more practical solution.
- Call professionals if you’re unsure of what you are doing or are nervous/scared to start.
What to Use to Dissolve Epoxy (Best Products)
The best products most often bring the best results! Whichever method you choose to remove epoxy from your garage floor, you can find a tool that suits you best.
Dichloromethane
Carolina chemical is a trusted brand in the States, and its dichloromethane is one we can recommend. It has a concentration above 99.8%, so you can remove all the epoxy you like. Different packages range from 1-liter bottles to 4-liter ones, so depending on the size of your garage, you can choose which is best for you. Click here to check it out on Amazon!
Putty Knife/Metal Scraper
A putty knife, also known as a metal scraper, is one of the items you will need to remove epoxy from your garage floor. You want to choose something strong but flexible enough not to break under the pressure you put on it when removing epoxy. Check it out here on Amazon!
DeWalt Heat Gun
DeWalt is another company that has been around for a while and can be trusted. If you are looking for a heat gun to remove your epoxy flooring, which will quickly generate enough heat to soften the epoxy, this DeWalt heat gun is one of the best options. Reliability comes at a great price with this one.
DeWalt Concrete Surface Grinder Kit
The large floor buffer we discussed earlier is rare on Amazon. It is also a hugely unnecessary investment if you only look for a tool to remove the epoxy.
DeWalt grinder kit is the best option if you want to buy something which will help you remove the epoxy but don’t want to purchase your floor buffer. You can separately buy all different types of disks to perfect your epoxy-grinding game. Check it out on Amazon by clicking on this link!