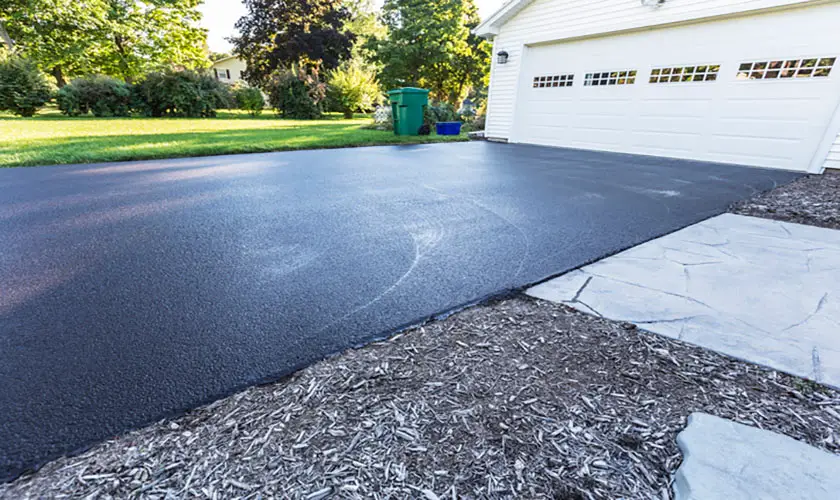
Mismatched concrete can be a glaring mistake, especially in a high traffic space. The typical mismatch appears as one area of the concrete is darker and the other lighter. The good news is that this is a rectifiable problem. So how do you fix mismatched concrete?
It’s virtually impossible to match new concrete and old concrete. Your best option is to apply a concrete overlay across both the new and old surfaces. However, if this is not an option, to lessen the effect of mismatched concrete, you can:
- wash the old concrete to remove dirt buildup
- use very dilute acid on the old concrete, scrubbing the area with soapy water
- use a neutralizer to balance the acid
- pressure wash the old concrete to flush and clean the concrete
This may lighten the concrete enough if the concrete is not too old.
If the concrete still doesn’t match, you can use a concrete stain technique blending two or more colors together to create a finish you’re satisfied with. Staining with one color may not give you the desired look.
Laying concrete is not an exact science. You should plan to deal with potential mismatches. See our article on staining concrete at How to Acid Stain Garage Floor: Step by Step Guide With Video.
Let’s dive into how concrete becomes mismatched and what you can do to remedy the situation.
Why Is My Concrete Two Different Colors?
There are several reasons why your concrete is two different colors.
1. Variation In Concrete Mixtures
The materials used in the mixture can cause a variation in colors.
For example, use cement consisting of fly ash, micro-silica, or ggbs (ground granulated blast furnace slag). You will have a different color from using regular coarse particles of cement.
2. The Use Of Water
The amount of water used in the mixing can affect the color. Concrete with less water is drier, and that makes the final color darker. Concrete with more water is wet, making it lighter in color.
To achieve the correct amount of water in the mix, you should pour only a small amount at a time to prevent the concrete from drying out.
Finally, make sure that you do the same for all the other batches if you pour water into the batch at the beginning. If you pour water at the beginning of one batch and for the next batch, you pour at the end, the colors of the two mixes will be off.
3. Outside Temperatures
The different materials you choose to use will affect the final color of the concrete because of their absorbance rates. And absorption is affected by the ambient temperatures.
For instance, cement containing ggbs will give you a blueish color because the material has a long absorbance rate. But once the concrete has undergone complete absorption, it will lighten while still retaining a far-off blue tinge.
You may also notice the concrete looks yellowish or greenish when you use ground slag. But with time, the concrete becomes lighter.
On the other hand, if you decide to use calcium chloride to hasten the setting time, you will also end up with a darker color. But that usually happens when you use too much of this ingredient.
Calcium chloride is used when you do not want to wait for the concrete to set at its own pace. It is an accelerant that sets the concrete faster, so it works on time-constrained applications.
Also, if you use calcium chloride, it is critical to mix it very well to avoid discoloration.
4. Poor Workmanship
It is best to use a professional mason who knows how to work the concrete and prevent discoloration to avoid poor workmanship.
For example, a professional will avoid trowel burning the concrete, which will result in black spots.
They will also make sure that the curing is uniform. When the curing is uneven, you will notice certain areas are darker or lighter depending on which part sets sooner.
Types Of Concrete Discoloration To Expect
Blotchiness
Blotchy concrete discoloration occurs when the concrete has a different absorption rate. The varying absorption rate can result from different batches of concrete mixes featuring different amounts of water on your space.
One batch may cure faster than the other, and the result is a blotchy look.
Also, blotchy concrete may come about when you apply sealer poorly. Before applying the sealer, you need to give the surface between 12 to 24 hours to dry after cleaning with water.
If you apply the sealer before the concrete surface dries completely, moisture remains under the sealant, causing a blotchy white discoloration. In some cases, you probably didn’t apply enough sealer.
Spots
Spotty concrete is a result of trowel burn. Trowel burns result from hard troweling the concrete surface so stiffly that the trowel leaves some metal fragments that embed in the concrete.
As a result, you notice tiny black specks all over the surface.
The spots also result from the densification of the surface because of the reduced water to cement ratio.
That is because trowel burning causes the water to evaporate from the concrete mix.
Apart from black specks, there is also efflorescent discoloration. This type of discoloration features white crystals or a white powdery finish that continues to reappear after every wash.
They are removable using an efflorescence cleaner.
Stripes
Stripes can be caused by water. If the concrete is fully cured but comes into contact with water, the liquid can cause streaking over time, especially in areas where the water follows a similar path every time.
Unfortunately, if the water has a high mineral content, it can leave rust-colored streaks.
Color Differences
These result from poor mixing techniques, insufficient curing, using different materials, and poor workmanship.
It is always critical to get a professional to do your concrete work. And if you decide to DIY, it is essential to have an ample understanding of the materials you are using.
So can you do anything about concrete discoloration?
Consider matching your concrete to each other.
Can New Concrete Match Old Concrete?
It is possible to make the old and new concrete match. Here are the options to work with:
Replicate the Old Concrete
To replicate the old concrete, you must study it and copy every element to the tee.
First, you have to determine the texture of the old concrete. When choosing the surface texture, you should identify whether it is knockdown, stamped, or smooth finish. That determines the type of texture that you will use on the new concrete.
Also, pay attention to the colors used on the older concrete and how much damage is present. Attention to these details will help significantly when choosing the materials that help you match the two concretes.
You always have to make a sample of the new concrete and compare it with the old one to get it right. This can be time-consuming because it relies heavily on relieving another contractor’s thought process and technique.
There is always a massive margin for error with this approach.
Work With Concrete Overlays
It is pretty tedious to get the old and new concrete to match, especially if the old concrete is too dated or has too much deterioration.
So, you can opt to use concrete overlays to match the entire surface.
Concrete Overlays Come in Four Styles.
- Stamped Concrete Overlays
Stamped overlays are decorative. You can use them both indoors and outdoors, allowing you room to get creative and decorative.
A stamped concrete overlay is typically ⅜ to ¾ inches. That allows the concrete to be thick enough to take any design imprint you may have in mind.
The concrete can mimic materials like brick, stones, tile, and wood.
- Self-leveling Overlays
The self-leveling concrete overlay offers you a smooth finished surface. This type of overlay works well for an old concrete surface with a high deterioration and damage level.
The overlay will be poured out, and it will spread on its own. You will need a squeegee to even out the distribution as you pour out the concrete.
Of course, you must ensure that the old concrete surface is clean, washed and gaps/cracks are filled and leveled for the self-leveling concrete overlay to work best.
A self-leveling overlay is easy to work with in terms of spreading, but it requires a professional who can work it quickly and without trowel burning the concrete.
- Knockdown Concrete Overlays
This overlay works well for creating a textured surface that you can lay a stamped or self-leveling overlay over.
You can use it to repair the old concrete and then apply a more decorative overlay like the stampable option.
Alternatively, you can leave the overlay as a textured surface.
You also have to repair the existing old concrete and fill in any cracks and gaps. You then apply the concrete to the surface and knock it down using a trowel shortly after application.
Using the trowel levels the surface and spreads the concrete.
This is a multi-purpose surface so that one can use it indoors and outdoors.
- Micro-Topping Overlay
If the old concrete surface is still in excellent shape, you can use a micro-topping concrete overlay.
It is a very thin topping that is stainable. Or will rejuvenate the surface of the old concrete and cover over any discoloration with a new color.
The thickness can be as little as 1/16 inches or as much as one inch. Micro-topping overlays should be applied using a squeegee, and they cannot be polished.
How Do You Match Old Concrete To New Concrete?
If only a section of your concrete surface needs some work, you do not have to consider laying an entire overlay. Instead, you can use the step-by-step guide below to replace the damaged section.
Step 1
Clean the old concrete surface thoroughly. Use a pressure washer to remove any grime, dirt, and debris.
Pressure washing is critical because it helps you see the exact color of the concrete you will be matching.
Use a pressure washer with a 15-degree tip wand.
Step 2
Leave the floor to dry completely. Air drying is usually best, and 12 to 24 hours is sufficient to ensure that the surface is completely dry.
Get on your knees and inspect the old concrete closely to see what grains you can identify. Take a picture to share with staff at the hardware store where you will buy your materials.
Ensure that you find the same sand that looks like what is in the old concrete.
You must get the sand right so pay attention to the colors and grain of the sand in the existing concrete.
Step 3
Next, identify the cement used in the concrete. Match the exact color: Off white, grey, or buff. If it is gray, get the correct match of gray.
Step 4
Once you have all these ingredients, mix a small batch and compare it to the old concrete.
Step 5
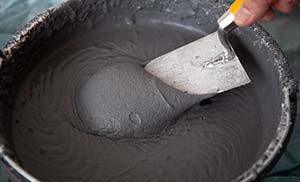
Get some clean gravel with stones the sizes of green peas to grapes. Mix the gravel, sand, and cement in the ratio of 3:2:1.5.
Blend the mixture while dry first and then begin to add water. Add water in small amounts until the consistency is like stiff applesauce.
Step 6
Test the mixture in a sample and cover it for two weeks. This is enough time for you to see whether the mixture matches the existing concrete.
If it does, pour the mixture into small portions and finish it with a texture that matches the old concrete.
Do not buy pre-bagged concrete because it is highly likely not to match, especially if the previous contractor mixed the old concrete.
How Do You Attach New Concrete To Old Concrete
Typically, you can bond new concrete to old concrete by patching. You can do the patching mechanically or chemically.
- Mechanical Bonding
In this method, you apply a soupy consistency of scratch coat. A scratch coat is a repair product mixed with water to make it very wet.
Once the mixture is slop, smear it onto the area that needs patching. You can use a rag or a gloved hand for this part. Do not forget to put the mixture into the cracks, nooks, and crannies.
It doesn’t have to dry.
Next, you can apply the repair material mixed to the correct thickness consistency over the scratch coat and let it dry.
Some people prefer to bond the old and new concrete using pins.
In this scenario, the two concretes will be pinned together using rebar or dowels. There is a range of rebar from heavy-duty to a standard ½ inch rebar.
Begin by drilling holes with a diameter of ⅝ inches into the existing concrete. The rebars should be 12 inches long on center.
Make sure the holes are six inches away from the edges to prevent chipping on the older concrete.
Clean the holes by flushing them with water. Next, inject some epoxy into the back of the holes, filling them halfway.
Insert the rebars into the holes and turn them so that the epoxy coats them lengthwise and on the diameter.
Now, puncture holes into duct tape using the ends of the rebars. Slide the tapes down the lengths of the rebars until they cover the hole with the epoxy. That will prevent the epoxy from seeping out of the hole during curing.
The portion of the rebar that remains above the concrete will need a coat of metal primer to prevent rusting.
Now you can pour the new concrete, letting it flow all around the rebar pins. As the new concrete cures and solidifies around the rebar, it stays attached to the old concrete by the pins.
- Chemical Bonding
Chemical bonding requires using a liquid bonding agent like the Sakrete Concrete Bonder and Fortifier to hold the new concrete to the old one.
Bonding agents contain polymers that help strengthen the bond between the two concrete to prevent separation.
Apply the bonder onto the existing concrete and let it dry for a few minutes until it feels tacky. Next, apply the repair material in the correct consistency.
Use a brush or a rag to apply the bonder for the best application. Alternatively, you can use a sprayer. Squeegees tend to take too much product, and the application is not thorough enough.
Some liquid bonding agents can be mixed into water. But applying an undiluted bonding agent may be more effective for a longer-lasting bond.
How Do You Fix Different Colored Concrete
Sometimes, the different colors have nothing to do with the mixture of the concrete. It may be a stamped overlay that has different colors.
After pouring the stamped slab, you may notice an inconsistency in the colors. You can choose to rectify this by adding or reducing the color.
You can apply more stain, dye, or tint to match the color you want to add color.
To reduce the color, spray the surface with very diluted acid. The recommended ratio for the acid mixture is 40:1 (40 parts water and one part muriatic acid).
Apply the acid-water mixture to small portions of the affected area, one at a time and scrub with a bristle brush, then rinse with soapy water.