Refinishing a wood deck involves several steps to ensure it is protected and looks its best. Here’s a comprehensive guide to refinishing a wood deck:
Cleaning the Deck
Here are 4 tips for cleaning a deck:
- Remove all furniture and debris: Clear the deck of all items to allow easy access to the entire surface.
- Sweep or blow off loose debris: Use a broom or leaf blower to remove loose dirt or leaves.
- Deep clean the deck: Use a biodegradable deck cleaner or a mixture of water and mild dish soap. Scrub the deck with a stiff bristle brush to remove dirt, mold, and mildew.
- Rinse thoroughly: Use a hose or a pressure washer on a low setting to rinse the deck. Be careful not to damage the wood with high pressure.
Sanding the Deck
Here are 3 steps for sanding a deck:
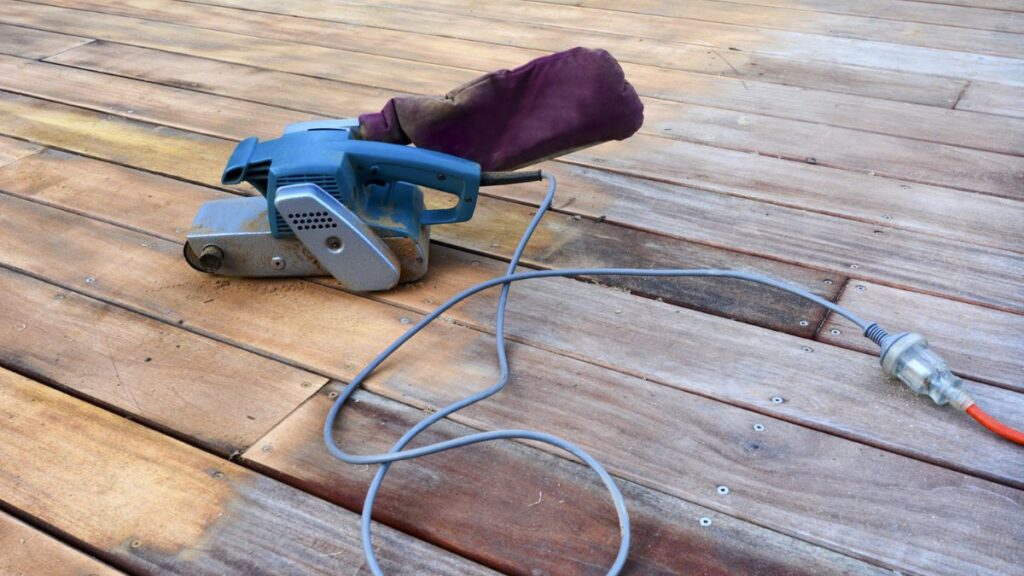
- Sand the deck surface: Use a sander appropriate for your deck size, such as a belt sander, floor sander, or random orbital sander. Start with 60 to 80 grit sandpaper for the deck boards and 80 to 100 grit for handrails.
- Sand corners and details: Use a detail sander or sanding sponge with larger sanders for areas that are hard to reach.
- Clean up sawdust: After sanding, remove all sawdust from the deck surface using a broom, leaf blower, or vacuum.
Staining and Sealing the Deck
Here are 4 tips for restaining a deck:
- Choose the right stain or sealant: Select a product appropriate for your deck’s wood type and desired appearance.
- Apply wood brightener if necessary: This step can enhance the wood grain and prepare it for better stain absorption.
- Stain the deck: Apply the stain with a brush, roller, or sprayer, making sure to work it into all nooks and crannies. Follow the manufacturer’s instructions for application and drying times.
- Seal the deck: After the stain has dried, apply a sealant to protect the wood from moisture and UV damage. This step may not be necessary if you use a stain that includes a sealant.
Regular Maintenance
- Regular cleaning: Keep the deck clean by sweeping and washing it regularly to prevent the buildup of dirt and debris.
- Inspect and repair: Check the deck periodically for any loose boards, nails, or other issues and address them promptly.
The process is different for composite decking as these materials usually cannot be traditionally sanded or stained. Instead, cleaning is the primary method of maintenance:
- Clean regularly: Use a composite deck cleaner or a mixture of vinegar, water, and baking soda to clean the surface.
- Rinse well: After cleaning, rinse the deck thoroughly with water.
- Address fading: If the composite deck has faded, there are products specifically designed to restore the color of composite decking. Follow the manufacturer’s instructions for application.
How to Refinish a Deck
Before diving into the wood deck refinishing process, it’s essential to understand your deck. Knowing the type of material your deck is made of and recognizing the signs that it needs refinishing are crucial first steps.
Types of Deck Materials
There are primarily two types of deck materials:
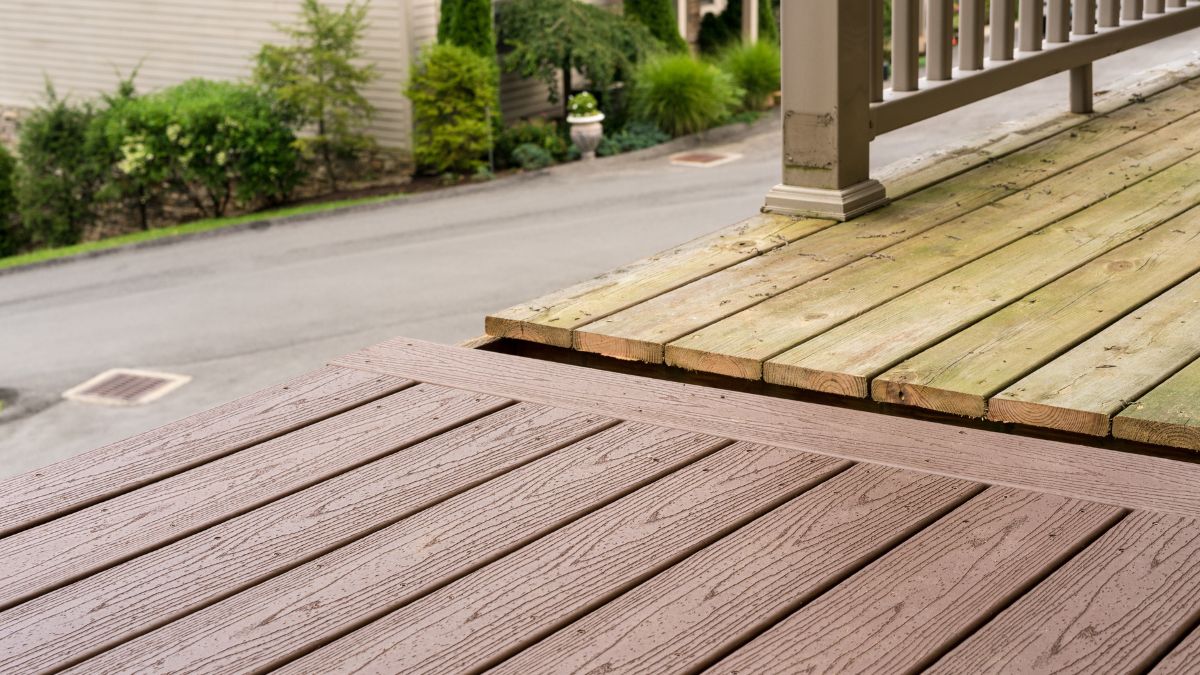
- Wood Decks: These are traditional and offer a classic, timeless look. They can be made from various woods, including pressure-treated pine, cedar, redwood, and tropical hardwood. Each type of wood has its unique characteristics and maintenance needs.
- Composite Decks: These are made from wood fibers and plastic. They are durable, resist rot and insects, and require less maintenance than wood decks. They come in various natural uniform colors and mimic the look of real wood.
Now, let’s talk about the signs that your deck needs refinishing. It’s hard to tell when your deck cries out for help. Here are some telltale signs:
- Peeling or Fading Finish: This is a clear sign that your deck’s protective layer is wearing off and needs to be reapplied.
- Splintered Wood: Wood decks can develop splinters over time, making them unsafe and uncomfortable.
- Discoloration and Coat of Stain: These can be caused by mold, mildew, or weathering, indicating that your deck needs a good cleaning and a new finish.
- Water Absorption: When water no longer beads up on the deck surface but instead soaks in, it’s time for a new finish.

Tools and Materials Needed for Deck Refinishing
Now that you’ve assessed your deck and determined it’s time to refresh, let’s gather the tools and materials you’ll need for this project. Having the right tools at your disposal will make the process smoother and more efficient.
Here’s your refinishing wood toolkit:
- Deck Cleaner: This is a must-have for removing dirt, mildew, and old stains from your deck. Choose a cleaner suitable for your deck material.
- Pressure Washer: This powerful tool helps deep clean your deck and prepare it for the new finish. Remember to use it carefully to avoid damaging the wood.
- Sandpaper or Sander: You’ll need this to smooth out any rough spots or splinters on your deck. A power sander can make the job quicker for larger decks.
- Paint Brushes and Rollers: These are for applying the new finish. Brushes are great for detail work and getting into tight spots, while roller brushes can cover large areas quickly.
- Deck Finish: This could be a water-based or oil-based stain, sealant, or coat of paint, depending on your preference and the look you’re going for.
- Paint Tray and Stir Stick: This will help mix and apply your deck finish evenly.
Safety should always be your top priority when undertaking a project like this. Here’s the safety equipment you should have:
- Safety Glasses or Protective Gear: These protect your eyes from splashes of cleaner or finish.
- Gloves: Protect your hands from harsh chemicals, cleaning, and splinters.
- Protective Clothing: Wear long sleeves and pants to protect your skin.
- Non-Slip Shoes: These will help prevent slips and falls, especially when working with a wet deck.
Preparing Your Deck for Refinishing
The secret to successful wood deck refinishing lies in the preparation. A well-prepared wooden deck ensures a smoother application of the new finish and a more stunning result. Let’s walk through cleaning, repairing, and sanding your deck.
Cleaning the Deck
Your first task is to give your wooden deck a thorough cleaning. This step is crucial to remove any dirt, mildew, or old finish that could prevent the new finish from adhering properly.
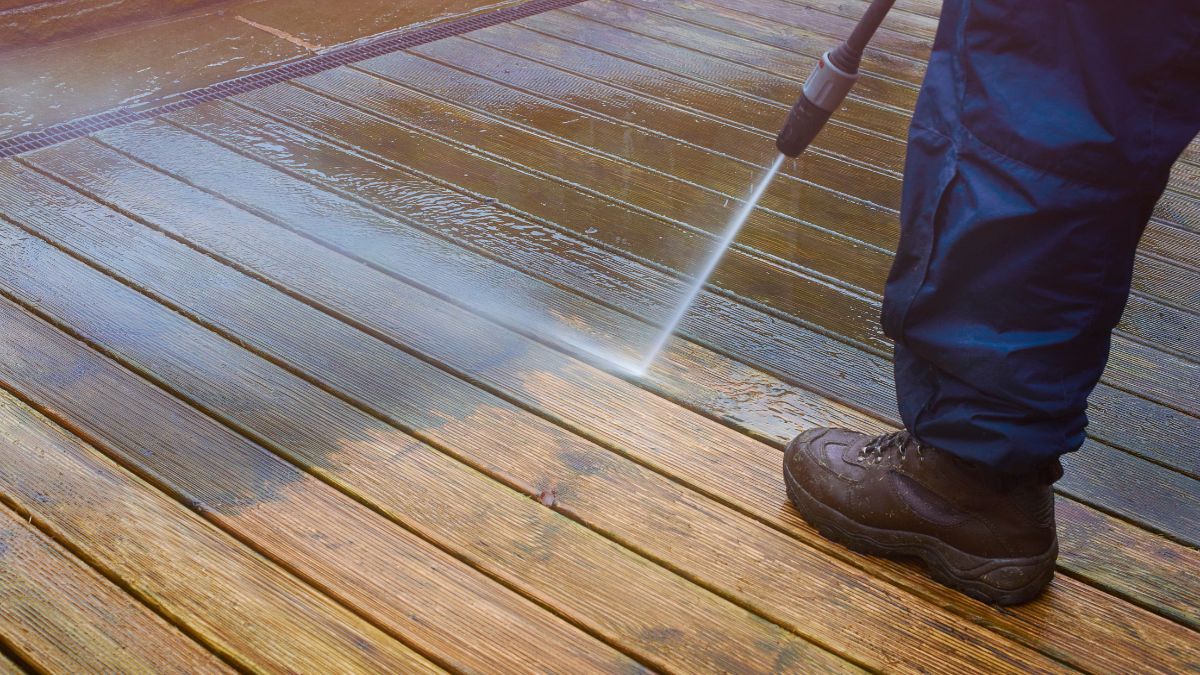
Start by sweeping the deck to remove loose debris. Then, apply a deck cleaner suitable for your decking material. Follow the instructions on the cleaner, which usually involves applying it, letting it sit for a specified time, and then rinsing it off.
A pressure washing or power washer can be valuable, but be careful not to damage the wood with too much pressure.
After cleaning, give your deck time to dry completely before moving on to the next step. This could take a day or two, depending on the weather.
Deck strippers are great for removing old paint, stains, and sealants from wooden decks. They can also be used to remove old wood finishes and blemishes. Deck strippers help make the job of cleaning up your deck easier and more efficient, but remember to use proper safety gear like safety glasses and rubber gloves, and wear protective clothing,
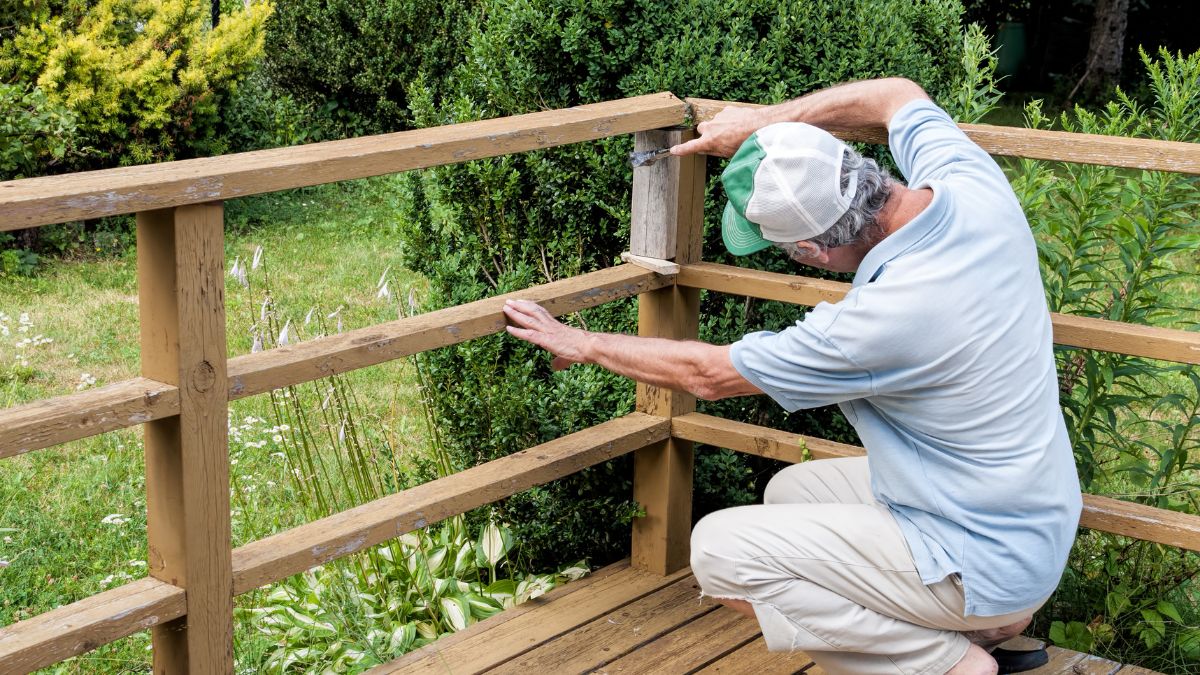
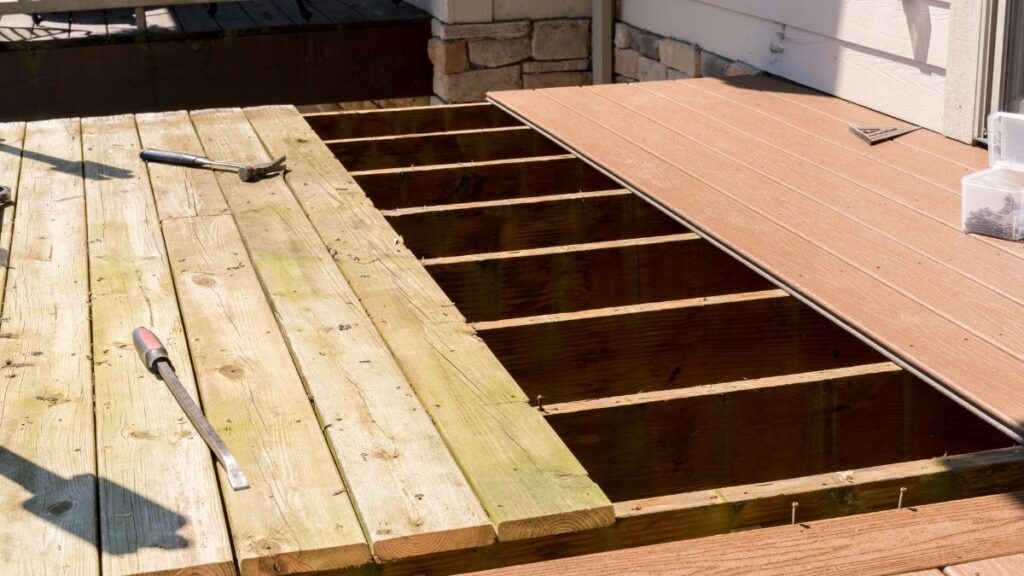
Repairing Damaged Parts
Once your deck is clean and dry, inspect it carefully for any damage. Look for cracked or splintered boards, loose nails, or any other issues that need attention.
Replace any severely damaged deck boards, and hammer in or replace any protruding nails. If you notice loose or shaky deck railings or steps, tighten or reinforce them as needed.
Sanding the Deck
Sanding is the final step in your deck preparation. This step is essential for smoothing out any rough spots or splinters and creating a better deck surface for the new finish to adhere to.
You can sand your deck by hand, but an electric sander can save you time and effort for larger decks. Use medium-grit sandpaper and sand toward the wood grain to avoid scratches.
Pay special attention to railings and other areas where hands are likely to touch. These areas should be as smooth as possible to prevent splinters.
Once you’ve finished sanding, sweep or vacuum your deck to remove any dust. Now, your deck is ready for the new finish.
Choosing the Right Finish for Your Deck
Now that your deck is clean, repaired, and sanded, it’s time to choose the right finish. The finish you choose will determine not only the look of your deck but also its durability and maintenance needs.
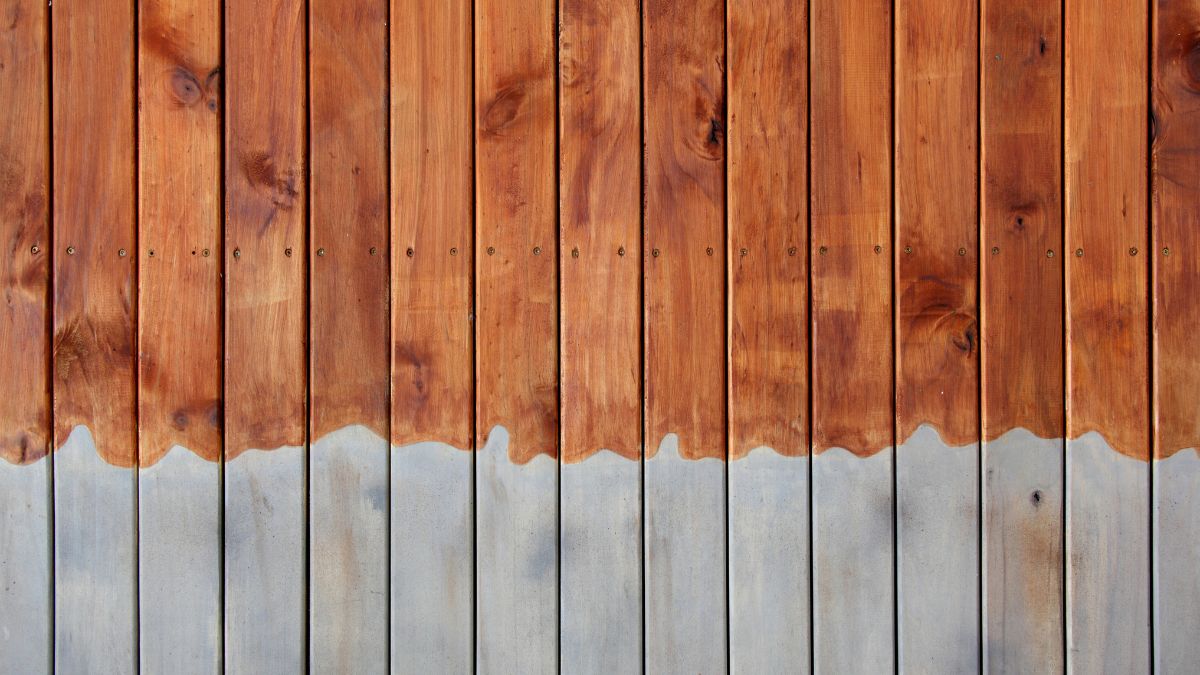
There are three main types of deck finishes:
- Stains: Deck stains penetrate the wood and provide color while allowing the wood grain to show through. They come in a range of opacities, from clear to solid. Clear stains show the most wood grain but offer the least UV protection. Solid color stains offer the most UV protection but show the least wood grain.
- Sealants: These are clear finishes that protect the wood without adding color. They’re great for preserving the natural color of your deck.
- Paints: Deck paints provide the most color options and the highest level of protection, but they hide the wood grain patterns.
When choosing a finish, consider these factors:
- Deck Material: The type of wood or composite material your deck uses can influence which finishes will work best.
- Weather Conditions: If your deck is exposed to harsh sun, a finish with UV protection is essential. A water-resistant finish is a must if you live in a wet climate.
- Maintenance Level: Some finishes require more frequent reapplication than others. Consider how much time and effort you will put into deck maintenance.
- Aesthetics: Think about the look you want for your deck. Do you prefer the natural look of wood, or do you want a pop of color?
How to Refinish Your Deck
You’ve prepared your deck and chosen the perfect finish. The exciting part comes: applying the finish and seeing your deck transform. Let’s walk through the process step by step.
Step 1: Check the Weather
Before you start, make sure the weather is on your side. You’ll need a few dry days to apply the finish and let it dry. Avoid working in direct sunlight if possible, as it can cause the finish to dry too quickly and unevenly.
Step 2: Prepare Your Workspace
Cover any areas you don’t want to get chemicals, paint, or stain on, like house siding or landscaping plants, with plastic sheeting. Also, ensure you have all your tools: your chosen finish, paint brushes or rollers, a paint tray, and a stir stick.
Step 3: Stir the Finish
Stir your finish thoroughly to make sure any color pigments or protective additives are evenly distributed. Don’t shake the finish, as this can create bubbles that will show up on your deck.
Step 4: Apply the Finish
Start at one end of your deck and work to the other, applying the finish in thin, even coats. Use a brush or roller appropriate for your type of finish and deck material. Remember to work with the grain of the wood, not against it.
For the best results, “back-brush” the finish — that is, brush over it after application to ensure it penetrates the wood and eliminates any puddles or drips.
Step 5: Let It Dry
Once you’ve covered your entire deck, give the finish time to dry. The drying time will depend on the type of finish and the weather conditions, but generally, you should wait at least 24-48 hours before walking on your deck.
Step 6: Apply a Second Coat (If Needed)
Some finishes require a second fresh coat for maximum durability and additional protection. If your finish is one of them, apply the second coat after the first one has dried completely.
And there you have it — a beautifully refinished deck ready for barbecues, sunbathing, and making memories.
Here are a few extra tips for a smooth application:
- Don’t Rush: Take your time to apply the finish evenly and thoroughly. Rushing can lead to a sloppy job and an unsatisfactory result.
- Maintain a “Wet Edge”: You should always brush the wet paint or wood stain onto the wet finish to avoid lap marks.
- Clean Up Promptly: Clean your stiff-bristle brushes and paint rollers as soon as you’re done to keep them in good condition for your next project.
Maintaining Your Refinished Deck
Congratulations! You’ve successfully refinished your deck, which looks better than ever. But your work isn’t quite done yet. Regular maintenance is key to keeping your deck looking its best and extending its lifespan. Here’s how to take care of your newly refinished deck.
Regular Cleaning
Just like any part of your home, your deck needs regular cleaning. Sweep it regularly to remove leaves, dirt, and other debris. Rinse it with a garden hose to remove dust and pollen. Use a mild detergent and a soft brush for a deeper clean, then rinse thoroughly. Avoid using a pressure washer for regular cleaning, as it can damage the finish and the wood underneath.
Periodic Reapplication of Finish
Even the best deck finish won’t last forever. Over time, it will start to wear off, especially in high-traffic areas. It’s time for a touch-up when you notice the finish starting to fade or wear thin. Depending on the type of finish and the weather conditions, you might need to reapply the finish every 1-3 years.
Addressing Minor Damages Promptly
Even with regular cleaning and reapplication of finish, your deck might still suffer minor damages, like small cracks or loose nails. Address these issues promptly to prevent them from becoming bigger problems. Replace any severely damaged deck boards, hammer in any protruding nails, and fill small cracks with a wood filler.
Common Mistakes to Avoid When Refinishing a Deck
Refinishing a deck is a rewarding project, but it has its pitfalls. To help you navigate the process and achieve the best possible result, here are some common mistakes to avoid and tips on how to sidestep them.
1: Not Preparing the Deck Properly
Proper preparation is key to successfully refinishing wood decks. This includes cleaning the deck thoroughly, repairing any damages, and sanding the entire surface smoothly.
Avoidance Tip: Don’t rush the preparation process. Take the time to clean, repair, and sand your deck properly before applying the new finish.
2: Choosing the Wrong Finish
Not all deck finishes are created equal. The right finish for your deck depends on the type of deck material, the weather conditions in your area, and the look you want to achieve.
Avoidance Tip: Do your research before choosing a finish. Consider your deck material, your local climate, and your aesthetic preferences.
3: Applying the Finish Incorrectly
Applying the finish incorrectly can lead to a patchy, uneven result that won’t protect your deck effectively.
Avoidance Tip: Follow the instructions on the finished product carefully. Apply the finish in thin, even coats, and always maintain a “wet edge” to avoid lap marks.
4: Ignoring Safety Precautions
Deck refinishing involves using tools and chemicals that can be hazardous if not handled correctly.
Avoidance Tip: Always wear appropriate safety gear, including safety glasses, gloves, and non-slip shoes. Follow all safety instructions on the tools and materials you’re using.
5: Neglecting Regular Maintenance
Even after your deck is beautifully refinished, it needs regular care to stay in top shape.
Avoidance Tip: Regularly clean, reapply the finish as needed, and promptly address minor damages.
FAQs About How to Refinish a Deck
As you embark on your deck refinishing journey, you may have questions. Here are answers to some of the most common questions about deck refinishing.
How often should I refinish my deck?
The frequency of deck refinishing depends on several factors, including the type of finish you use, the weather conditions in your area, and the amount of traffic your deck gets. Generally, you should plan to refinish your deck every 1-3 years.
Can I refinish my deck myself, or should I hire a professional?
Deck refinishing is a project that many homeowners can handle with the right tools and patience. However, hiring a professional can be a good option if your deck is large, in poor condition, or you don’t have the time or inclination to do the job yourself.
What’s the best time of year to refinish my deck?
The best time to refinish your deck is usually in the spring or fall when temperatures are moderate. Avoid refinishing your deck in extreme heat, which can cause the finish to dry too quickly or in damp conditions, preventing the finish from adhering properly.
How long does it take to refinish a deck?
The time it takes to refinish a deck depends on the size of the deck and the condition it’s in. A small, well-maintained deck might only take a weekend to refinish, while a large, neglected deck could take several couple days.
Can I change the color of my deck when I refinish it?
Yes, you can change the color of your deck when you refinish it. If you’re using a solid stain or paint as your finish, you can choose from a wide range of colors. If you’re going from a dark color to a lighter one, you may need to apply a primer first.
What should I do if my deck is in really bad shape?
If your deck is severely damaged, it may need more than refinishing. You might need to replace some or all of the deck boards, or in extreme cases, you might need to rebuild the deck entirely. If you’re unsure about the condition of your deck, it’s a good idea to consult a professional.