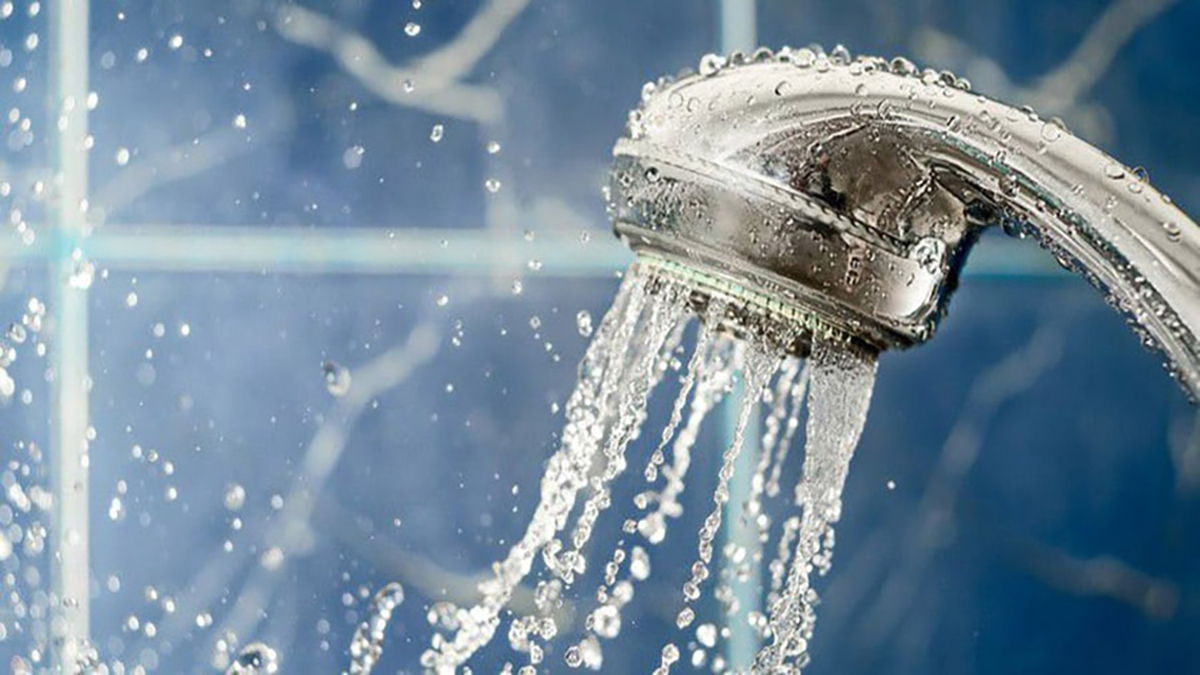
Gas water heaters and the thermocouple that control their gas flow are integral to your home heating system. And similar to all other appliances, they need routine maintenance. This ensures that the gas water heater is working correctly and not leaking any dangerous gases into your home. So how do you clean a thermocouple on a gas water heater?
Here’s how I clean our thermocouple:
In cleaning a thermocouple, you need some steel wool or 60-grit sandpaper, and a cloth. First, turn off the gas supply, unscrew the thermocouple and then clean it with steel wool or sandpaper then wipe down with a cloth to remove residue. I clean our thermocouple every six months to avoid getting it coated with soot. If you can’t remove your thermocouple without removing the burner assembly, you should call a plumber because your entire burner assembly may need to be replaced.
Once your thermocouple gets coated in soot from the flame, it may start to oxidize. This can lead to a breakdown of the thermocouple, which could cause a massive explosion or even a fire hazard.
Cleaning it is not a glamorous job, but it is a crucial one. Want to learn how to clean your gas water heater thermocouple? It is easy, and this step-by-step guide will walk you through it. We will also look further at how thermocouples work and how to keep them in their best condition. Keep reading!
What Is A Thermocouple?
A thermocouple is a small device near the bottom of the gas water heaters. These devices control how much gas should flow through it for it to work correctly. It then uses this mechanism to heat enough hot water for your household’s needs.
This small device sends an electric current into the pilot light to keep it lit. If you neglect regular cleaning and replacement of the thermocouple, corrosion can cause build-up. And this may result in dangerous situations that you could easily avoid.
Most homes that I have inspected with dysfunctional water heaters are because of an unkept thermocouple. If you plan to sell your home, working and well-maintained appliances such as water heaters can add value to your home.
The thermocouple device usually does not work alone. But it works hand-in-hand with a device by the name standing pilot. The standing pilot is a tiny flame that stays on when the appliance is in operation. And so, when the pilot goes off, the water is no longer heating.
For the pilot to stay on, the thermocouple must be in good condition. It is the primary way the sensor attached to the pilot gets an electric current to stay on. The sensor is on the gas valve, and it sends a signal to the pilot to stay on. The thermocouple has two metals, making it a probe to generate a voltage when two wires get heat. This is due to a scientific phenomenon called the Seebeck Effect.
Are Thermocouples Universal?
Ideally, thermocouples are not universal, but some specific models are compatible with most gas water heaters. The so-called ‘universal thermocouples’ are inexpensive and can be found online and in-home supply stores, as well as most hardware stores and department stores. When purchasing one, consider the length and type.
Thermocouples may work intermittently with other safety components but in rare cases. In these rare cases, a faulty thermocouple can render the gas valve inoperable. This is not always an issue because other safety devices will detect and shut down the system before any damage occurs.
The problem arises when these fail as well. For example, if both don’t work correctly, then you could still get some gas flowing to your home even though it’s malfunctioning – only now without being monitored by either of them.
7 Easy Steps In Cleaning Your Thermocouple
Step 1: Prepare The Tools
Before you carry out the cleaning process, here are some of the items you must have before proceeding:
- A multiway wrench: This is what helps you unscrew all the bolts and nuts inside the entire system.
- A screwdriver: This is to unscrew any tightened screws in the system.
- An emery cloth: This resembles a nail file, but this one has a cloth back. You use this to sandpaper the surface of the thermocouple to dislodge any soot build-up. It also removes any oxidation layers.
- Lint-free fabric: After you are done using the emery cloth to rub off all the build-up, you use this fabric. The main reason that lint-free fabric is the best is that it eliminates any chance of residue remaining on the thermocouple you just cleaned.
- Fine grit sandpaper or steel wool: You may also have a brush as an alternative to steel wool. This is the last piece of item that you will use to dust off any remaining particles on the thermocouple. You also use it to clean the rest of the water heater assembly.
Step 2: Disconnect The Water Heater Gas Supply
Because some gas water heaters have two supply injectors, it is best to turn them both off. Always keep your safety in mind when working with a gas-powered water heater.
Also, stay away from any open flames or sparks. These can cause an explosion if there is too much fuel in one area.
Step 3: Disassemble The Water Burner
Untwist the mounting screws first if your heater has an access lid. Then proceed by loosening and removing the nuts that secure the burner plate. Turn the screwdriver a couple of times to loosen any threaded links connecting it to other components.
If there is anything else wired into your control center, disconnect the wires too. You can do this by carefully pulling on any protruding connectors. If they don’t detach easily, then put some pressure onto their release levers while gently tugging at each wire simultaneously until they break free from one another’s grip. Make sure not to pull on them with excessive force or yank unnaturally. This is because otherwise, you’ll only end up damaging something.
Examine your tank base to see if it has a vapor sensor. Remove it if it does. To access the thermocouple, remove the burner installation from the water heater.
Step 4: Sand The Thermocouple
Using an emery cloth, sand the thermocouple ends. This will get rid of any stubborn stains you may have. This will help to maintain a clean sensing area for optimal performance when heating water later on. Check for corrosion between the terminal and the power wire and wipe it away before the cleaning process. Finish by wiping down the sanded areas with a new microfiber towel to ensure everything is in good working order.
Step 5: Cleanse The Burner
If you want to save money on your energy bills, also clean your burner. You’d be surprised how much debris can accumulate in those ports or holes.
So, while steel wool and emery cloth sandpaper work their magic scrubbing, use a small brush to remove any dust that may have gotten into these places. This will aid in the improvement of efficiency as well as general safety checks.
Step 6: Reconstruct The Gas Water Heater
Restore the burner assembly to its proper location in the tank and ensure that it is securely balanced on its bracket for safety. Tighten all of the mounting screws or nuts before moving on to the next step of securing other parts. Reattach any wiring that you removed during disassembly and any external components such as internal sensors.
Step 7: Turn On the Gas Water Heater
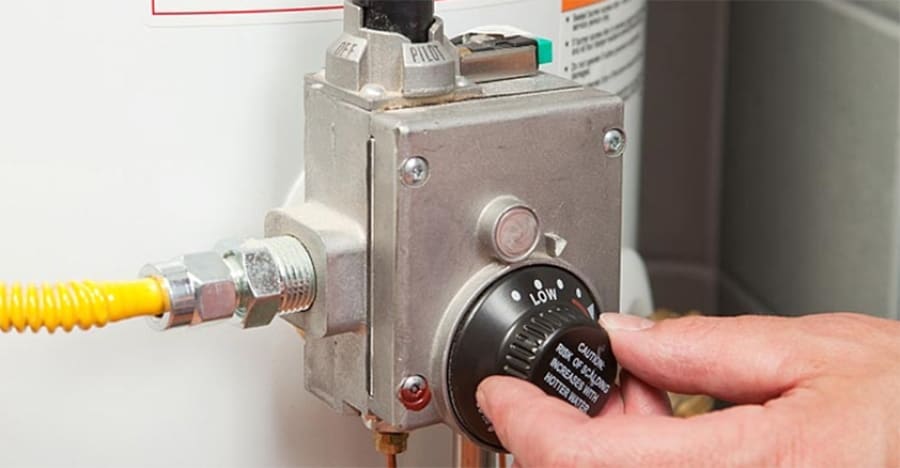
To keep your water heater running smoothly and save money on gas, you should toggle its thermostat between 120°F-140°F. To do this, first, turn off the power or unplug it if there’s a cord so that electricity won’t flow through the unit while working with it. Then, open up the natural gas supply line before turning back on the pilot light manually for ignition.
Be sure not to go higher than 160 degrees Fahrenheit because, at these temperatures, corrosion could occur inside your device. And this could lead to potential leaks in pipes as well as other safety hazards. Such hazards include carbon monoxide poisoning and fires from spontaneous combustion.
How Do I Know If My Thermocouple Is Bad On My Water Heater?
After a while, soot, dust, and dirt may settle on a thermocouple. This build-up is the leading cause of the thermocouple not detecting heat, thus, not working correctly. And this means that the sensor inside the unit gets improper readings.
Finding out if the thermocouple is bad on your gas water heater requires an observant eye. You need to check for signs. And if you notice any of the following signs, you need to clean, repair or replace that thermocouple:
Water Temperature Drops
If you notice a drop in the water temperature or not getting enough hot water, it may be due to a dirty thermocouple. Also, when you realize that there is no hot water entirely, then the thermocouple may be the problem.
When the thermocouple wears out, the pilot stays off too. And consequently, the burner does not light, thus, not heating the water.
Now here is the catch:
This sign may be caused by another fault, not just a bad thermocouple. But since we are talking about a thermocouple, here is how you confirm it is the culprit behind no hot water:
- You will first try to light up the pilot manually using the instructions on the tank.
- If the pilot goes on, but the flame goes off once you let go of the switch, it is a sure sign the thermocouple has a problem.
Irregular Thermocouple Volt Readings
The ideal reading on a well-functioning thermocouple is 30 to 40 millivolts. And this is the reading when the pilot is lit. You can test this at home if you have a multimeter at hand, but you will need some help. Here is how you test it:
- Begin by unscrewing the thermocouple from the gas valve.
- The next step is to calibrate the multimeter to read millivolts.
- The person helping you holds in the gas control knob to keep the pilot on. You stay in this position for about a minute to ensure the probe heats up.
- Then position one lead shaft on the thermocouple and the other end on the connector of the multimeter.
- If the reading you get is below 25 millivolts, that thermocouple is faulty.
The Thermocouple Is Loosely Attached
Sometimes some issues may arise due to a loosely attached thermocouple. And that is why this has to be the first thing you confirm.
To properly set a thermocouple, you need to tighten it with a wrench. Be careful not to apply too much pressure, or the nut will become loose and unusable. Once you tighten it enough, try lighting the pilot flame again but be mindful of any possible smoke that may come out. If it happens, please replace your old one with an identical model.
When Should You Replace A Thermocouple?
You should replace your thermocouple when there is no hot water running or the readings on the multimeter are below 25 millivolts. You should also replace it if the build-up dirt on the thermocouple is beyond repair and impairs its function.
It should also mean your thermocouple is too faulty to be fixed and needs to be replaced if you notice the following signs:
- No Hot Water
When the gas water heater breaks, your whole household will be affected. You won’t have any hot water for cooking or cleaning up after dinner, and you’ll need to take cold showers that don’t make it easy in winter.
- Your Thermostat Gets Too Hot
One of the most dangerous things about a faulty thermocouple is that it may cause your thermostat to get too hot and lead to an all-out fire. This can be catastrophic.
One factor contributing to this fire breakout is faulty wiring which could lead to electrical fires or even minor, accidental blazes resulting from static electricity build-up.
- Higher Electrical Bills
This could happen if you let your broken thermocouple go unnoticed. The situation worsens when it becomes too late to fix this problem, and energy spikes are higher due to lower efficiency rates.
- The Smell Of Gas
The smell of gas is one of the tell-tale signs your thermocouple should be replaced. The last thing you want to experience is a build-up of harmful gases. If you use natural gas or propane, inhaling it in large quantities is detrimental to anyone’s health. These gases could also be the source of explosive fire.
Can You Replace A Thermocouple Yourself?
Yes, you can. But you must have some basic skills so that you can get the job done appropriately. It will cost you approximately $20, and the whole activity will take you about 45 minutes. All in all, here is a simple guide on how to replace a thermocouple yourself:
- Collect all the tools you need: You need to have an adjustable wrench and a set of various wrenches for various bolt sizes. It would help if you also had the new thermocouple you are to replace.
- Disconnect all energy supplies: You need to unplug any gas inlet and electrical inlets for safety reasons. Ensure that the water heater is also unplugged and off. The next thing is you proceed to unbolt any connection to the entire burner unit.
- Disassemble the burner unit to remove the thermocouple: After removing the burner, you will remove the thermocouple. Ensure the replacement one is the same model compatible with your gas water heater.
- Replace the thermocouple: Revert the steps you took to disassemble, reconnect the entire system with the new thermocouple.
Note: While you carry out the thermocouple replacement, clean the entire system as well. Follow the steps we discussed earlier to get a thorough job done.
Can Water Damage A Thermocouple?
Water can damage a thermocouple. Although, the thermocouple will never contact water or moisture as it’s adequately covered.
If it contacts water, the standing pilot will most probably not stay on. It may light up for a few minutes then go off. Some people suggest that blow-drying the water heater to evaporate the moisture may help—alternatively, use a fan.
The slim chance is that it may work again. However, you may have to change the thermocouple. So yes, water can damage the functioning of the thermocouple by inhibiting the standing pilot from staying lit to heat the thermocouple.
Take Away
It’s essential to keep your thermocouple clean for it to work correctly. Your gas water heater is a significant investment, so you want to ensure that everything works well and lasts as long as possible.
You can prevent issues with the unit by simply cleaning out the thermocouple every six months or so. You can hire someone who knows what they’re doing if you don’t know how! A dirty-running appliance will also show up on your monthly power bill because of higher usage levels. So be mindful of this when checking your power rates each month.
Finally, check whether any new legislation has been passed about gas water heaters before proceeding with anything concerning them, like replacing a thermocouple.