Moving an electrical panel is sometimes necessary to meet local electrical codes. When moving an electrical panel, there are several things to remember. The primary considerations include the following:
- A permit may be required, so check with your local municipality to determine if a license is necessary. Permits ensure the work meets current NEC guidelines.
- Moving a main breaker box may require electrical wire improvements or extensions.
- Moving an electrical panel to a new panel location is unlike DIY projects and shouldn’t be attempted without proper training by a licensed electrician.
- Moving an electrical panel can cost $1600 to $4000 or more, depending on the amount of work needed to complete the job. The national average is $1,107 to install a main new electrical service panel.
The cost of moving an electrical panel can increase if upgrades to the electrical meter base are needed to comply with the local electric company.
This article will discuss all the details involved with moving your electrical panel. We’ll examine the cost expectations of moving or upgrading your breaker box and some good reasons to do so.
Is It Expensive to Move an Electrical Panel?
Moving an electrical panel is somewhat expensive, considering what you’re doing, but not compared to other home improvement projects. Your most significant expenses will be labor costs because it could take a professional electrician anywhere from 1 to 3 days to complete the job.
Electricians typically charge anywhere from $70 to $120 per hour, and the job will take from 8 to 24 hours in most cases. Your average cost for labor will be from $500 to $2,000 on the high end, depending on what your electrician charges.
There are also a few material charges to keep in mind, such as the extra wire you’ll need. Besides the new wires, you’ll also need to figure out junction boxes to make the connections.
When moving your panel box from its current location to another in your house, the odds are that you’ll have to splice most of the wires going into the panel. The splicing process takes extra wire, junction boxes, box covers, and Romex connectors.
None of these items are costly, but they’re not free either. Junction boxes, the covers, and the Romex connectors needed for each connection cost around $10 to $15. Wire costs anywhere from 50 cents to $1.00 per foot, so the farther you move the box, the more wire you’ll need. Additional costs will add up fast if many cables need to be rerouted and extended.
Can Electrical Panels be Relocated?
You can relocate electrical panels to suit your needs, although removing and reinstalling the breaker box and extending wires where necessary takes time. The most challenging part of the job will likely be moving an electrical panel and the service wire coming in from the outside.
Extending your main service line is the same as any other splice but on a much larger scale. You’ll need specially approved lugs and boxes to make your splice. This connection and all the parts needed will be close in cost to all the other connections combined.
The amount of voltage traveling through your primary service wire is 220 volts which is more than enough to kill a person.
Ensure that there isn’t any power running through this wire before disconnecting and extending it. This work should only be done by a professional electrician or someone with extensive electrical experience.
12 Steps to Consider When Moving an Electrical Panel
Many people ask how difficult it is to move an electrical panel during home inspections.
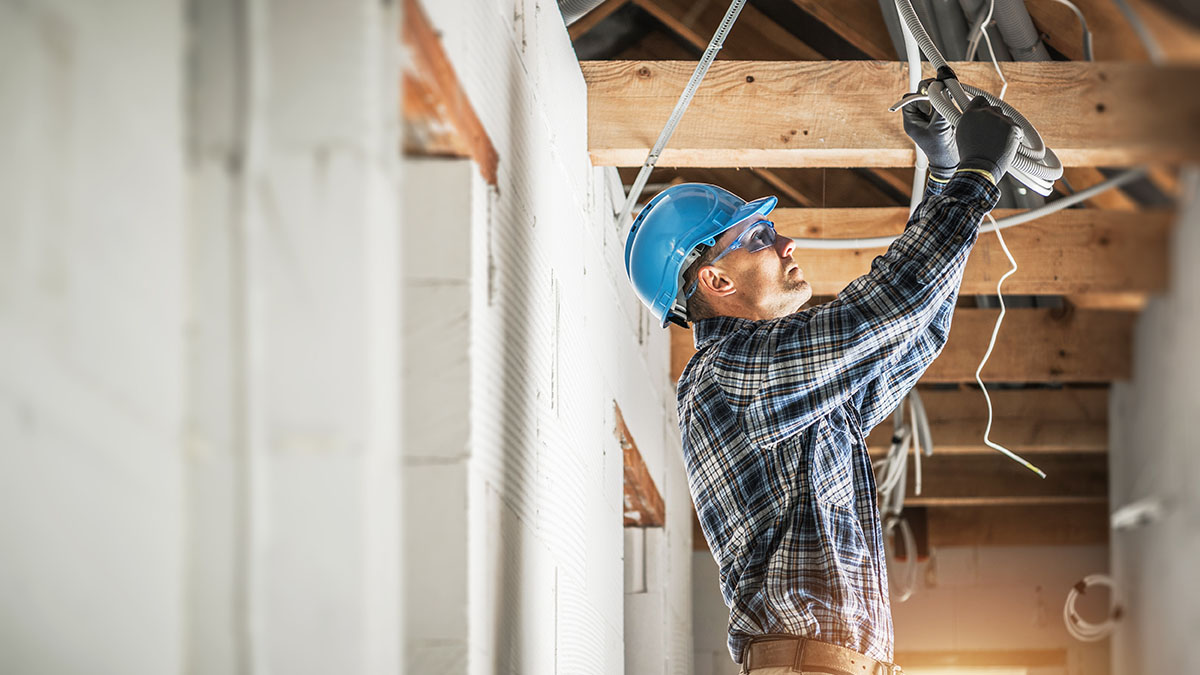
Relocating a breaker box is tedious and should be done by a qualified electrician. If you don’t have any electrical experience, you’re at a very high risk of electrical shock. You should proceed with extreme caution and have an electrical tester handy to check the voltage of everything you touch for safety reasons.
Before you move an electrical panel, we recommend using an electrical load calculation to determine the panel size you need.
Here is a step-by-step process of how to move an electrical panel.
1. Ensure Power is off to Your Primary Service Wire
First and foremost, in the process, you want to be safe. The only way to safely handle electrical wiring or any electrical work is to ensure no wires you’re handling are energized. Electrical shock can cause pain, injury, or death if there’s enough voltage.
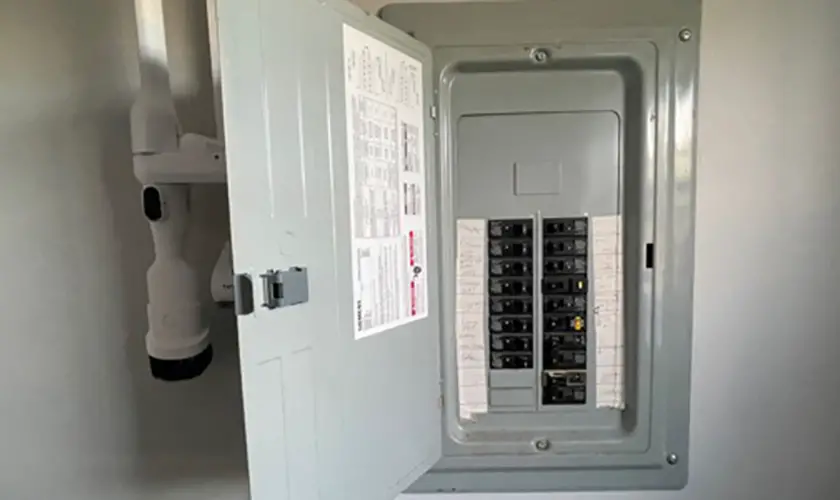
2. Remove the Existing Panel Box Outer Cover
You will secure the outer cover of the panel box with four or six screws to remove to take the panel. Make sure you put the screws in a safe place after removing them so you don’t lose them.
3. Disconnect the Individual Wires from the Breakers
Your panel box will be full of breakers and wires, and you’ll have to disconnect each wire before proceeding. Your goal is to remove the wires from the breakers so you can get to the primary service wire.
It’s a good idea to take several photos of the panel box inside before you start disconnecting wires. That way, you’ll be able to reattach everything precisely as it was.
4. Label Wires for Easy Reconnection
Before or first thing after disconnecting each wire, take a marker and denote its location in the box. If you installed your panel box correctly, the installer should have marked each breaker on the cover.
By matching up the breaker to the marking on the panel box and writing to which space it belongs, you can keep track of everything when reattaching the wires.
Another way you can mark the wires is by counting down from the top and writing which space the wire belongs in. If a wire is on the left side of the breaker box and it’s the fifth breaker down, mark it as “5 down left” or something similar that makes sense to you.
Every wire must go to the same breaker you removed because different wires and breakers have different amounts of power. Matching a wire that’s too big or small for the breaker could result in an electrical malfunction or a fire hazard.
When removing the wires from the breakers, make sure not to loosen any of the breakers themselves. You want everything to go back together exactly as it came apart.
5. Disconnect the Primary Service Wire
Once you’ve disconnected and removed each of the individual wires from the box, it’s time to disconnect the main wire. The wire and lugs they attach to are much larger than the rest of the cables. You’ll likely need a larger screwdriver and pliers than the ones you used to disconnect the smaller wires.
6. Remove the Breaker Box from the Wall
Most breaker boxes are screwed to the wall they’re connected to. Get a drill and the right kind of bit to disconnect the breaker box from the wall, ensuring you don’t lose track of the screws. Remove the breaker box from the wall and prepare for the next steps.
7. Select the New Electrical Panel Location
According to NEC Section 110.26(A), electrical panels must have a clear space of at least 30 inches wide and 36 inches deep for safe repair work. The clear space gives electricians enough room to move and conduct repair work when necessary.
Also, the new location can not be over a staircase, inside a bathroom, or in other spaces that don’t meet guidelines.
Ensure that the new spot you pick is where the breaker box can reside for the rest of its existence. After you finish the current move, the odds are that you won’t want to repeat the process. If you plan to remodel or add an addition to the house, keep your panel box away from these areas.
Using the same screws that were previously attaching the panel box to the wall, reattach the breaker box to its new location. If you lost the screws or deemed them unusable, get some new ones similar in size and strength to the old ones.
9. Extend the Main Service Wire to the New Location
You’ll need specially approved lugs and a junction box suitable for the service wire for the main service line. These are much larger than typical wire connectors and boxes and must be the same size as the lugs inside your breaker box. You’ll also need to purchase extra wire to perform the splice and extension.
10. Extend and Reattach Each Circuit Wire to Their Breaker
Depending on where you moved your panel box, there’s a good chance not all the wires need splicing. You can start by reinstalling wires long enough to hook up without splicing.
Once you install those, it’s time to splice the wires too short and install junction boxes in appropriate locations. A junction box should be readily accessible and easy to get to.
Every wire going into a junction box requires a Romex connector to protect it from the sharp edges of the metal boxes. If you use plastic boxes, Romex connectors aren’t needed. Once the wires are installed and spliced with wire nuts, it’s time to put the outer covers on each box.
11. Secure the Panel Cover to the Electrical Panel
You can put the panel cover back onto the box with all the wires reinstalled and spliced where necessary. Use the same screws you initially removed from the box, and securely fasten the cover.
12. Turn the Power Back on at the Main Disconnect
Now that everything is as it should be, it’s time to turn the power back on and conduct a test run. Use an electrical tester on each wire and check if there’s power running to the wires. Next, start flipping switches and turning devices on to ensure everything works.
Can I Move the Panel Box Myself?
Attempting to move a breaker box or panel box yourself is extremely dangerous. We don’t recommend doing the job yourself unless you have electrical experience and the proper tools. Working with electricity is deadly. The main electrical line in your house has more than enough power to kill you.
Professional electricians have the skills and training necessary to do the job properly and safely. Electricians are accustomed to working with high voltage daily and have the tools essential for success.
Cost of Moving an Electrical Panel Box
The cost of upgrading and moving an electrical box is slightly different from simply moving the electric box. Most older houses have older systems that are only equipped with a 100-amp service, while newer homes have a 200-amp service.
If you have the former and want to upgrade to the latter, it will take a little more money than simply moving your electrical box. You can expect to pay between $1,500 and $4,000 on the high end to move and upgrade your box.
There are also 400-amp services that you can upgrade to. Upgrading to this type of service is where the $4,000 cost comes into play. Here’s a table with more information about electrical panel upgrade costs.
| Amps | Average Cost |
|---|---|
| Upgrade from 60 to 100 Amps | $850 – $1,100 |
| Upgrade from 100 to 200 Amps | $1,300 – $1,600 |
| Upgrade from 200 to 400 Amps | $2,000 – $4,000 |
| Size | Average Cost |
|---|---|
| Install New 100-Amp Panel | $1,200 – $1,600 |
| Install New 200-Amp Panel | $1,800 – $2,500 |
| Install New 400-Amp Panel | $2,000 – $4,000 |
While these prices might vary from electrical company to company or electrician to electrician, it’s a good expectation of your spending.
Don’t forget always to expect labor costs and material costs if you choose to move your panel while you’re upgrading it. Moving will add an extra $500 to $2,000 to the project, depending on the difficulty, time, and materials your electrician uses.
5 Reasons to Relocate Your Electrical Panel
There are many reasons that you might want to relocate your electrical panel. Sometimes you want to clear up some valuable wall space, and other times you’re remodeling, and the panel box is in the way. Here are a few of the main reasons for relocating an electrical panel.
1. Move from the Outside to the Inside
In some regions of the country, installing the electrical panel outside your house instead of inside is common. Moving is an option if you move into a home where this is the case and want the box inside. Make sure to check local building codes before doing so.
2. Move to a Safer Location
Many older homes have circuit breaker panels in poor locations like clothes closets, bathrooms, over staircases, or inside kitchen cabinets. These locations are no longer considered safe according to NEC guidelines.
There are many benefits to relocating an old electrical panel. Many of these panels are obsolete, and relocating (and replacing the breaker panel) would make the house safer.
If you have an older breaker box like Federal Pacific, Zinsco, or Challenger, you will benefit from relocating and upgrading the electrical panel.
3. Move the Panel Box to Another Floor
The panel box is in the basement for easy access and installation in most newer and older houses. As people get older and stairs become more difficult to traverse, some want to move the electrical panel upstairs for easier access. Moving your panel box, for this reason, is a valid one and could make your life much easier.
4. For Remodeling Purposes
One of the most common reasons for moving a panel box is for remodeling purposes. If a panel box is on a wall in the middle of your house and you need to remove that wall, you’ll have no choice but to relocate it. Moving the panel box is an extra cost to keep in mind when planning your next remodel project.
Another construction-related reason to move a panel box is when you’re adding an addition to your existing house. Additions often require moving the panel box or upgrading to a larger service to accommodate the extra electricity you need.
5. Upgrading the Electrical Panel Amps
Many older houses only have a total amperage of 60-amp or 100-amp services running into them. Lower amp electrical service can’t demand the demands of most modern homes. Upgrading to a 200 amp electrical service is expensive, but it might also be necessary. For most people, improved safety is worth the additional cost.
Final Thoughts
As you can see, if you need to move your electrical circuit breaker box to a new location, check local electrical codes before starting.
Moving a panel box is a lot of work and expensive, but it’s also sometimes necessary. Whether moving an old breaker box or making panel upgrades, this work is best left to the pros. Don’t put yourself or your loved ones at risk because you want to save some money.