Are you looking to tile a floor in your home or office but unsure whether it needs a backer board underneath? Whether or not tile floors need backer boards has been a hot topic in the home improvement world for years. I often get this question as a home inspector, so I decided to do some in-depth research.
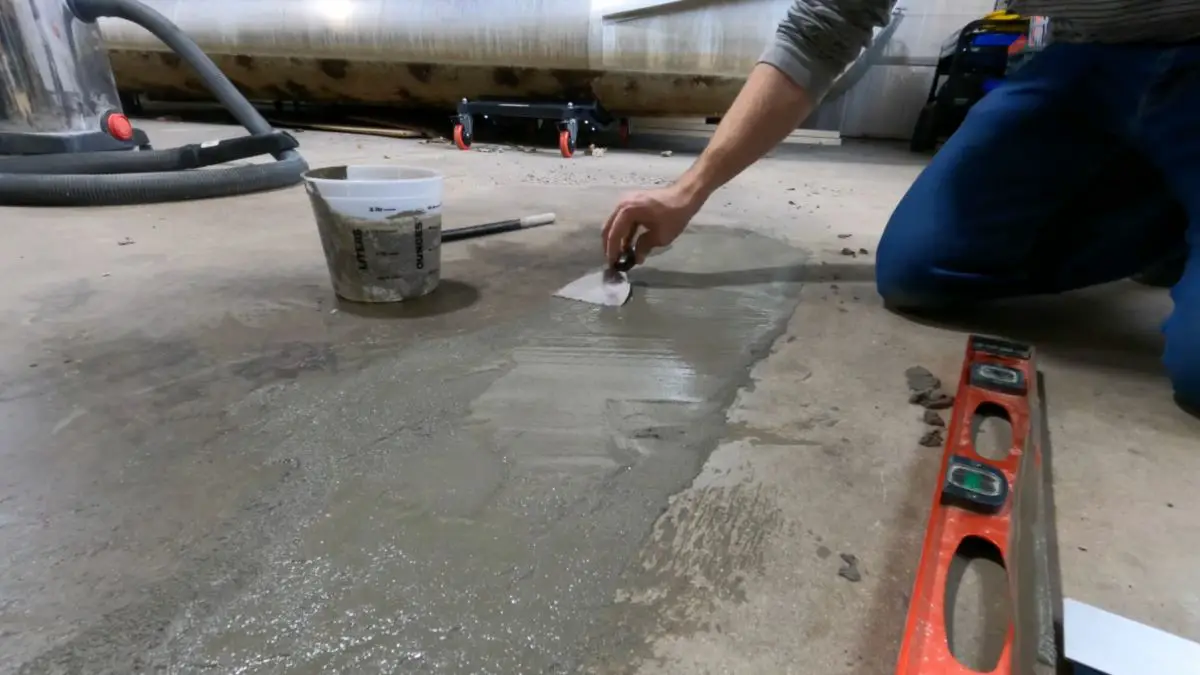
A cement backer board is not necessary when installing tile on a concrete slab. It’s best practice to apply a self-leveling compound to even out low and high spots in the concrete slab to form an even surface which helps prevent tiles from cracking in the future.
This article will look at various opinions on the matter, and I will also offer my thoughts to help you make an informed decision.
On the flip side, there are certain cases where using a backer board on the floor will be a requirement. Here they are:
Situations Where You Should Use A Backer Board
The Builders Laid the Concrete Poorly
The cement backer board is not a suitable replacement for concrete.
If you find that your existing base material does not provide an adequate, solid foundation for tile placement, it will likely need more work than just installing a cement board overtop.
You may want to have this repaired instead of adding the cement that can create uneven surfaces. This would make working with tile difficult and potentially lead to damage.
Inadequate Surface
Tile adhesives and overlays do not adhere well to painted concrete surfaces. For people who painted their concrete floors before deciding on tiling, a cement backer board is necessary (and often cheaper) if you don’t want to spend time sanding or etching it off first.
You can apply a cement board over any painted area for easy application of thin-set adhesive or mortar. This will give the tiles a good base to adhere to.
Issues With Height
Some tile installations may require a layer of cement board and thin-set to provide an extra 1/4-inch -1/2 inch. This extra can be necessary when installing tiles because it allows for better water resistance.
It also increases strength against compression forces on the surface materials such as carpets or hardwood floors.
Why Use Backer Boards?
Backer boards are durable and flexible sheets that provide a smooth, level surface. Manufacturers design them for use with adhesive materials like mortar or cement.
You can install heavy tiles on these backer boards without worrying about them slipping off. This is because they have mortared edges along their perimeter, which create an insulating barrier against moisture.
So yes, they are not a must, but you need them. And below is more information on these backer boards.
What is a backer board in the first place? Let’s start with that.
Backer Board: Definition, Types, And Uses
What is Cement Backer Board
Tile installation is a delicate process that requires the proper support. While relatively new on the construction scene in America, the backer board has become one of those essential items for building professionals and DIYers alike.
This is because you can use backer boards to both underlay walls with tile as well as floors. Bathrooms are just an example of where you’ll find backer boards installed below existing wood sub-floors.
Backer boards are moisture-resistant, so your tiling won’t start crumbling if any water damage or leakage comes from pipes underneath.
Types of Backer Board
The backer board is the support structure for tiles and mosaics. It comes in a range of materials, each suited to various purposes.
The most common are:
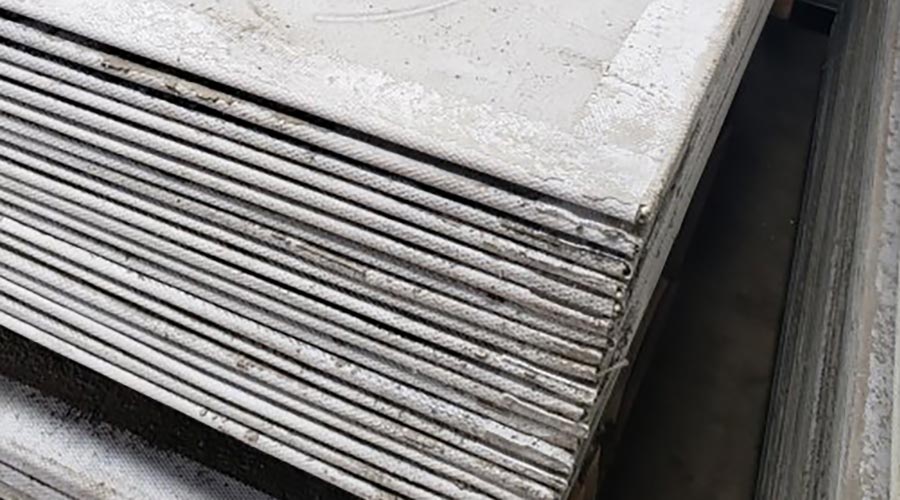
1. Cement Backer Board
A cement board is the most common backer board for all types of ceramic and porcelain tiles. Made from cement, you can use this waterproof material in wet areas such as tiled shower surrounds or floors.
It also can serve a purpose on exterior jobs on its own. In these cases, it’s often combined with other materials to create an exciting design that will last for years to come.
2. Glass Mat Gypsum Board
The glass mat gypsum board is a lightweight backer that provides the perfect solution for all spaces. It’s waterproof and resists mold, mildew, bacteria, fungus as well as any other microorganisms.
Manufacturers reinforce gypsum boards from top to bottom with fiberglass mats. This layer makes them stronger than cement boards. Builders mostly install them in damp areas like your bathroom tub surround.
However, large format floor tiles can become damaged if water gets behind them – so be careful when installing those at home on this type of surface material.
3. Cement Fiberboard
Fiber cement boards are a go-to solution for any flooring project. They provide the perfect surface to adhere to tile since thin-set mortar adheres well. They assure you that your investment will not be ruined by loose tiles or cracks in the material.
Not only does fiberboard come in different thicknesses, but it also has various sizes. These differences accommodate all installations from large residential homes to small commercial buildings and everything in between.
4. Water-Resistant Drywall
Water-resistant drywall is a popular choice for kitchens with glass tile backsplashes. The main reason is that it can withstand the occasional splash from cooking or dishwashing.
This kind is water-resistant, not waterproof, so don’t use this type of board in bathrooms and other wet areas where moisture may be present on an ongoing basis.
5. Styrofoam Backer Board
Styrofoam backer board is a lightweight and water-resistant option for shower walls or floors. This inexpensive product can be cut easily with the right tools, allowing working within tight spaces like corner showers. It’s also dust-free.
6. Plywood
Plywood is often used as the substrate for tile installations, but it isn’t always good. Plywood can expand and contract with temperature changes which may cause tiles to crack or shift around on uneven surfaces. It also rots if you expose it to high humidity.
So you have to be careful in installing plywood’s backer board overtop when laying down other materials. This could lead moisture into the backing material and rot any underlying substrates like insulation boards you install behind them.
Where Do You Use Backer Boards?
Here are all the locations in your construction that you can use the above backer boards:
Tile Installed on Walls And Ceilings
You’re sure to create a sturdy and supportive wall when you use boards with at least 1/2″ thickness. This will make your home feel safe, secure, and comfortable for the entire family.
Tiled Kitchen Countertops
Using a 1/4 inch or thicker backer board on top of 3/4 exterior-grade plywood is an essential step in ensuring longevity and stability.
The thickness will help prevent cracking, splitting, and warping since you are protecting it from water penetration as well as heavy loads that could result in damage to your base below.
Tiled Kitchen Backsplash
The best way to install your sink is over a 1/4″ backer board. Drywall, while an option for installing sinks that are not in wet areas like kitchens or bathrooms, will require extra care and attention when installing the plumbing pipes because it can amplify sound from water running through them if they’re too close to the drywall.
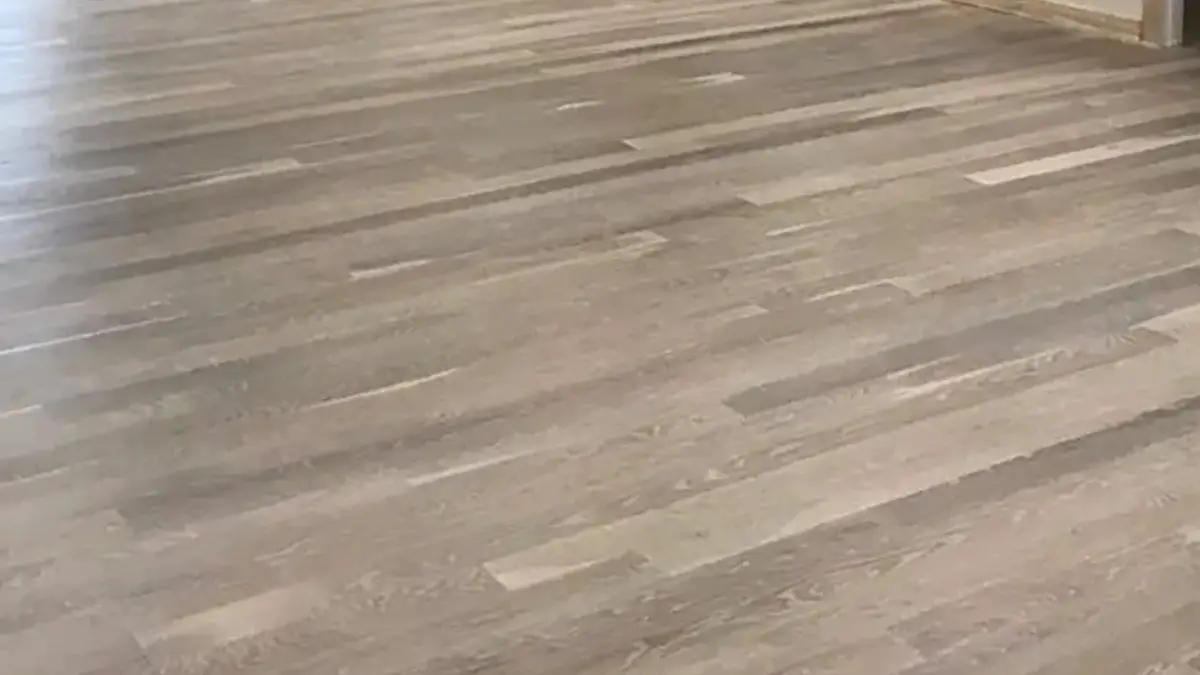
Tile Installed on Floors
A cement backer board is an excellent addition to any tiling project. But it’s essential to make sure the floor you’re using is prepared well before installation.
For example, plywood boards should be at least 5/8 of an inch thick. They also need to have cement applied on one side to prevent peeling apart when exposed to water damage.
Installing Cement Board For Floor Tile On Concrete
This is a step-by-step guide that can help any DIYer install a cement backer board before laying tiles.
Materials and Tools You Will Require
- A working bucket
- A margin trowel
- Drill-driver tool
- Drywall T-Square
- A utility knife
- 1/4 inch notched trowel
- A drywall knife-4 or 6-inches.
- Cement boards
- One 1/4-inch cement board screws
- 1/8-inch thin-set mortar
- Cement board mesh joint tape with a self-adhesive backing
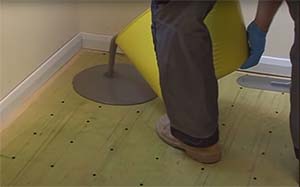
Step 1: Apply A Layer Of Mortar
Spread a thin layer of mortar over the concrete, following instructions from your manufacturer.
Start with one side to make sure you have enough for an entire sheet, and then do the next section before going any further in case it doesn’t work out as planned.
When spreading on sub-flooring, be careful not to get too close to the walls. Or else you’ll end up with cement spilling onto drywall that will need more than just a couple of dabs of paint to cover.
Step 2: Lay The Cement Backer Board
You start by first laying down a sheet so that the rough side is facing up. Leave about a 1/4 inch gap between it and any adjacent walls.
Next, take another piece and do the same thing as before but make sure to cover your seams with a thin-set or mortar for stronger adhesion.
Step 3: Fasten The Cement Boards
Fasten the cement board sheet to your floor with 1.25-inch screws that have a particular coat that is rust-resistant.
These will help you get ahead flushing against the panel, so it’s not visible but still provides excellent protection for years to come. Drive them every 8-inch along all edges of the cement board as well as in any open field areas.
Step 4: Finish Laying All The Cement Boards And Trim The Last One
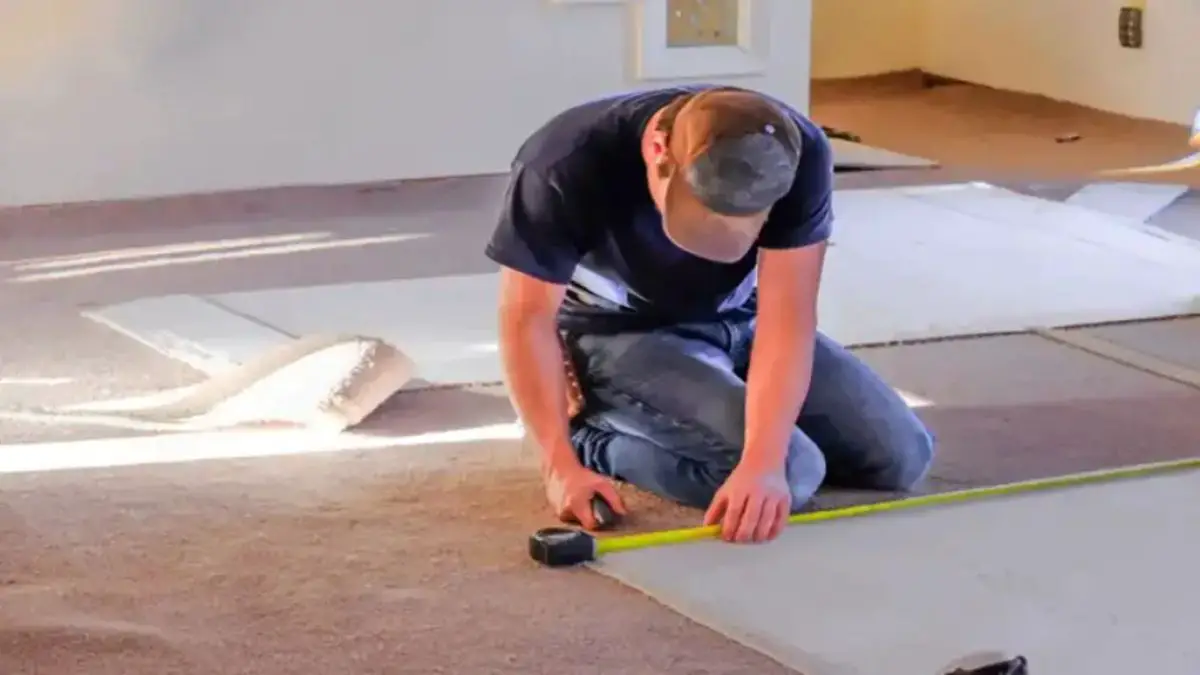
Repeat the same process to install one panel at a time, staggering them, so there’s no gap between boards. Ensure that you are also leaving an 8-inch space in front. With the help of your T-square and utility knife, you can make a clean cut through that tough layer of fiberglass to get those panels up on the floor.
First off, measure how wide each panel should be with your square; then score it by running your blade along its edge. Then use two or three deep scores so you’ll eventually have enough leverage for cutting all at once when mounted onto studs.
When done right – there’s almost nothing more satisfying than laying them into place neatly one after another until everything looks just as good.
Step 5: Apply Tape For The Joints
Cover the seams of your cement paneling with high-quality joint tape if you don’t want to risk any leaks. The best tape is a unique self-adhesive, alkali-resistant product that can withstand contact with concrete.
Cover any gaps between the panels with self-adhesive cement board joint tape. This gluing makes the floor sturdy so that the cement backer board won’t crack or buckle under pressure.
Make sure it entirely sticks tight, so you don’t need to worry about water getting in. If it does, it might lead to mold growth on the interior of your floors.
Step 6: Mud The Joints Using Mortar
You will need to create a smooth surface for your tiles with thin-set mortar. Cover the joint tape and make sure it is flush with the surrounding surfaces before curing it fully.
What Is The Recommended Thickness Of A Backer Board For Tiling?
If you can afford it, thicker panels are great for your floor and wall projects. A 1/4-inch board only provides a thin surface to lay tile that will be easy to scratch or crack.
Nevertheless, if cost is an issue, then even narrower boards work just as well.
Nailing Or Screwing The Cement Board: Which Is Better?
Both nailing and screwing are fine, but each has its pros and cons. The cement board is similar to regular drywalls except that it has tabs on one side.
The tabs allow protruding nails or screws from adjacent materials like studs and joists to securely hold onto its surface without leaving holes where water may enter your home if not properly sealed with caulk.
What Is A Thin-Set For Tiling?
The thin-set cement is a type of adhesive that can adhere tiles and mosaics onto surfaces. This type of mortar typically does not need any sand, aggregate, or other filler materials mixed into it. And this makes the installation process quicker and easier.
The applicator needs to scoop up some cement out from its container with a trowel. Then proceed to apply directly on the surface where you wish to put the floor or wall tile.
It ensures that the tiles stick solidly without having cracks appear as they shift around over time.
What Is The Ideal Thickness Under A Tile Layer?
To properly lay tiles, the builder must apply a layer of thin-set mortar to the surface. This is typically done with an appropriate trowel and will not exceed 3/16 inches in thickness after the builders press it into place.
What Type Of Thin-Set Should One Use For Tiling?
If you have normal-sized tiles, then it’s best to use a regular thin-set. If they’re large, we would advise using a modified variety made explicitly for larger tiles.
When laying your flooring on the ground, the most important thing is how much space there will be between them. Also, what type of adhesive material you will lay down underneath so that everything stays together tightly with no movement in any direction.
When using a thin-set, keeping the water content low is essential. It helps to avoid creating too much excess thickness.
This will make your tile application process more complex and may cause ridges that prevent your flooring surface from full coverage with 100% adherence.
Can You Apply A New Thin-Set Over Another Later When Tiling?
When doing floor tiling, it is best to use a new layer of thin-set for the tiles. However, you may not be able to do this if your old thin-set was never perfectly smooth and level in the first place.
Luckily some steps can help with fixing these problems by grinding out imperfections on top of bad layers:
- Use a floor grinder and pass back and forth over the old thin-set until it becomes as even as possible (most likely multiple times).
- Using an air compressor or power chisel will also work. However, it usually takes more time than just using a manual tool.
Can The Cement Board Be Used On All Tiled Surfaces?
Cement board is a heavy-duty building material that can be used as the exterior for buildings and sometimes even on its own. Cement board offers more impact resistance than water-resistant gypsum boards, making it ideal for use in high winds or hail areas.
This means you may use it on its own on the driveway and as a tile underlayer in the house.
Conclusion
Floors are essential for any home, so it’s vital to get the installation right. But how do you know what type of flooring is best? With all the options out there, it can be hard to decide.
Sometimes people make costly mistakes in their homes that they regret later down the road. In this post, we have taken a look at tile floors on concrete slabs – specifically whether or not the builders should use the backer board when installing these types of tiles or not.
The verdict is that they are not necessary but may be beneficial to you. So whether you use a backer board or not depends on how thick your existing concrete slab is.
But in general, we recommend installing some form of protection between the two layers for extra peace of mind! Every homeowner would love having that assurance, even if it costs a little bit over the budget.